
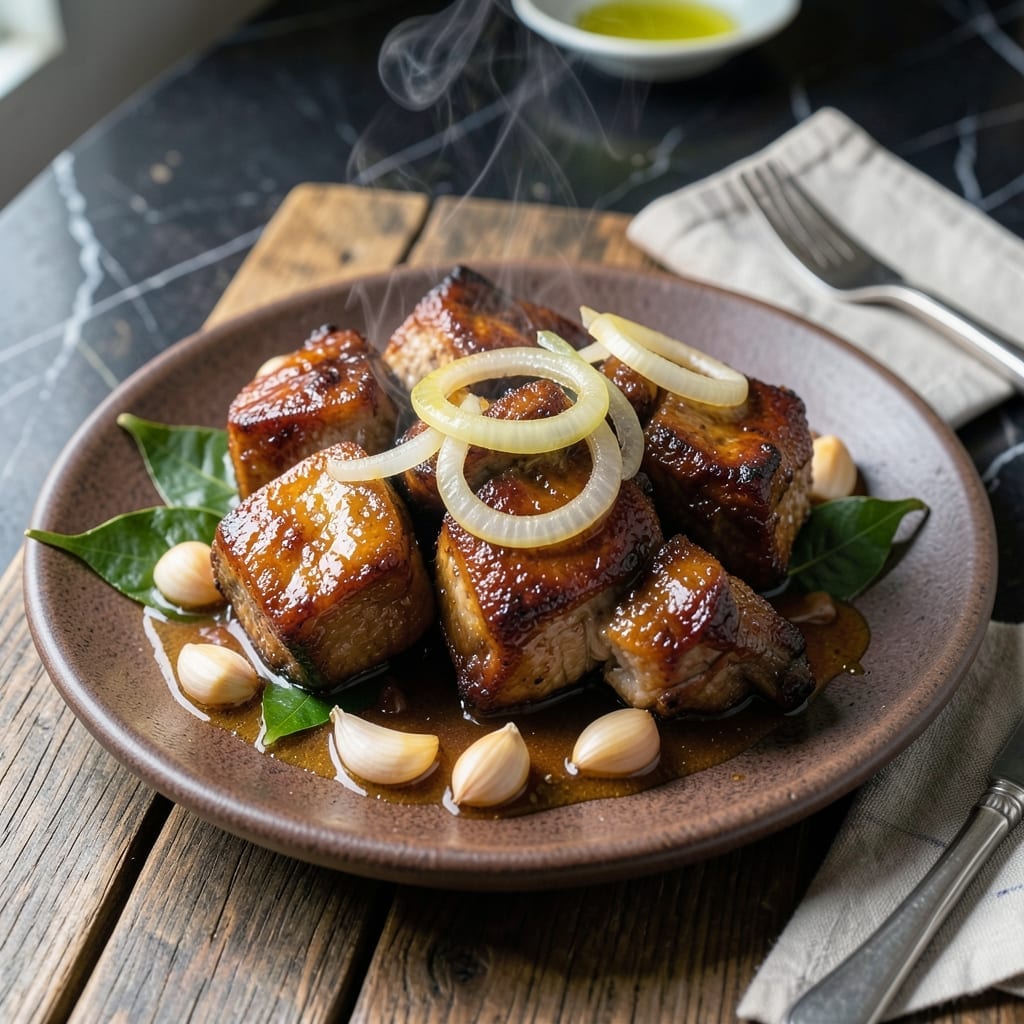
This Filipino-style pork lomo delivers a perfect balance of sweet, savory, and garlicky flavors that define the dish. The braising technique ensures tender meat that falls apart with each bite.
I rely on traditional ingredients like soy sauce, garlic, and a touch of sugar to create the signature caramelized sauce. The slow cooking process allows the flavors to meld into something deeply satisfying.
The result is meat so tender it nearly melts in your mouth, coated in a glossy, deeply flavored sauce. It pairs beautifully with steamed rice to soak up every last drop.
This recipe brings authentic Filipino comfort food to your table with minimal effort. Serve it for dinner and watch everyone ask for seconds.
Ingredients for Pork Lomo Recipe Filipino Style
A handful of Filipino pantry staples transform pork into something extraordinary and deeply comforting.
| Ingredient | Amount | Notes |
|---|---|---|
| Pork Shoulder 🥩 | 2 lb | Cut into 2-inch cubes, bone-in preferred |
| Soy Sauce 🫒 | ¾ cup | Filipino brands like Silver Swan preferred |
| Garlic Cloves 🧄 | 12 cloves | Peeled and minced |
| Brown Sugar 🍚 | ½ cup | Packed, for caramelization |
| White Vinegar 💧 | ¼ cup | Balances sweetness |
| Bay Leaves 🍃 | 3 pieces | Dried, whole leaves |
| Black Peppercorns 🌶️ | 1 tsp | Whole or freshly cracked |
| Onion 🧅 | 1 whole | Medium, sliced into rings |
| Water 💧 | 1 ½ cups | For braising liquid |
| Vegetable Oil 🫒 | 2 tbsp | For searing pork |
| Salt 🧂 | 1 tsp | Adjust to taste |
| Calamansi Juice 🍋 | 2 tbsp | Optional, for brightness |
The pork is everything here. Pork shoulder (sometimes labeled pork butt) gives that melt-in-your-mouth texture—avoid lean cuts like tenderloin. Ask your butcher to cube it for you, or buy a whole roast and do it yourself. Filipino markets often carry pre-cut pork for braising. Look for pieces with good marbling and a bit of fat for the best results.
No calamansi? Lime or lemon juice works fine (use half the amount). Short on soy sauce? Oyster sauce plus a pinch of salt can sub in a pinch, though the flavor will differ slightly. Brown sugar can be swapped for white in a 1:1 ratio, but the molasses in brown adds depth. For the vinegar, apple cider vinegar is a great alternative to white.
This keeps beautifully—tastes even better the next day once the flavors meld. Store in an airtight container in the fridge for up to 5 days, or freeze for 3 months. Reheat gently to keep the pork tender.
Why You’ll Love This Recipe
- I’ll be real: it tastes even better the next day, and the pork shreds perfectly for sandwiches or fried rice.
- Set It and Forget It: I just toss the pork shoulder with soy sauce, garlic, and brown sugar in the morning, and by dinner, the slow cooker does all the work.
- Sweet-Savory Magic: The brown sugar caramelizes with the soy and vinegar, creating this sticky, finger-licking glaze that coats every bite.
- Feeds a Hungry Crowd: Between us, this is my go-to for potlucks and family gatherings—everyone leaves asking for the recipe.
Step-by-Step Instructions for Pork Lomo Filipino Style
Follow this method precisely for tender pork with a rich, caramelized sauce every time.
Step 1: Sear the Pork Shoulder
Heat the 2 tbsp vegetable oil in a large pot over medium-high heat. Add the 2 lb pork shoulder cubes and sear until deeply browned on all sides, working in batches if needed. This should take about 8-10 minutes total.
Don’t overcrowd the pot—this prevents proper browning and leads to steaming instead. You want a dark, caramelized crust on each piece, which adds depth to the final sauce. Remove the pork and set aside temporarily.
Step 2: Build the Flavor Base
In the same pot, sauté the 1 whole onion (sliced into rings) and the 12 cloves garlic cloves (minced) for 2-3 minutes until softened and fragrant. The aroma will be intense and appetizing—this is your flavor foundation.
Add the 0.75 cup soy sauce, 0.5 cup brown sugar, 0.25 cup white vinegar, 1 tsp salt, 3 pieces bay leaves, and 1 tsp black peppercorns. Stir to combine, allowing the sugar to begin dissolving. Cook for 2 minutes until the mixture starts to bubble.
Step 3: Braise the Pork to Tenderness
Return the seared pork to the pot along with any accumulated juices. Pour in the 1.5 cups water and stir to combine. The liquid should just cover the pork—if it doesn’t, add a splash more water.
Bring to a boil, then reduce heat to low. Cover and simmer for 1.5 to 2 hours, stirring occasionally, until the pork is fork-tender and the sauce has thickened. You’ll know it’s ready when the meat easily pulls apart with a fork and the sauce coats the back of a spoon.
Step 4: Finish and Adjust the Sauce
Once the pork is tender, uncover and simmer for an additional 10-15 minutes to reduce the sauce further. This concentrates the flavors and gives you that glossy, caramelized finish characteristic of pork lomo.
Stir in the 2 tbsp calamansi juice (if using) for a bright, tangy finish. Taste and adjust seasoning with additional salt if needed. The sauce should balance sweet, savory, and slightly tangy notes perfectly.
Pro Tips For Making Pork Lomo Recipe Filipino Style
- Sear First, Simmer Slow: I learned this the hard way—browning the pork shoulder first in a hot pan for 3-4 minutes per side locks in juices before you add the soy sauce mixture. Skip this and your lomo will taste flat, no matter how long it simmers.
- Crush the Garlic: Sounds obvious, but smashing the garlic cloves with the flat of your knife before mincing releases way more flavor into the marinade. My grandmother swore by this, and she was right.
- Balance the Vinegar: After burning a batch by adding too much white vinegar at once, I now mix it with the soy sauce and brown sugar first—it mellows the acidity and prevents that harsh, raw taste.
- Let It Rest: Give the pork a solid 10 minutes off the heat before slicing, tented with foil. I skip this when I’m in a rush, but the juices stay in the meat instead of all over the cutting board.
Dietary Considerations for This Dish
Gluten-Free Adaptation
Swap soy sauce for tamari or a certified gluten-free soy sauce like San-J. I’ve tested this with coconut aminos too—it adds a slightly sweeter note but works beautifully. Always check labels to avoid hidden gluten in sauces. 💡
Reduced Sodium Option
Cut the soy sauce by half and replace with low-sodium versions. Boost flavor with extra garlic and black peppercorns. I also add a pinch of MSG (about ¼ tsp) to enhance umami without salt overload.
Lower Sugar Version
Replace brown sugar with erythritol or monk fruit sweetener in a 1:1 ratio. For a natural option, use coconut sugar, which has a lower glycemic index. The caramelization will still happen, though the color may be slightly lighter.
Keto-Friendly Adjustments
Skip the brown sugar entirely and use a keto sweetener like allulose. Increase the vegetable oil to 3 tbsp for extra fat. Serve over cauliflower rice instead of traditional rice to keep carbs minimal.
Dairy-Free Note
This recipe is naturally dairy-free, so no modifications are needed. Just ensure your soy sauce and other sauces don’t contain hidden dairy derivatives. I always double-check labels at New Seasons Market for peace of mind.
Allium Sensitivity
Omit garlic and onion, replacing with 1 tbsp garlic powder and 1 tsp onion powder for flavor without the fermentable carbs. A pinch of asafoetida (about ⅛ tsp) mimics the savory depth. 🌱
Nutrition Facts
Frequently Asked Questions
Can I use pork loin instead of shoulder?
Shoulder is ideal for its fat content, but loin can work. Reduce cooking time to 1-1.5 hours to prevent dryness. Shoulder’s marbling gives that melt-in-mouth texture you want.
Why is my sauce too thin?
Uncover and simmer for an extra 10-15 minutes to reduce. If still thin, mix 1 tbsp cornstarch with water and stir in. The sauce should coat the back of a spoon.
How do I store leftovers?
Keep in an airtight container in the fridge for up to 5 days, or freeze for 3 months. Reheat gently on the stove with a splash of water to maintain tenderness.
What can I substitute for calamansi?
Use lime or lemon juice (half the amount). The citrus brightens the dish’s rich flavors. Avoid bottled juice for the best fresh taste.

- Potato Patty Recipe No Egg: Crispy Edges Without the Binder - October 30, 2026
- Paula Deen’s Potato Chip Cookies Recipe: Salty-Sweet Crunch in Every Bite - October 30, 2026
- Potato Gnocchi Recipe Ideas: Pillowy Soft Dumplings With Rustic Charm - October 30, 2026