
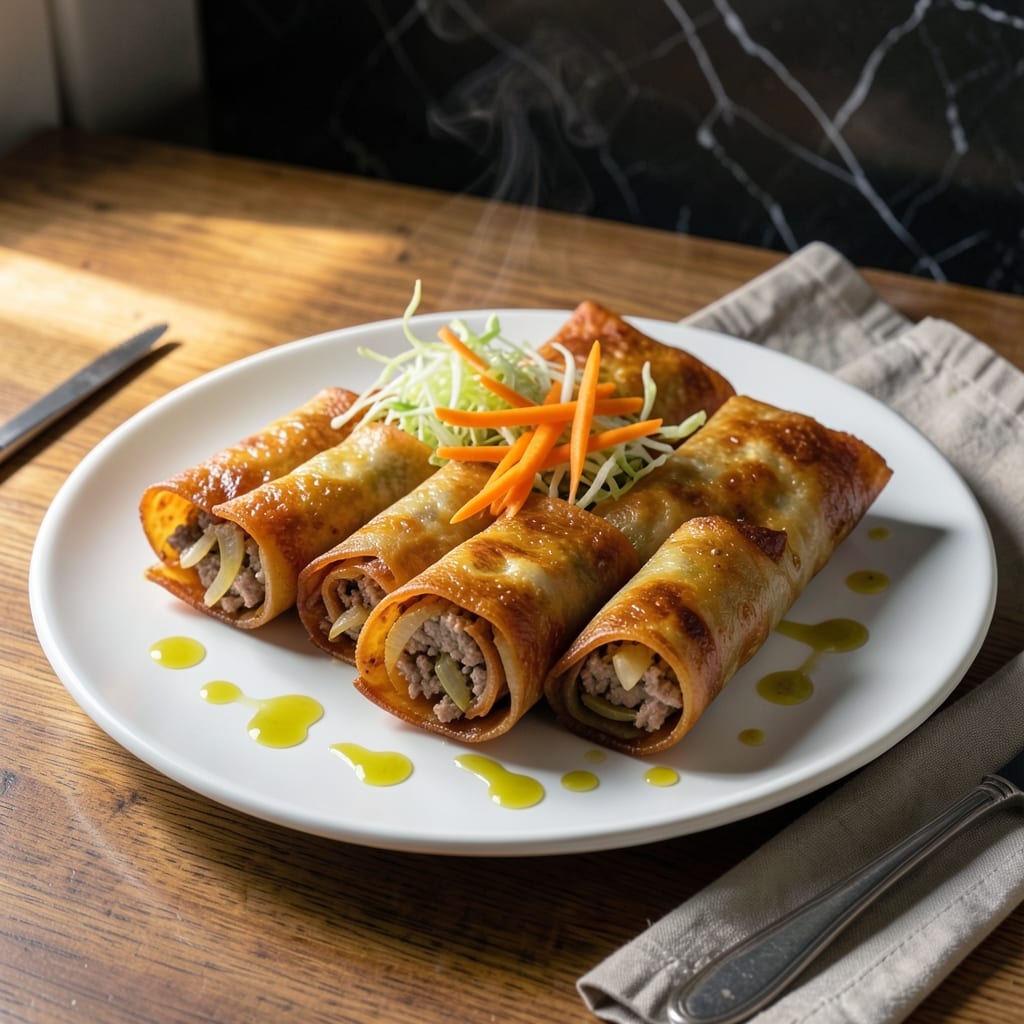
Filipino spring rolls have always held a special place in my kitchen, carrying the warmth of tradition in every bite. This version delivers the crispy perfection that defines lumpia shanghai, with a savory filling that balances meat and vegetables just right.
I remember watching my grandmother work her magic with these, her hands moving with practiced ease. She taught me that the secret lies in proper rolling technique and precise frying temperature—never rushed, always patient.
What emerges from the fryer is golden, shatteringly crispy rolls with a filling that stays juicy and flavorful. The contrast between the delicate wrapper and hearty interior makes these impossible to resist.
The beauty of this dish is its versatility—serve as appetizers or a main course. Let’s begin.
Ingredients for Pork Lumpia Shanghai Recipe Panlasang Pinoy
Traditional Filipino flavors packed into crispy, golden rolls with a savory pork and veggie filling
| Ingredient | Amount | Notes |
|---|---|---|
| Ground Pork 🥩 | 1 lb | Lean to medium fat ratio |
| Lumpia Wrappers 🥟 | 20 sheets | Thin spring roll wrappers |
| Carrots 🥕 | 1 cup | Finely grated or julienned |
| Green Cabbage 🥬 | 1 ½ cups | Finely shredded, packed |
| Garlic Cloves 🧄 | 4 cloves | Minced for filling |
| Yellow Onion 🧅 | ½ cup | Finely diced |
| Soy Sauce 🫒 | 2 tbsp | Use low-sodium for control |
| Ground Black Pepper 🌶️ | ½ tsp | Freshly ground preferred |
| Salt 🧂 | 1 tsp | Adjust to taste |
| Sesame Oil 🫒 | 1 tsp | Toasted for aroma |
| Large Egg 🥚 | 1 whole | Beaten, for sealing wrappers |
| Green Onions 🧅 | ¼ cup | Thinly sliced, for garnish |
| Neutral Oil 🫒 | 3 cups | For deep frying |
The pork is the foundation here. Ground pork shoulder (about 70/30 lean-to-fat) gives the juiciest filling—avoid lean ground, which dries out. Asian markets often carry pre-made lumpia wrappers in the freezer section, but check the international aisle at Walmart or H-Mart too. Freshness matters with the wrappers; if they crack when you bend them, they’re too old. For the cabbage and carrots, pre-shredded bags from the produce section save time (just squeeze out excess moisture).
No ground pork? Ground chicken or turkey works well—just add an extra tablespoon of oil to compensate for the lower fat. Swap cabbage for shredded napa cabbage or bean sprouts for a different texture. Soy sauce alternatives: tamari for gluten-free or coconut aminos for a slightly sweeter profile. If you’re out of sesame oil, use an extra teaspoon of neutral oil plus a drop of toasted sesame oil from that half-empty bottle in the fridge.
Uncooked filling keeps in the fridge for 1 day—any longer and the veggies release too much water. Wrapped but uncooked lumpia can be refrigerated for 4 hours or frozen for 1 month. Fry from frozen, adding a minute or two. Leftovers? Reheat in a 350°F oven for 10-12 minutes to revive the crisp.
Why You’ll Love This Recipe
- Minimal Chopping: I just shred the carrots and cabbage—no fancy knife skills needed, and the lumpia wrappers do half the work.
- Garlic Punch: The garlic cloves fry into the pork filling, giving every bite that deep, savory aroma I can’t get enough of.
- Freezer Friend: Honestly, I make a double batch and freeze half—crisp them straight from frozen for last-minute snacks or parties.
- Budget Stretcher: Ground pork and humble veggies feed my whole family without breaking the bank, and leftovers taste even better the next day.
Step-by-Step Instructions for Pork Lumpia Shanghai
Here’s the method I rely on for golden, crispy spring rolls with a flavorful, juicy filling.
Step 1: Sauté Aromatics and Prepare the Filling
Heat a large skillet over medium-high heat and add the 1 lb Ground Pork. Cook for 5-6 minutes, breaking it into small pieces, until it’s no longer pink and starts to brown. Drain excess fat, leaving just enough to coat the pan.
Add the 0.5 cup Yellow Onion and 4 cloves Garlic Cloves, sautéing for 2 minutes until fragrant. Stir in the 1 cup Carrots and 1.5 cups Green Cabbage, cooking for another 3-4 minutes until the vegetables soften slightly but retain some crunch.
Season the mixture with 2 tbsp Soy Sauce, 1 tsp Salt, 0.5 tsp Ground Black Pepper, and 1 tsp Sesame Oil. Stir well to combine, then remove from heat and let it cool completely. This step ensures your lumpia filling stays moist but not soggy when fried.
Step 2: Assemble the Lumpia
Lay a Lumpia Wrapper flat on a clean surface, keeping the remaining wrappers covered with a damp towel to prevent drying. Place 2 tablespoons of the filling near the bottom edge, shaping it into a log about 1 inch from the edge.
Fold the bottom edge up and over the filling, then fold in the sides. Roll tightly toward the top edge, like a burrito, and seal the final edge with a bit of the 1 whole Large Egg beaten with a teaspoon of water. Repeat with the remaining 20 sheets Lumpia Wrappers and filling.
Proper sealing is critical—if the edges aren’t secure, the lumpia may unravel during frying. I always double-check each roll before moving to the next.
Step 3: Fry to Golden Perfection
In a deep, heavy-bottomed pot, heat the 3 cups Neutral Oil over medium heat to 350°F. Use a thermometer for accuracy; the oil is ready when a small piece of wrapper sizzles immediately upon contact.
Fry the lumpia in batches to avoid overcrowding, which lowers the oil temperature and leads to greasy results. Cook for 3-4 minutes per batch, turning occasionally, until they’re deep golden brown and crispy all over.
Drain on a wire rack or paper towels to remove excess oil. The rack is ideal—it allows air circulation, keeping the lumpia crispy on all sides.
Step 4: Garnish and Serve
Transfer the fried lumpia to a serving platter and garnish with the 0.25 cup Green Onions for a fresh, vibrant finish. Serve immediately while hot and crispy.
For the best texture, serve with a dipping sauce like sweet chili or spiced vinegar. I always recommend letting guests dip as they eat—it keeps the lumpia from getting soggy.
Pro Tips For Making Pork Lumpia Shanghai Recipe Panlasang Pinoy
- Chill the Filling: After mixing the ground pork with carrots, cabbage, and garlic, refrigerate the filling for 20-30 minutes. This makes it easier to handle and prevents the lumpia wrappers from tearing as you roll.
- Use Warm Wrappers: Cover the lumpia wrappers with a damp towel to keep them pliable. I learned this the hard way—dry wrappers crack and make rolling a nightmare.
- Skip the Overstuffing: Resist the urge to add too much filling. A slender, finger-sized log (about 1-2 tablespoons) cooks evenly and fries up crispier than fat lumpia.
- Double-Fry for Crisp: Fry the lumpia once at 350°F until golden, then again at 375°F for 1-2 minutes. Sounds like extra work, but it guarantees that shatteringly crisp shell every time.
Essential Equipment for Great pork lumpia shanghai recipe panlasang pinoy
Deep Fryer Setup
I use a 5-quart Dutch oven for frying—it holds enough neutral oil for stable temperature while leaving room for safe bubbling. Peanut oil is my go-to for its high smoke point and clean flavor, but vegetable or canola work too. 🔥
Temperature Control
A candy or deep-fry thermometer clipped to the pot is non-negotiable. Maintain 350°F throughout frying; if the temperature drops below 325°F, the lumpia will absorb oil and turn greasy. I check mine every batch.
Rolling Station
Set up a clean, dry surface with a damp kitchen towel nearby to cover unused lumpia wrappers. A small bowl of beaten egg for sealing and a pastry brush make assembly efficient. Keep everything within arm’s reach.
Draining Solution
A wire cooling rack set over a baking sheet lets oil drip away while air circulates, keeping every lumpia crisp on all sides. Paper towels work in a pinch, but flip them halfway through draining to avoid soggy bottoms.
Prep Tools
For the filling, a box grater makes quick work of carrots, and a sharp chef’s knife ensures fine, even cabbage shreds. My grandmother always said a sharp knife is safer—and she was never wrong.
Safety Essentials
Keep a lid nearby to smother any flare-ups and have tongs ready for turning. Never leave hot oil unattended, and always dry lumpia thoroughly before frying to prevent dangerous splattering.
Nutrition Facts
Frequently Asked Questions
Can I bake these instead of frying?
Yes! Brush with oil and bake at 400°F for 20-25 minutes, flipping halfway. They won’t be as crispy but will still be delicious.
How do I prevent them from bursting while frying?
Don’t overfill—use 2 tablespoons max per roll. Seal edges tightly with beaten egg and fry at steady 350°F.
Can I make the filling ahead of time?
Cook and cool the filling, then refrigerate for up to 1 day. Assemble and fry just before serving for best texture.
What’s the best dipping sauce?
Classic pairings: sweet chili sauce or a mix of soy sauce, vinegar, and garlic. For heat, add sriracha or chili flakes.

- Potato Chip Cookie Recipe With Pecans: Buttery Crunch Meets Nutty Richness - October 30, 2026
- Potato Patty Recipe No Egg: Crispy Edges Without the Binder - October 30, 2026
- Paula Deen’s Potato Chip Cookies Recipe: Salty-Sweet Crunch in Every Bite - October 30, 2026