
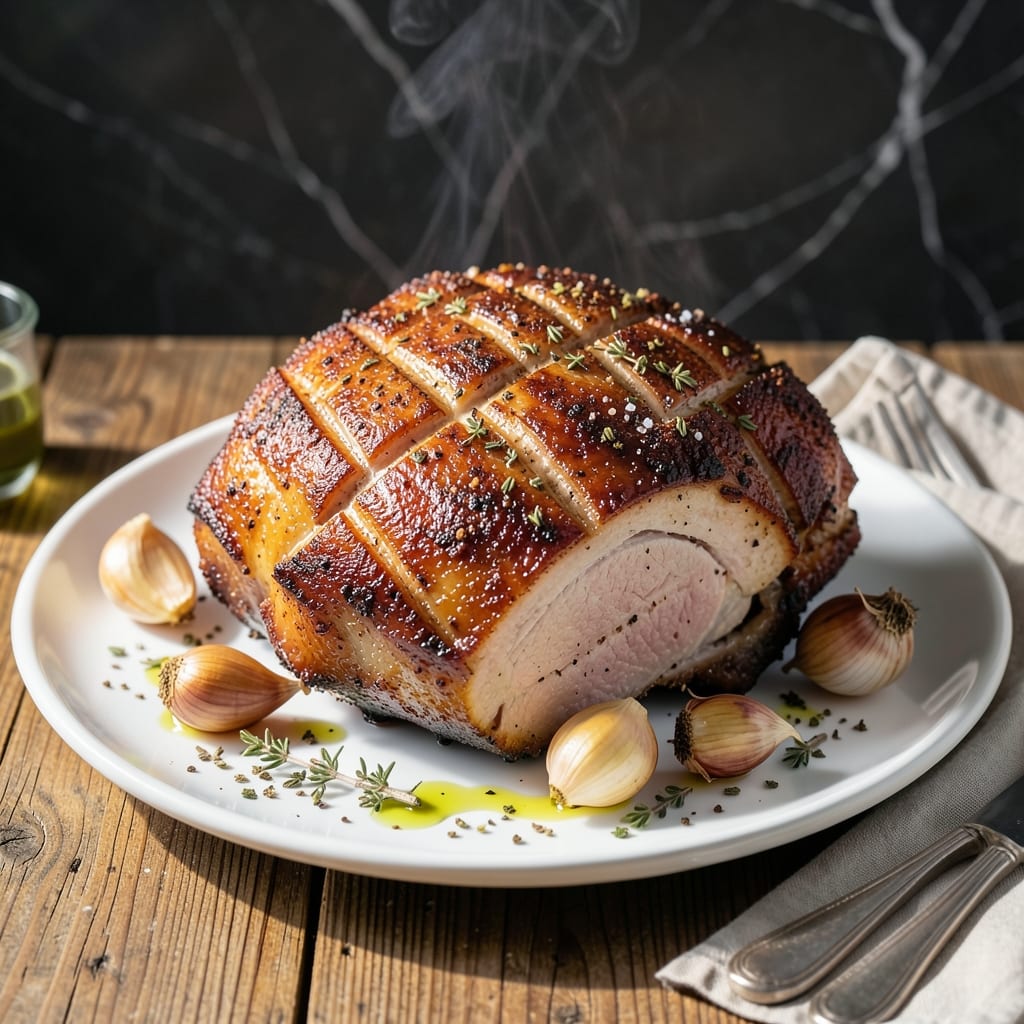
This oven method transforms pork picnic shoulder into a showstopper with crispy skin and tender meat. My grandmother’s handwritten notes called for patience and a hot oven—no fancy techniques required.
I perfected this after years of trial and error, learning that high initial heat creates that coveted crispy exterior while slow roasting keeps the inside succulent. The skin blisters and browns beautifully without drying out the meat.
What you get is fall-off-the-bone tenderness with a shatteringly crispy top layer that crackles with every slice. The aroma alone will have everyone gathering around the kitchen before it’s even done.
Serve it with your favorite sides for a meal that tastes like it took all day, though the oven does most of the work for you.
Ingredients for Pork Picnic Recipe Oven
Pantry staples and a pork picnic shoulder make this oven roast unforgettable.
| Ingredient | Amount | Notes |
|---|---|---|
| Pork Picnic Shoulder 🐖 | 4 lb | Skin-on, bone-in preferred |
| Kosher Salt 🧂 | 2 tbsp | Diamond Crystal preferred |
| Black Pepper 🌶️ | 1 tsp | Freshly ground for best flavor |
| Garlic Cloves 🧄 | 6 cloves | Minced for maximum flavor |
| Dried Oregano 🌿 | 1 tbsp | Mediterranean variety ideal |
| Dried Thyme 🍃 | 1 tbsp | Crushed between fingers |
| Olive Oil 🫒 | 2 tbsp | Extra-virgin for richness |
| Apple Cider Vinegar 🍏 | ¼ cup | Balances richness of pork |
| Brown Sugar 🍚 | 2 tbsp | Light or dark works |
| Yellow Onion 🧅 | 1 whole | Quartered for roasting |
| Carrots 🥕 | 3 whole | Peeled, cut into chunks |
| Chicken Stock 🥣 | 1 cup | Low-sodium preferred |
| Fresh Rosemary 🌿 | 2 slices | Sprigs, tied together |
The pork picnic shoulder is key here—look for skin-on, bone-in cuts at your butcher or Whole Foods meat counter. The skin crisps up beautifully in the oven, giving you that shatteringly crispy texture my grandmother loved. Don’t skip the bone-in version; it adds depth of flavor. If you can’t find picnic shoulder, pork butt works in a pinch (just trim excess fat).
No fresh rosemary? Dried at half the amount works fine. Apple cider vinegar can be swapped for white wine vinegar if needed. Brown sugar not on hand? Honey or maple syrup adds a similar caramelized touch. The chicken stock keeps the meat moist—vegetable stock works if you’re avoiding poultry. For extra crunch, pat the skin dry before seasoning (worth the extra minute).
Leftovers? Shred for sandwiches or tacos—keeps 4-5 days in the fridge. The roast freezes beautifully for up to 3 months. I like to save the pan drippings for gravy or soups (don’t waste that flavor).
Why You’ll Love This Recipe
- Set It and Forget: I toss the pork picnic with salt, pepper, garlic and oregano, pop it in the oven, and walk away for hours.
- That Garlic-Oregano Kick: The combo of crushed garlic cloves and dried oregano gives every bite a warm, savory depth I can’t get enough of.
- Feeds the Whole Crew: One picnic shoulder roasted low and slow stretches to feed my family of five with leftovers for sandwiches.
- Budget Hero: Honestly, pork picnic is the cheapest cut that still tastes like a million bucks after a long oven roast.
Step-by-Step Instructions for Pork Picnic Shoulder Roast
Here’s how to achieve that perfect balance of crispy skin and tender meat every time.
Step 1: Season and Marinate the Pork Picnic Shoulder
Pat the 4 lb Pork Picnic Shoulder dry with paper towels to ensure crispy skin. Score the skin and fat cap in a crosshatch pattern, being careful not to cut into the meat. This helps the fat render out and creates more surface area for crisping.
Rub the pork all over with the 2 tbsp Kosher Salt, 1 tsp Black Pepper, 1 tbsp Dried Oregano, and 1 tbsp Dried Thyme. Massage the spices into every crevice, including the scored skin. Let it sit at room temperature for 30 minutes to absorb the flavors.
In a small bowl, mix the 2 tbsp Olive Oil, 0.25 cup Apple Cider Vinegar, minced 6 cloves Garlic Cloves, and 2 tbsp Brown Sugar. Pour this mixture over the pork, ensuring it coats the surface evenly. This marinade adds moisture and a touch of sweetness to balance the richness.
Step 2: Prepare the Roasting Pan with Aromatics
Preheat your oven to 425°F. While the oven heats, prepare the roasting pan. Place the 1 whole Yellow Onion (quartered) and 3 whole Carrots (peeled and cut into chunks) in the bottom of a roasting pan. These vegetables will act as a natural rack and infuse the meat with additional flavor.
Pour the 1 cup Chicken Stock into the pan, along with the 2 slices Fresh Rosemary. The liquid will create steam, keeping the pork moist during the initial high-heat roast, while the rosemary adds a fragrant, herbal note.
Step 3: Roast at High Heat for Crispy Skin
Place the pork picnic shoulder skin-side up on top of the vegetables in the roasting pan. Transfer it to the preheated oven and roast at 425°F for 45 minutes. This high heat is crucial for rendering the fat and creating that coveted crispy skin.
After 45 minutes, the skin should start to turn golden brown and crisp up. If it’s browning too quickly, loosely tent the pork with aluminum foil to prevent burning. The meat should be sizzling, and your kitchen will smell incredible at this point.
Step 4: Lower Heat and Finish Cooking
Reduce the oven temperature to 325°F and continue roasting for another 2 to 2.5 hours, or until the internal temperature reaches 195°F. Baste the pork with the pan juices every 30 minutes to keep it moist and enhance the flavor.
The pork is done when it’s fork-tender and the skin is deep golden brown and crispy. The meat should pull apart easily with a fork, and the juices should run clear. The vegetables in the pan will be soft and caramelized, adding to the overall richness of the dish.
Step 5: Rest and Serve
Remove the pork from the oven and transfer it to a cutting board. Tent it loosely with foil and let it rest for 20 minutes. This resting period allows the juices to redistribute, ensuring every bite is succulent and flavorful.
While the pork rests, skim off any excess fat from the pan juices if desired, and use the remaining liquid to make a quick pan sauce. Slice the pork and serve it with the roasted vegetables and pan juices spooned over the top. The skin should be crispy, the meat tender, and every bite packed with flavor.
Pro Tips For Making Pork Picnic Recipe Oven
- Score the Fat: Cut deep crosshatches into the pork picnic’s fat cap—about 1/2 inch apart—so the salt, garlic, and oregano actually penetrate and flavor the meat.
- Low and Slow: Roast at 275°F until it hits 195°F internally; I learned this the hard way after drying out two shoulders at higher temps.
- Rest Before Slicing: Tent it with foil and let it sit 15 minutes after pulling it from the oven, or all the juices will end up on your cutting board.
- Crush the Garlic: Smash the cloves with the flat of your knife and leave the skins on—they’ll roast into sweet, spreadable paste that melts into the pork.
Essential Equipment for This Recipe
Roasting Pan Essentials
For this dish, I swear by my heavy-duty stainless steel roasting pan with a rack—it distributes heat evenly and the rack elevates the pork for better air circulation. A 13×9 inch pan works perfectly for a 4 lb picnic shoulder. 💪
Meat Thermometer Must
Don’t even attempt this without an instant-read meat thermometer. I use a ThermoWorks ThermoPop to track the internal temp, aiming for that perfect 195°F finish. It’s the only way to guarantee juicy meat without overcooking.
Basting Tools
A silicon basting brush or large spoon helps redistribute those flavorful pan juices every 30 minutes. I keep a small bowl nearby to collect drippings for easy basting without opening the oven too long.
Aluminum Foil
Heavy-duty aluminum foil is crucial for tenting if the skin browns too quickly. It also covers the pork during resting to keep it warm. I always have a roll on hand for those high-heat cooking moments.
Sharp Carving Knife
After resting, a long, sharp carving knife makes slicing through the crispy skin effortless. I love my 8-inch chef’s knife for this—it handles both the skin and tender meat beautifully.
Kitchen Towels
Keep clean kitchen towels ready for handling the hot pan and patting the pork dry before seasoning. They’re also perfect for tenting the meat during its 20-minute rest to retain heat. 🔥
Nutrition Facts
Frequently Asked Questions
What if my pork skin isn’t crispy?
Try broiling for 2-3 minutes at the end while watching closely. Ensure you pat the skin completely dry before seasoning and use high initial heat of 425°F.
Can I cook this a day ahead?
Yes! Reheat covered at 350°F for 20-30 minutes. The skin loses some crispness but regains it under the broiler. Store leftovers in the fridge for up to 4 days.
Why is the internal temp so high?
The 195°F target breaks down collagen for fall-apart tenderness. Unlike lean cuts, picnic shoulder needs this higher temp to become perfectly tender without drying out.

- Potato Chip Cookie Recipe With Pecans: Buttery Crunch Meets Nutty Richness - October 30, 2026
- Potato Patty Recipe No Egg: Crispy Edges Without the Binder - October 30, 2026
- Paula Deen’s Potato Chip Cookies Recipe: Salty-Sweet Crunch in Every Bite - October 30, 2026