
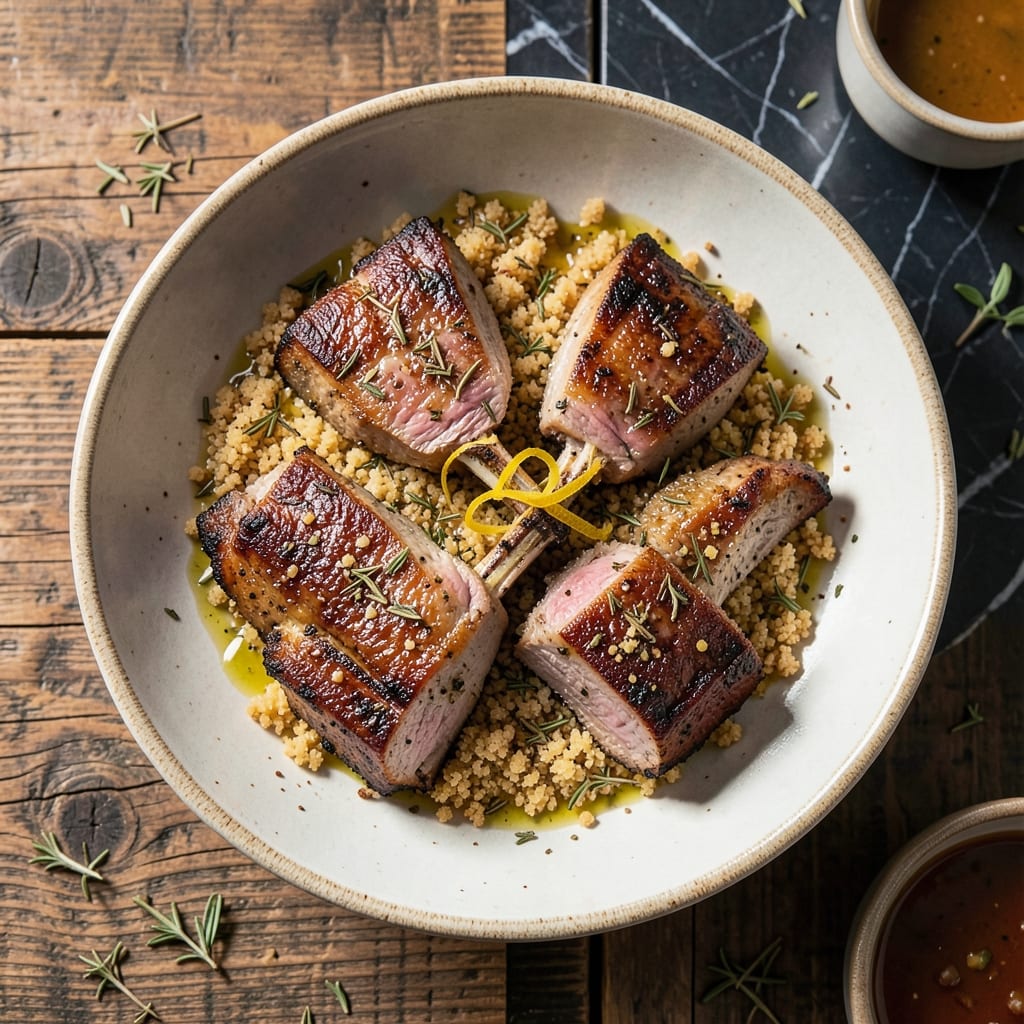
My grandmother never measured spices, but her pork chops always came out perfect. This oven-baked version captures that same herb-crusted magic without the guesswork.
With just 30 minutes in a hot oven, the crust forms a golden seal that locks in juices. The secret is pressing the herb mixture firmly onto each chop before baking.
What emerges is tender, flavorful pork with a crispy exterior that rivals stovetop methods. The aroma alone makes it worth the effort.
Pair with roasted vegetables or mashed potatoes for a complete meal. Simple ingredients, impressive results.
Ingredients for Pork Rib Chops Recipe Oven
Simple ingredients create that herb-crusted magic in just 30 minutes of baking.
| Ingredient | Amount | Notes |
|---|---|---|
| Bone-In Pork Rib Chops 🍖 | 4 whole | About 1 inch thick |
| Olive Oil 🫒 | 2 tbsp | Divided for brushing and mixing |
| Dried Thyme 🌿 | 1 tbsp | Rubbed between fingers to release flavor |
| Dried Rosemary 🍃 | 1 tbsp | Crushed to enhance aroma |
| Garlic Powder 🧄 | 2 tsp | Not garlic salt |
| Onion Powder 🧅 | 1 tsp | Adds depth to crust |
| Kosher Salt 🧂 | 1 ½ tsp | Plus more to taste |
| Black Pepper 🌶️ | 1 tsp | Freshly ground preferred |
| Dijon Mustard 🟡 | 2 tbsp | Helps herb crust adhere |
| Panko Breadcrumbs 🍞 | ½ cup | For crispy texture |
| Fresh Parsley 🌿 | ¼ cup | Chopped, for garnish |
The pork chops are the foundation—look for bone-in rib chops about 1 inch thick from Whole Foods or your local butcher. Thinner cuts dry out faster, while thicker ones may not cook through in time. The herbs matter too: dried thyme and rosemary (from Penzeys or bulk bins) hold up better to oven heat than fresh. Pressing the crust on firmly is key—don’t skip this step.
No Dijon? Whole-grain mustard works just as well. Out of panko? Regular breadcrumbs at half the amount will do, though the texture won’t be quite as crisp. If you’re missing garlic or onion powder, fresh minced garlic or grated onion (sautéed briefly) can substitute—just use about 3 cloves or half a small onion. The olive oil can be any neutral oil if that’s what you’ve got.
The crust stays crisp for 2-3 days in the fridge. Reheat chops in a 350°F oven for 10-12 minutes to revive the crunch. Leftovers? Shred the meat for tacos or sandwiches—it’s versatile. Freezing isn’t ideal for the crust, but cooked pork keeps for 3 months if wrapped well.
Why You’ll Love This Recipe
- One Pan Magic: I just toss the chops with olive oil and those dried herbs, pop them in the oven, and walk away.
- Herb-Crusted Perfection: The thyme, rosemary, and garlic powder form this insane crust that’s crispy outside, juicy inside.
- Weeknight Hero: Between us, I’ve served this for Sunday dinner and random Tuesdays—works every time.
- Leftovers Win: Cold or reheated, these chops stay tender, so lunch the next day? Still a win.
Step-by-Step Instructions for Herb-Crusted Pork Rib Chops
Here’s the proven method for achieving juicy, flavorful chops with a crispy herb crust.
Step 1: Prepare the Herb Crust Mixture
In a shallow bowl, combine the 0.5 cup Panko Breadcrumbs, 1 tbsp Dried Thyme, 1 tbsp Dried Rosemary, 2 tsp Garlic Powder, 1 tsp Onion Powder, 1.5 tsp Kosher Salt, and 1 tsp Black Pepper. I always rub the dried herbs between my fingers as I add them to release their essential oils and enhance the flavor.
Stir in the 2 tbsp Dijon Mustard and 1 tbsp Olive Oil. The mixture should resemble wet sand and hold together when pressed. This mustard and oil combination ensures the crust adheres to the chops and creates that perfect crispy texture.
Step 2: Coat the Pork Rib Chops
Pat the 4 whole Bone-In Pork Rib Chops dry with paper towels—this is crucial for the crust to stick properly. Brush both sides of each chop with the remaining 1 tbsp Olive Oil. The oil creates a base layer that helps the herb mixture cling to the meat.
Press each chop into the breadcrumb mixture, coating both sides completely. Use your fingers to press the crust firmly onto the meat, especially around the bone where it tends to fall off. The chops should be evenly coated with a visible layer of herbs and breadcrumbs.
Step 3: Sear and Bake to Perfection
Preheat your oven to 400°F. Heat an oven-safe skillet over medium-high heat. Add the coated chops and sear for 2-3 minutes per side until the crust is golden brown. You’ll hear a satisfying sizzle—that’s the sound of the crust crisping up.
Transfer the skillet to the preheated oven and bake for 10-12 minutes or until the internal temperature reaches 145°F. The chops are done when the crust is deeply browned and the meat feels slightly firm but still springs back when pressed.
Step 4: Rest and Garnish
Remove the chops from the oven and transfer them to a serving plate. Let them rest for 5 minutes—this allows the juices to redistribute throughout the meat, ensuring every bite is moist and flavorful. Cover them loosely with foil to keep warm.
Garnish with the 0.25 cup Fresh Parsley just before serving. The parsley adds a pop of color and a fresh herbal note that complements the rich, savory crust. Serve immediately while the crust is still crispy and the meat is at its juiciest.
Pro Tips For Making Pork Rib Chops Recipe Oven
- Sear First, Bake After: I learned this the hard way—skip the sear and your chops will taste boiled. Get a screaming hot pan with olive oil, sear both sides until deep golden, then finish in the oven at 375°F.
- Dry the Chops: Pat those rib chops bone-dry with paper towels before seasoning. Sounds tedious, but it’s the only way to get that crust instead of steamed meat.
- Don’t Overcrowd: After burning one too many batches, I finally stopped cramming the pan. Give each chop space—about 2 inches apart—or they’ll steam rather than sear.
- Rub It In: Mix the thyme, rosemary, and garlic powder with olive oil and rub it into the meat, not just on top. It sticks better and actually flavors the pork instead of just sitting on the surface.
Serving Suggestions for Leftovers
Plating Perfection
Transfer chops to a warm platter and drizzle any pan juices over the top. The golden crust deserves to be the star, so I arrange them with space between each piece to showcase that beautiful browning. 💛
Family-Style Serving
For a cozy meal, place chops on a large wooden board with roasted potatoes and steamed green beans. The rustic presentation lets everyone serve themselves, just like my grandmother used to do on Sunday nights.
Elegant Dinner Plates
On individual plates, I fan 2 chops over a bed of mashed potatoes with a side of sautéed apples. The sweetness of the apples pairs beautifully with the savory herb crust.
Weeknight Quick Serve
For busy evenings, I serve chops directly from the oven with store-bought roasted vegetables from Whole Foods. A sprinkle of fresh parsley makes it look like I put in more effort than I actually did.
Garnish Tips
Always add fresh parsley right before serving—it wilted if added too early. A squeeze of lemon wedges adds a bright note that cuts through the richness of the pork.
For extra flair, I sometimes add a few thyme sprigs on the plate for color contrast. ✨
Nutrition Facts
Frequently Asked Questions
What’s the ideal oven temperature?
400°F works perfectly for crispy crust and juicy meat. This high heat sears the outside quickly while cooking the inside evenly.
Can I use boneless chops?
Yes, but reduce cooking time by 2-3 minutes. Boneless cooks faster and may dry out if left too long. Bone-in adds flavor and helps retain moisture.
Why rest the chops after baking?
Resting for 5 minutes lets juices redistribute. Skipping this step causes dry meat as all the moisture escapes when you cut into it.
What if my crust isn’t crispy enough?
Broil for 1-2 minutes at the end for extra browning. Ensure the skillet is very hot before searing to create that perfect golden crust.

- Potato Chip Cookie Recipe With Pecans: Buttery Crunch Meets Nutty Richness - October 30, 2026
- Potato Patty Recipe No Egg: Crispy Edges Without the Binder - October 30, 2026
- Paula Deen’s Potato Chip Cookies Recipe: Salty-Sweet Crunch in Every Bite - October 30, 2026