
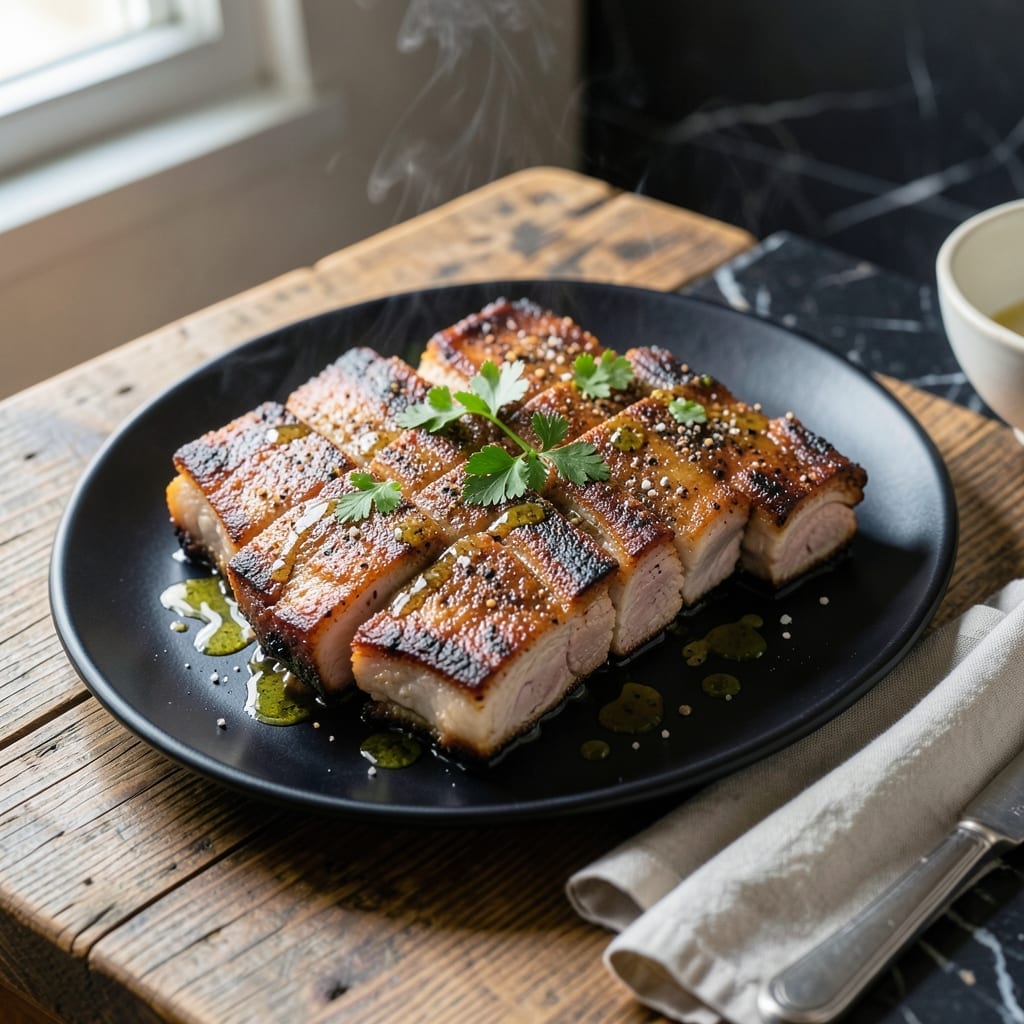
Pan-frying pork ribs creates a crispy exterior while keeping the meat tender and juicy inside. This method delivers restaurant-quality results with simple ingredients and a hot skillet.
I developed this technique after years of experimenting with different cooking methods for ribs. The key is high heat and patience—letting the ribs sear undisturbed until deeply browned and caramelized.
The result is fall-off-the-bone meat with a crispy crust that locks in all the savory flavors. Each bite offers a perfect balance of texture and depth, proving that great ribs don’t always need a smoker.
Serve these with your favorite sides for a meal that feels special but comes together quickly. The process is straightforward, but the flavor is anything but ordinary.
Ingredients for Pork Ribs Recipe Pan Fry
Simple ingredients transform into restaurant-quality ribs with a crispy, savory finish.
| Ingredient | Amount | Notes |
|---|---|---|
| Pork Baby Back Ribs 🥩 | 2 lb | Cut into individual ribs |
| Kosher Salt 🧂 | 2 tsp | Divided for seasoning |
| Black Pepper 🌶️ | 1 tsp | Freshly ground preferred |
| Garlic Powder 🧄 | 1 tsp | For dry rub base |
| Onion Powder 🧅 | 1 tsp | For dry rub base |
| Smoked Paprika 🌶️ | 1 tsp | Adds depth and color |
| Brown Sugar 🍚 | 2 tbsp | Light or dark variety |
| Olive Oil 🫒 | 3 tbsp | For pan-frying ribs |
| Apple Cider Vinegar 🍏 | 1 tbsp | For deglazing pan |
| Chicken Broth 🥣 | ½ cup | Low-sodium preferred |
| Fresh Thyme 🌿 | 2 tsp | Chopped, for garnish |
| Fresh Rosemary 🌿 | 2 tsp | Chopped, for garnish |
The ribs are the star here. Baby back ribs work best for pan-frying—they cook faster and stay tender. Look for ribs with good marbling at Costco or your local butcher. The dry rub ingredients should be fresh; old spices lose their punch. I always keep a stock of Penzeys for reliable quality.
No smoked paprika? Regular paprika plus a pinch of cayenne gets you close. Fresh herbs not available? Dried thyme or rosemary at one-third the amount. Short on apple cider vinegar? White vinegar or lemon juice works in a pinch. The brown sugar can be swapped for honey if preferred.
Store ribs in the fridge for up to 3 days before cooking. Leftovers keep 4-5 days refrigerated or freeze for 3 months. Reheat gently to maintain that crispy texture.
Why You’ll Love This Recipe
- One Pan Wonder: I love that I can sear, season, and cook these ribs all in one skillet—minimal cleanup, maximum flavor.
- Smoky Depth: The garlic and onion powder create that rich, savory crust on the ribs that’s honestly hard to resist.
- Weeknight Hero: Here’s what sold me—it’s ready faster than oven-baked ribs but still delivers that fall-off-the-bone tenderness.
- Budget-Friendly Feast: Pork baby back ribs are affordable, and this method stretches them to feed a crowd without breaking the bank.
Step-by-Step Instructions for Pork Ribs Pan Fry
Master the technique for fall-off-the-bone ribs with perfectly crispy edges every time.
Step 1: Season the Ribs for Maximum Flavor
Pat the 2 lb pork baby back ribs dry with paper towels to remove excess moisture. This ensures the seasoning adheres properly and promotes even browning.
In a small bowl, combine 1 tsp garlic powder, 1 tsp onion powder, 1 tsp smoked paprika, and 1 tsp black pepper. Rub this mixture evenly over all sides of the ribs, then sprinkle with 2 tsp kosher salt and 2 tbsp brown sugar. Let the seasoned ribs rest at room temperature for 15 minutes to allow the flavors to penetrate.
Step 2: Sear the Ribs to Develop a Crust
Heat a large, heavy skillet over medium-high heat until hot. Add 3 tbsp olive oil and swirl to coat the pan evenly. The oil should shimmer but not smoke.
Add the seasoned ribs in a single layer, working in batches if necessary to avoid overcrowding. Sear for 4-5 minutes per side until the ribs develop a deep golden-brown crust. The sugar in the rub will caramelize, creating a sticky, flavorful exterior. Don’t move the ribs too soon—wait until they release easily from the pan.
Step 3: Deglaze and Braise for Tenderness
Once all ribs are seared, return them to the skillet in a single layer. Reduce heat to medium and pour in 0.5 cup chicken broth and 1 tbsp apple cider vinegar. The liquid should sizzle and immediately start deglazing the pan, lifting all the browned bits from the bottom.
Cover the skillet with a lid and let the ribs braise for 15-20 minutes. Check occasionally and add a splash of water if the liquid evaporates too quickly. The ribs are ready when they’re tender but still cling slightly to the bone.
Step 4: Crisp the Ribs and Garnish
Remove the lid and increase heat to medium-high. Let the ribs cook uncovered for 5-7 minutes until the braising liquid has mostly evaporated and the edges are crispy. Flip the ribs occasionally to ensure even crisping.
Transfer the ribs to a serving platter and sprinkle with 2 tsp fresh thyme and 2 tsp fresh rosemary. The herbs add a bright, aromatic finish to the rich, savory ribs. Serve immediately while the edges are at their crispiest.
Pro Tips For Making Pork Ribs Recipe Pan Fry
- Pre-Dry the Ribs: Pat the ribs completely dry with paper towels before seasoning—I learned this the hard way after my first batch steamed instead of seared in the pan.
- Season Overnight: Rub the ribs with salt, pepper, garlic and onion powder at least 4 hours ahead (or overnight), as the spices need time to penetrate the meat for real flavor.
- Use Medium Heat: Crank the pan to medium, not high, or the sugars in the rub will burn before the ribs cook through—after ruining two batches, I finally got this right.
- Cover to Finish: After browning both sides, add a splash of water, cover the pan, and let them steam for 10-12 minutes to guarantee tender meat without drying out.
Essential Equipment for This Recipe
Heavy Skillet
I always reach for my 12-inch Lodge cast iron for this recipe. It retains heat beautifully and develops that perfect sear on the ribs. A heavy stainless steel skillet works too, but cast iron gives better results for this technique.
Tongs
Use 12-inch lockable tongs to flip the ribs without piercing the meat. I prefer the OXO Good Grips style—they’re sturdy and comfortable. This prevents losing those precious juices during cooking.
Lid or Foil
A tight-fitting lid is essential for the braising step. If your skillet doesn’t have one, use heavy-duty aluminum foil to cover tightly. This traps steam to tenderize the meat during the 15-20 minute braise.
Meat Thermometer
While not mandatory, I love my ThermoWorks Instant Read for checking doneness. The ribs are perfect at 195-203°F internal temperature. It takes the guesswork out of knowing when they’re ready.
This is especially helpful if you’re new to cooking ribs this way. 💡
Wooden Spoon
A sturdy wooden spoon helps scrape up those flavorful browned bits when deglazing. I use mine to press the ribs gently into the chicken broth and apple cider vinegar mixture to maximize flavor infusion.
Paper Towels
Keep a stack handy for patting the ribs dry before seasoning and for cleaning up any splatters. The drier the ribs, the better the sear. I go through several sheets during this process.
Nutrition Facts
Frequently Asked Questions
What’s the best skillet for pan-frying ribs?
A heavy cast iron skillet works best for even heat distribution. Stainless steel is a good alternative if properly preheated.
How do I know when the ribs are done?
Ribs are ready when they reach 195-203°F internally and the meat pulls back from the bone slightly. Tender but not falling apart is ideal.
Can I use a different vinegar for deglazing?
Yes! White vinegar or lemon juice works in place of apple cider vinegar. The acidity helps lift those flavorful browned bits.
Why are my ribs tough instead of tender?
Likely they needed more braising time. Ensure the skillet is covered and maintains medium heat for 15-20 minutes to properly tenderize.

- Potato Patty Recipe No Egg: Crispy Edges Without the Binder - October 30, 2026
- Paula Deen’s Potato Chip Cookies Recipe: Salty-Sweet Crunch in Every Bite - October 30, 2026
- Potato Gnocchi Recipe Ideas: Pillowy Soft Dumplings With Rustic Charm - October 30, 2026