
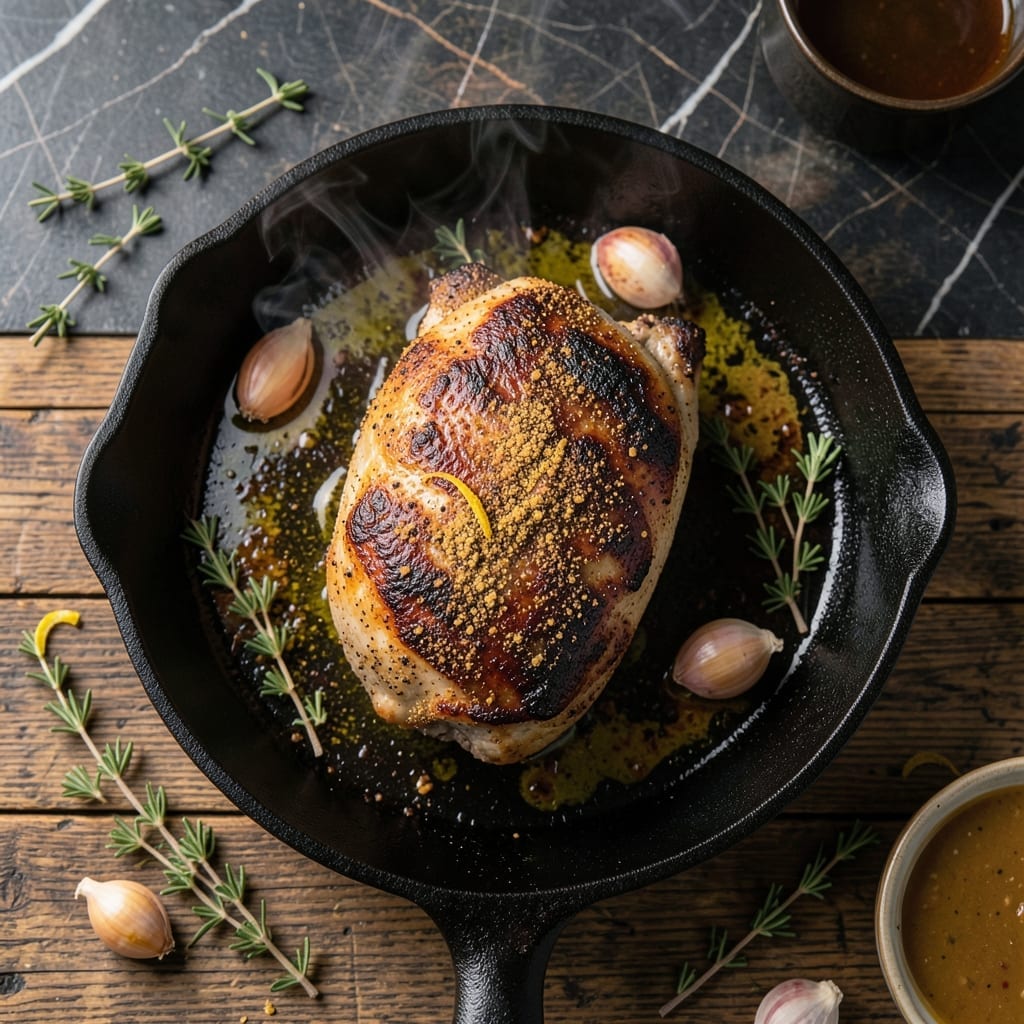
Cast iron transforms pork tenderloin into a masterpiece with crisp edges and juicy centers every time. This proven method delivers restaurant-quality results using basic ingredients and one pan.
The secret lies in a hot skillet and precise timing. Searing the tenderloin first creates a flavorful crust, while finishing in the oven ensures even cooking without drying out the meat.
You’ll achieve perfectly cooked pork with a golden exterior and tender, succulent interior. The pan juices create a natural sauce that enhances every bite.
Serve with roasted vegetables or mashed potatoes for a complete meal that impresses without effort.
Ingredients for Pork Tenderloin Recipe in Cast Iron Skillet
Basic ingredients elevated by cast iron create a restaurant-worthy centerpiece with minimal effort.
| Ingredient | Amount | Notes |
|---|---|---|
| Pork Tenderloin 🥩 | 1 ½ lb | Trimmed of excess fat |
| Kosher Salt 🧂 | 1 ½ tsp | Diamond Crystal preferred |
| Freshly Ground Black Pepper 🌶️ | 1 tsp | Coarse grind preferred |
| Garlic Powder 🧄 | 1 tsp | Not garlic salt |
| Onion Powder 🧅 | 1 tsp | Fine grind preferred |
| Smoked Paprika 🌶️ | ½ tsp | For depth of flavor |
| Dried Thyme 🍃 | ½ tsp | Crushed between fingers |
| Olive Oil 🫒 | 2 tbsp | High smoke point variety |
| Unsalted Butter 🧈 | 2 tbsp | For basting and finishing |
| Fresh Rosemary Sprigs 🌿 | 2 whole | Optional for aroma |
| Fresh Garlic Cloves 🧄 | 3 cloves | Smashed, for pan sauce |
| Chicken Stock 🍲 | ½ cup | Low-sodium preferred |
The pork tenderloin is the star—opt for 1.5 lb pieces with even thickness for consistent cooking. Whole Foods or Costco typically carry high-quality options. Look for pale pink color and minimal surface moisture, indicating freshness. Trim any silver skin or excess fat before seasoning; this ensures even browning and better crust formation.
No smoked paprika? Regular paprika plus a pinch of cayenne works as a substitute. Chicken stock can be replaced with vegetable stock or even water in a pinch. Fresh rosemary can be swapped for fresh sage or thyme—whatever herb you have on hand. The butter is essential for basting; don’t substitute with oil, as it won’t create the same rich pan sauce.
Store raw pork tenderloin in the coldest part of your refrigerator for up to 3 days, or freeze for 6 months. Once cooked, leftovers keep for 4 days refrigerated. Reheat gently in a skillet to preserve moisture, or enjoy cold in sandwiches.
Why You’ll Love This Recipe
- One Pan Wonder: I love that everything happens in one cast iron skillet—sear, season, and serve without dirtying a sink full of dishes.
- Crispy Garlic Crust: The combo of garlic powder, salt, and pepper forms this insane golden crust that crackles with every bite.
- Feeds the Crowd: One pork tenderloin stretches to feed four with leftovers for sandwiches the next day—my kids fight over them.
- Budget Friendly: Honestly, it’s one of the cheapest cuts that still feels fancy, and I always have the spices on hand.
Step-by-Step Instructions for Pork Tenderloin in Cast Iron Skillet
Here’s the method to achieve perfectly seared pork tenderloin with crisp edges and juicy centers every time.
Step 1: Season the Pork Tenderloin
Pat the pork tenderloin dry with paper towels to ensure a good sear. In a small bowl, combine the kosher salt, freshly ground black pepper, garlic powder, onion powder, smoked paprika, and dried thyme.
Rub this spice mixture evenly over all surfaces of the pork tenderloin, pressing gently to adhere. This dry brine method not only seasons the meat but also helps create that coveted crisp exterior. Let the seasoned tenderloin sit at room temperature for 20-30 minutes while you preheat your skillet.
Step 2: Sear the Pork Tenderloin in Cast Iron
Place a large cast iron skillet over medium-high heat and add the olive oil. When the oil begins to shimmer and a drop of water sizzles when flicked into the pan, it’s ready. Add the pork tenderloin and sear for 4-5 minutes per side, or until deeply browned.
Resist the urge to move the tenderloin during searing. You want to develop a rich, golden-brown crust on all sides before proceeding. The pork should release easily from the pan when it’s ready to turn. Reduce heat to medium once all sides are seared.
Step 3: Baste with Aromatics
Add the unsalted butter, fresh rosemary sprigs, and smashed fresh garlic cloves to the skillet. Tilt the pan slightly and baste the pork tenderloin with the melted butter continuously for 2-3 minutes.
The rosemary and garlic will infuse the butter with aromatic flavor while creating a beautiful glaze on the pork. This basting technique also helps regulate the cooking temperature and prevents the exterior from burning while the interior comes up to temperature.
Step 4: Finish with Chicken Stock and Rest
Carefully add the chicken stock to the skillet, then transfer to a preheated 375°F oven. Roast for 8-10 minutes or until the internal temperature reaches 145°F in the thickest part.
Remove from oven and transfer the pork tenderloin to a cutting board. Tent loosely with foil and let rest for 10 minutes before slicing. This resting period allows the juices to redistribute throughout the meat, ensuring each slice remains tender and juicy.
Pro Tips For Making Pork Tenderloin Recipe In Cast Iron Skillet
- Pat It Dry: Use paper towels to thoroughly dry the pork tenderloin before seasoning—moisture is the enemy of a good sear, and I learned this the hard way after too many steamed, pale cuts.
- Start Hot, Finish Low: Crank the cast iron to smoking hot for the initial sear, then drop to medium-low to cook through without burning the garlic and onion powder.
- Don’t Skip the Rest: Give the tenderloin a solid 5-10 minutes under foil after cooking; it keeps the juices inside where they belong instead of all over your cutting board.
- Season Aggressively: Pork tenderloin needs more salt than you think—go heavy with the kosher salt, garlic powder, and onion powder, or the flavor will taste flat.
Essential Equipment for This Recipe
The Right Skillet
Invest in a 12-inch Lodge cast iron skillet—its even heat distribution and retention are unmatched for searing. The weight feels substantial at first, but you’ll appreciate the stability. Preheat it for 5 minutes to ensure it’s screaming hot before adding oil. 🔥
Tongs for Turning
Use 12-inch locking tongs for safe, precise flipping of the tenderloin. I prefer the OXO Good Grips model for its comfortable handle and strong grip. Avoid forks—they pierce the meat, releasing precious juices.
Instant-Read Thermometer
A ThermoWorks ThermoPop gives accurate internal temps in 2-3 seconds. Check the thickest part of the tenderloin to hit that perfect 145°F. This small tool makes the difference between dry pork and juicy perfection.
Heat-Resistant Gloves
Cast iron handles get hot—silicone gloves let you adjust the pan safely. I keep a pair of Gorilla Grip gloves near my stove for this reason. They’re also great for transferring the skillet to the oven.
Basting Spoon
A long-handled silicone basting spoon helps you safely baste with butter and aromatics. The RSVP Endurance spoon is my go-to—it won’t melt and has a deep bowl for collecting pan juices.
Resting Surface
Use a wooden cutting board for resting the pork—it won’t cool the meat too quickly like metal or glass. A 10-minute rest is non-negotiable for juicy slices. I also place a folded kitchen towel underneath to catch any drips.
Nutrition Facts
Frequently Asked Questions
How do I know when the pork is done?
Use an instant-read thermometer to check the thickest part. It’s ready at 145°F. The meat should feel slightly firm but still springy to the touch.
Can I use a different pan?
Stainless steel works, but cast iron gives the best sear. Avoid nonstick—it won’t get hot enough for a proper crust. Always use oven-safe cookware if finishing in the oven.
Why rest the meat before slicing?
Resting for 10 minutes lets juices redistribute. Slicing too soon causes dry meat as the juices spill out. This step is non-negotiable for tenderness.
What if my tenderloin is uneven in thickness?
Tuck the thinner end under and secure it with toothpicks before searing. This ensures even cooking and prevents the thin part from overcooking.

- Potato Patty Recipe No Egg: Crispy Edges Without the Binder - October 30, 2026
- Paula Deen’s Potato Chip Cookies Recipe: Salty-Sweet Crunch in Every Bite - October 30, 2026
- Potato Gnocchi Recipe Ideas: Pillowy Soft Dumplings With Rustic Charm - October 30, 2026