
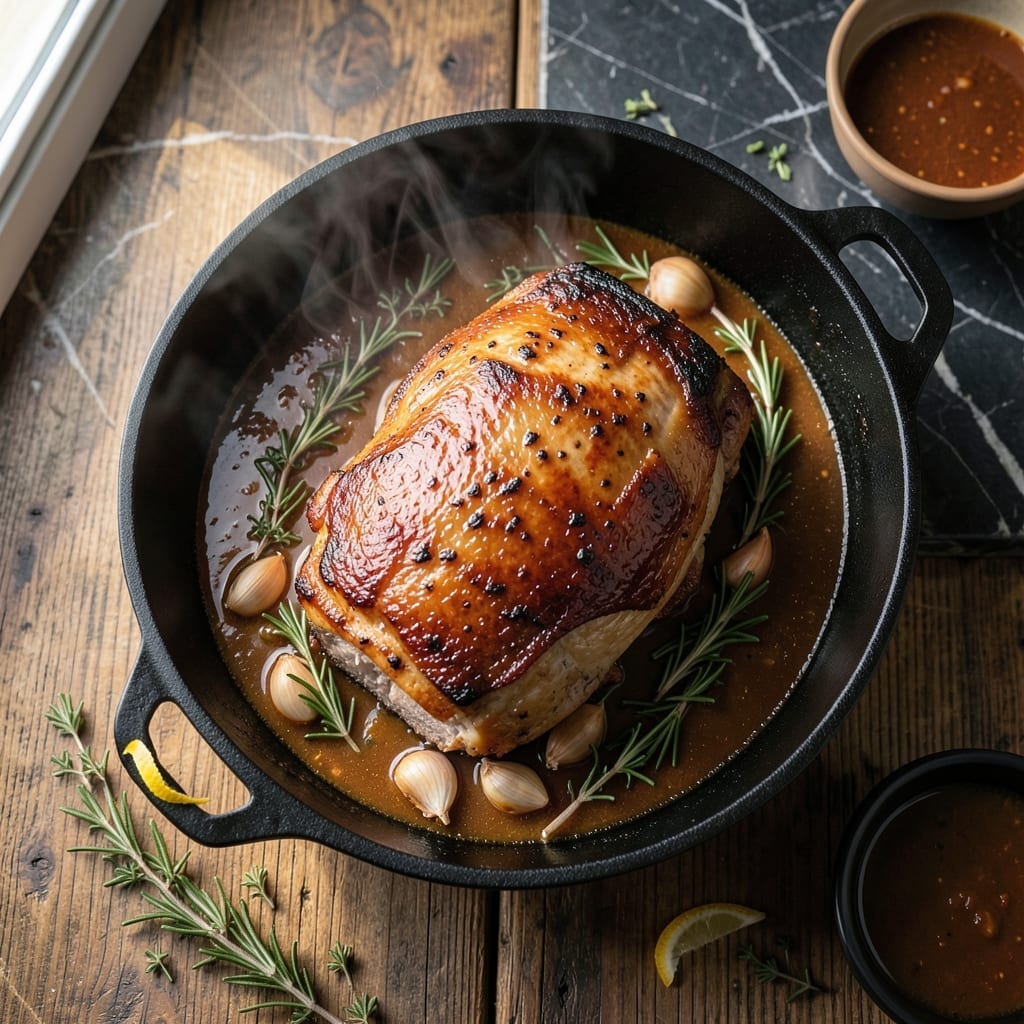
This herb-crusted pork roast transforms your Thanksgiving table with a juicy, flavorful centerpiece that rivals turkey. A simple rub of fresh rosemary, thyme, and garlic creates an aromatic crust that locks in moisture during roasting.
The secret is searing the pork first to develop a golden-brown exterior, then finishing in the oven until perfectly tender. The pan drippings become the base for a rich gravy that ties the whole meal together beautifully.
I’ve served this at family gatherings for years, and it always disappears faster than the turkey. The herb crust adds a festive touch that looks impressive with minimal effort.
Pair with roasted root vegetables or creamy mashed potatoes for a complete holiday spread. Let’s get started.
Ingredients for Pork Roast Recipe for Thanksgiving
Herb-crusted pork roast with rich pan gravy needs these quality ingredients for your holiday table.
| Ingredient | Amount | Notes |
|---|---|---|
| Pork Shoulder Roast 🐖 | 4 lb | Bone-in for extra flavor |
| Fresh Rosemary 🌿 | 3 tbsp | Finely chopped, stems discarded |
| Fresh Thyme 🍃 | 2 tbsp | Leaves only, stems removed |
| Garlic Cloves 🧄 | 6 cloves | Minced for maximum flavor |
| Kosher Salt 🧂 | 1 ½ tbsp | Diamond Crystal preferred |
| Black Pepper 🌶️ | 1 tsp | Freshly cracked for best aroma |
| Olive Oil 🫒 | 2 tbsp | For searing and roasting |
| Unsalted Butter 🧈 | 3 tbsp | For rich, glossy gravy |
| All-Purpose Flour 🌾 | 3 tbsp | For thickening the gravy |
| Chicken Stock 🍲 | 2 cups | Low-sodium preferred |
| Dijon Mustard 🟡 | 1 tbsp | For depth in herb crust |
| Red Wine 🍷 | ½ cup | Dry variety for deglazing |
The pork shoulder is non-negotiable here. Bone-in gives you that extra depth of flavor and keeps the meat juicy through the long roast. I always grab mine from Whole Foods or a local butcher—look for good marbling and a nice fat cap. The fresh herbs matter too: rosemary and thyme should be vibrant, not wilted. Don’t skimp on the garlic; six cloves sounds like a lot, but it mellows beautifully as it roasts.
No pork shoulder? Pork loin works in a pinch, but it’s leaner so keep an eye on the internal temp. Swap red wine for extra chicken stock plus a splash of balsamic. Out of fresh herbs? Dried at one-third the amount, but fresh really makes the crust shine. The Dijon is optional, but it adds a nice tang—whole-grain mustard works too if that’s what you’ve got.
The roast can sit in the fridge overnight if you’re prepping ahead—just bring it to room temp before cooking. Leftovers keep for 4-5 days and make killer sandwiches. The gravy freezes beautifully for up to 3 months.
Why You’ll Love This Recipe
- Set It and Forget: I rub the pork shoulder with rosemary, thyme, and garlic, then let the oven do the work while I prep the rest of Thanksgiving dinner.
- Herb-Crusted Perfection: That crust from the kosher salt and fresh herbs? Ridiculously good—like a cozy, savory hug on a cold holiday afternoon.
- Feeds a Holiday Crowd: Between us, this shoulder roast stretches to feed 8-10 people, so it’s exactly what you need for a big gathering.
- Next-Day Magic: Honestly, the leftovers make the best sandwiches—I pile them high with cranberry sauce and it’s my favorite part of Thanksgiving.
Step-by-Step Instructions for Herb-Crusted Pork Roast
This method ensures a juicy, aromatic centerpiece with a perfect crust and rich pan gravy.
Step 1: Prepare the Herb Crust and Season the Roast
In a small bowl, combine the 3 tbsp Fresh Rosemary, 2 tbsp Fresh Thyme, 6 cloves Garlic Cloves, 1.5 tbsp Kosher Salt, 1 tsp Black Pepper, and 1 tbsp Dijon Mustard. The mustard acts as a binder while adding depth to the herb blend.
Rub the 4 lb Pork Shoulder Roast with 2 tbsp Olive Oil, then press the herb mixture evenly over all surfaces. I like to get it into every crevice for maximum flavor. Let it sit at room temperature for 30 minutes to allow the flavors to penetrate.
Step 2: Sear the Roast for a Flavorful Crust
Preheat your oven to 325°F. In a large Dutch oven or heavy roasting pan, heat the pan over medium-high heat until hot. Add the pork shoulder roast and sear for 3-4 minutes per side until deeply browned. You want a rich, caramelized crust that will develop into a flavorful fond for the gravy.
Don’t rush this step—proper searing creates the Maillard reaction that gives the roast its complex, savory depth. The roast should release easily from the pan when it’s ready to turn. Remove it and set aside briefly while you prepare the braising liquid.
Step 3: Deglaze and Begin the Braise
With the pan still hot, add the 0.5 cup Red Wine to deglaze, scraping up all the browned bits from the bottom. These bits are packed with flavor and will dissolve into the liquid, creating a rich base for your gravy. Let the wine reduce by half, which should take about 2-3 minutes.
Return the pork shoulder roast to the pan and add the 2 cups Chicken Stock. The liquid should come about halfway up the roast. Cover the pan tightly with a lid or foil to trap the steam, which will help break down the connective tissue in the pork shoulder.
Step 4: Roast Low and Slow to Tenderness
Transfer the covered pan to the preheated oven. Roast for 3 to 3.5 hours, turning the roast halfway through the cooking time. The pork is done when it’s fork-tender and the internal temperature reaches 195-200°F.
This low-and-slow method ensures the collagen in the pork shoulder melts into gelatin, giving you that fall-apart texture. If the liquid reduces too much during cooking, add a splash more chicken stock to keep the pan from drying out.
Step 5: Make the Rich Pan Gravy
Carefully remove the roast to a cutting board and tent it loosely with foil to keep it warm. Skim any excess fat from the surface of the cooking liquid in the pan. Place the pan over medium heat and bring the liquid to a gentle simmer.
Whisk together the 3 tbsp All-Purpose Flour and 3 tbsp Unsalted Butter into a smooth paste (a beurre manié), then whisk it into the simmering liquid. Cook for 3-5 minutes, stirring constantly, until the gravy thickens enough to coat the back of a spoon. Taste and adjust seasoning if needed, then serve the gravy alongside the sliced pork.
Pro Tips For Making Pork Roast Recipe For Thanksgiving
- Dry the Roast: Pat the pork shoulder completely dry with paper towels before seasoning—this guarantees a crispy crust instead of a steamed exterior. I learned this the hard way after wondering why my roast looked pale and sad.
- Slash the Fat: Score the fat cap in a crosshatch pattern, about 1/4-inch deep, so the rosemary, thyme, and garlic penetrate deep into the meat. Sounds tedious, but it actually changes the outcome.
- Skip the Cold Start: Pull the pork out of the fridge 1-2 hours before cooking so it’s closer to room temp. After burning the outside of a cold roast once, I finally figured out this was the issue.
- Rest Before Carving: Tent the roast with foil and let it sit 15-20 minutes after pulling it from the oven—this keeps the juices inside where they belong. I used to rush this part and wondered why my pork was dry.
Essential Equipment for Great pork roast recipe for thanksgiving
Dutch Oven Essentials
I swear by my Le Creuset Dutch oven for this recipe—it sears beautifully, retains heat evenly, and transitions from stovetop to oven seamlessly. The 5-6 quart size is perfect for a 4 lb pork shoulder. I found mine at New Seasons Market during a holiday sale.
Meat Thermometer Must
A reliable instant-read thermometer is non-negotiable for perfect doneness. I use the ThermoWorks ThermoPop—it reads in 3-4 seconds and has a thin probe that fits easily into the thickest part of the roast. Aim for 195-200°F internal temperature. 🌡️
Sharp Carving Knife
Invest in a good 8-10 inch chef’s knife for slicing. My Wüsthof Classic has handled every holiday roast for years. A sharp blade makes clean cuts through the herb crust without dragging the juices out of the meat.
Wooden Cutting Board
Use a large wooden cutting board (at least 12×18 inches) to give yourself room to work. The natural wood is gentle on knife edges and provides a stable surface for carving. I keep mine from Portland farmers markets oiled with food-grade mineral oil.
Fat Separator Help
A gravy separator makes removing excess fat from pan drippings effortless. I pour the drippings into my OXO fat separator, then slowly pour the lean liquid into my gravy pot. It’s a small tool that makes a big difference in texture. 💡
Basting Tools
Keep a silicon basting brush and a ladle handy for basting the roast during cooking. I prefer heat-resistant silicone that won’t melt or scratch my Dutch oven. Basting every 45-60 minutes keeps the meat moist and builds layers of flavor.
Nutrition Facts
Frequently Asked Questions
What’s the best cut for a juicy roast?
Pork shoulder is ideal for its marbling and connective tissue that breaks down beautifully during slow roasting. It stays moist and develops rich flavor, unlike leaner cuts that can dry out.
Can I prepare this the day before?
Yes! Apply the herb rub and refrigerate overnight for deeper flavor penetration. Just bring it to room temperature for 30 minutes before searing and roasting.
How do I prevent dry meat?
Don’t skip searing or basting. Cook to 195-200°F internal temperature, and let it rest for 15-20 minutes before slicing to redistribute juices.
What sides pair well?
Classic pairings include roasted root vegetables, creamy mashed potatoes, or apple sauce for a sweet contrast. The rich gravy works perfectly with all of them.

- Potato Patty Recipe No Egg: Crispy Edges Without the Binder - October 30, 2026
- Paula Deen’s Potato Chip Cookies Recipe: Salty-Sweet Crunch in Every Bite - October 30, 2026
- Potato Gnocchi Recipe Ideas: Pillowy Soft Dumplings With Rustic Charm - October 30, 2026