
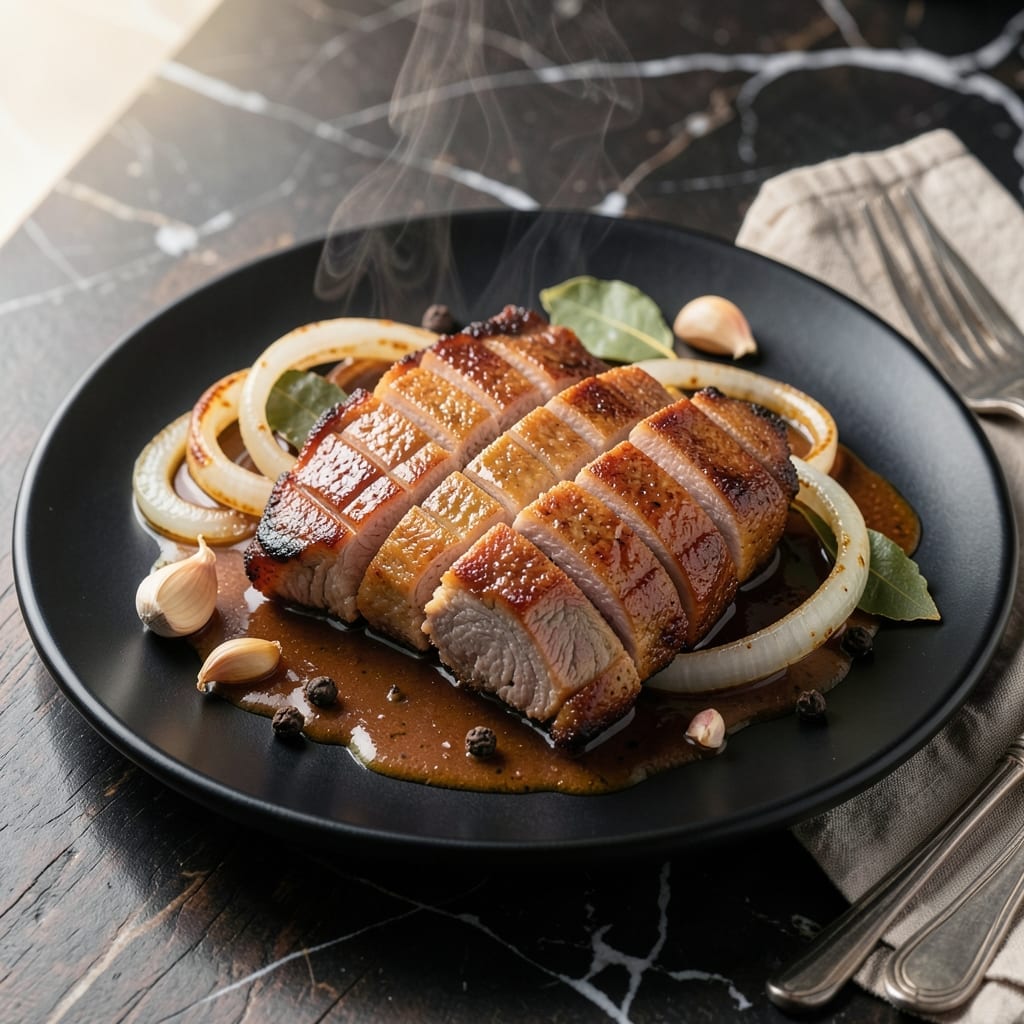
There’s something deeply satisfying about transforming pork tongue into a tender, flavorful centerpiece for the table. This slow-braised method coaxes out its natural richness while infusing every bite with garlic and soy.
I’ve refined this technique to ensure the meat becomes fall-apart soft without losing its structure. The key is patience—low heat and time work together to break down the fibers while building layers of savory depth.
The result is a dish that’s both comforting and impressive, with a sauce so rich you’ll want to soak it up with rice. It’s a celebration of Pinoy home cooking at its most rewarding.
Serve it for special occasions or Sunday family meals. This is how you turn humble ingredients into something extraordinary.
Ingredients for Pork Tongue Recipe Pinoy
Transform humble pork tongue into a rich, savory centerpiece with these carefully selected components.
| Ingredient | Amount | Notes |
|---|---|---|
| Pork Tongue 🐷 | 2 lb | Fresh, cleaned and trimmed |
| Soy Sauce 🫙 | ¾ cup | Prefer Filipino brands like Silver Swan |
| Garlic Cloves 🧄 | 8 cloves | Peeled, minced |
| White Onion 🧅 | 1 whole | Medium, sliced into rings |
| Bay Leaves 🍃 | 3 pieces | Dried, whole |
| Whole Black Peppercorns 🌶️ | 1 tsp | Lightly crushed |
| Brown Sugar 🧈 | 2 tbsp | Packed, for balance |
| White Vinegar 🍶 | ¼ cup | Cane or distilled |
| Water 💧 | 2 cups | For braising liquid |
| Vegetable Oil 🫒 | 2 tbsp | Neutral flavor, for searing |
| Green Onions 🧅 | 4 pieces | Thinly sliced, for garnish |
| Calamansi or Lemon Juice 🍋 | 2 tbsp | Freshly squeezed |
| Salt 🧂 | 1 tsp | Adjust to taste |
The pork tongue is the star—source from a trusted butcher or Asian market for the freshest quality. Look for tongues that are pink, plump, and free of any off odors. Cleaning is crucial: scrub under cold water, then blanch to remove the outer skin. Silver Swan soy sauce is ideal for authentic Pinoy flavor, but any quality soy will work.
No Filipino soy sauce? Low-sodium soy plus a pinch of sugar mimics the balance. Short on calamansi? Regular lemon or lime juice at a 1:1 ratio keeps the brightness. If you can’t find whole peppercorns, freshly ground black pepper at half the amount works. The vinegar is essential for cutting through the richness—apple cider vinegar adds a nice depth if that’s what you have.
Braised pork tongue keeps beautifully in its cooking liquid for 4-5 days refrigerated. For longer storage, freeze in portions for up to 3 months. Reheat gently to preserve the tender texture—microwaving can make it tough.
Why You’ll Love This Recipe
- One Pot Meal: I just toss the pork tongue, garlic, onion, and bay leaves in a pot with soy sauce—no fancy steps.
- Rich Garlic Soy: The soy sauce and garlic soak into the tender pork tongue, giving it that deep, savory taste I crave.
- Feeds the Family: It’s a hearty dish that works for weeknight dinners or special gatherings with loved ones.
- Budget Stretcher: Pork tongue is affordable, and leftovers taste even better the next day with steamed rice.
Step-by-Step Instructions for Pork Tongue Pinoy Style
This method ensures fall-apart tenderness with rich, balanced flavors in every bite.
Step 1: Prepare and Sear the Pork Tongue
Begin by thoroughly cleaning the 2 lb Pork Tongue, removing any membranes or fat. Pat it completely dry with paper towels—this prevents splattering when searing. I score the surface lightly in a crosshatch pattern to help it absorb the braising liquid better.
Heat the 2 tbsp Vegetable Oil in a heavy pot over medium-high heat until shimmering. Sear the pork tongue on all sides for 3-4 minutes per side until deeply browned. This step builds a flavor foundation and enhances the final texture. The tongue should develop a rich, golden crust before you proceed.
Step 2: Build the Braising Liquid with Aromatics
In the same pot, add the 1 whole White Onion (sliced into rings) and sauté for 2-3 minutes until translucent. Add the 8 cloves Garlic Cloves (minced) and cook for 30 seconds until fragrant—be careful not to let it burn, as burnt garlic turns bitter.
Pour in the 0.75 cup Soy Sauce, 0.25 cup White Vinegar, 2 cups Water, 2 tbsp Brown Sugar, 3 pieces Bay Leaves, 1 tsp Whole Black Peppercorns (lightly crushed), and 1 tsp Salt. Stir to dissolve the sugar and combine all the flavors. The liquid should be deeply aromatic at this stage.
Step 3: Braise Low and Slow for Maximum Tenderness
Return the seared pork tongue to the pot, ensuring it’s mostly submerged in the braising liquid. Bring to a boil, then reduce the heat to low, cover, and simmer gently for 2 to 2.5 hours. You’ll know it’s done when the tongue is fork-tender and easily pierced with minimal resistance.
Check occasionally to ensure the liquid hasn’t reduced too much—add a splash of water if needed. The pork tongue should absorb the flavors while becoming buttery soft. Turn it every 30 minutes to ensure even cooking and flavor distribution.
Step 4: Rest and Slice for Serving
Once tender, remove the pork tongue from the pot and let it rest for 10 minutes on a cutting board. This allows the juices to redistribute, ensuring every slice stays moist. Slice the tongue crosswise into ½-inch thick pieces while still warm.
Strain the braising liquid to remove solids, then simmer it for 5-7 minutes until slightly reduced and syrupy. This creates a glossy, flavorful sauce to drizzle over the sliced pork tongue. The liquid should coat the back of a spoon when ready.
Step 5: Garnish and Serve
Arrange the sliced pork tongue on a serving platter and spoon the reduced braising liquid generously over the top. Finish with the 4 pieces Green Onions (thinly sliced) scattered on top and a drizzle of 2 tbsp Calamansi or Lemon Juice for brightness.
Serve immediately with steamed rice to soak up the rich sauce. The pork tongue should be so tender it nearly melts in your mouth, with every bite infused with the deep, savory-sweet flavors of the braise. The sauce should be glossy and cling to each slice beautifully.
Pro Tips For Making Pork Tongue Recipe Pinoy
- Parboil First: Always simmer the pork tongue for 10-15 minutes in water with a splash of vinegar before braising—I learned this the hard way after my first batch had that strong, gamey aftertaste.
- Score the Tongue: Make shallow crosshatch cuts on the tongue’s surface before cooking so the soy sauce, garlic, and onion flavors actually penetrate the meat.
- Skip the Overcrowding: Don’t cram too many tongues in the pot at once; they need space to cook evenly, or you’ll end up with tough, unevenly flavored pieces.
- Use Fresh Bay Leaves: Dried bay leaves work in a pinch, but fresh ones add a brighter, more aromatic depth to the sauce—my grandmother swore by this, and she was right.
Make-Ahead Tips for This Dish
Prep Ahead Strategy
You can clean and trim the pork tongue up to 1 day ahead—store it in a sealed container in the fridge. This saves time on cooking day while ensuring the meat stays fresh. I always do this prep the night before for stress-free morning cooking. 💡
Braising Liquid Prep
Mix all braising components except the tongue in advance: soy sauce, vinegar, brown sugar, and aromatics. Store this in the fridge for up to 24 hours. The flavors meld overnight, creating an even richer base.
Partial Cooking Method
For true make-ahead magic, braise the tongue for just 1.5 hours, then refrigerate it in its liquid. The next day, finish cooking for 30-45 minutes until fork-tender. This approach actually improves texture and flavor absorption.
Freezing for Later
Once fully cooked and cooled, freeze the tongue in its braising liquid in airtight containers for up to 3 months. Thaw overnight in the fridge before reheating. The meat stays incredibly tender when reheated gently. ❄️
Sauce Separation Tip
If making ahead, store the reduced sauce separately from the sliced tongue. This prevents the meat from absorbing too much liquid and becoming mushy. Reheat the sauce first, then pour over the tongue just before serving.
Reheating Perfection
Gently reheat the tongue and sauce together in a covered pot over low heat for 10-15 minutes. Add a splash of water if needed to prevent drying. The key is slow, even warming to maintain that melt-in-your-mouth texture.
Nutrition Facts
Frequently Asked Questions
How do I clean the tongue before cooking?
Scrub under cold water to remove membranes, then blanch in boiling water for 3-5 minutes to peel off the skin. Pat completely dry before searing.
Can I use a pressure cooker to speed up the process?
Yes! Cook on high pressure for 45-50 minutes with natural release. The texture will be slightly different but still tender.
Why did my sauce turn out too salty?
Reduce the salt in the recipe by half if using salty soy sauce. Dilute with 1/4 cup water and extra 1 tbsp vinegar to balance flavors.
What’s the best way to slice it for serving?
Cut crosswise into 1/2-inch thick pieces while warm. Slice against the grain for maximum tenderness.

- Potato Patty Recipe No Egg: Crispy Edges Without the Binder - October 30, 2026
- Paula Deen’s Potato Chip Cookies Recipe: Salty-Sweet Crunch in Every Bite - October 30, 2026
- Potato Gnocchi Recipe Ideas: Pillowy Soft Dumplings With Rustic Charm - October 30, 2026