
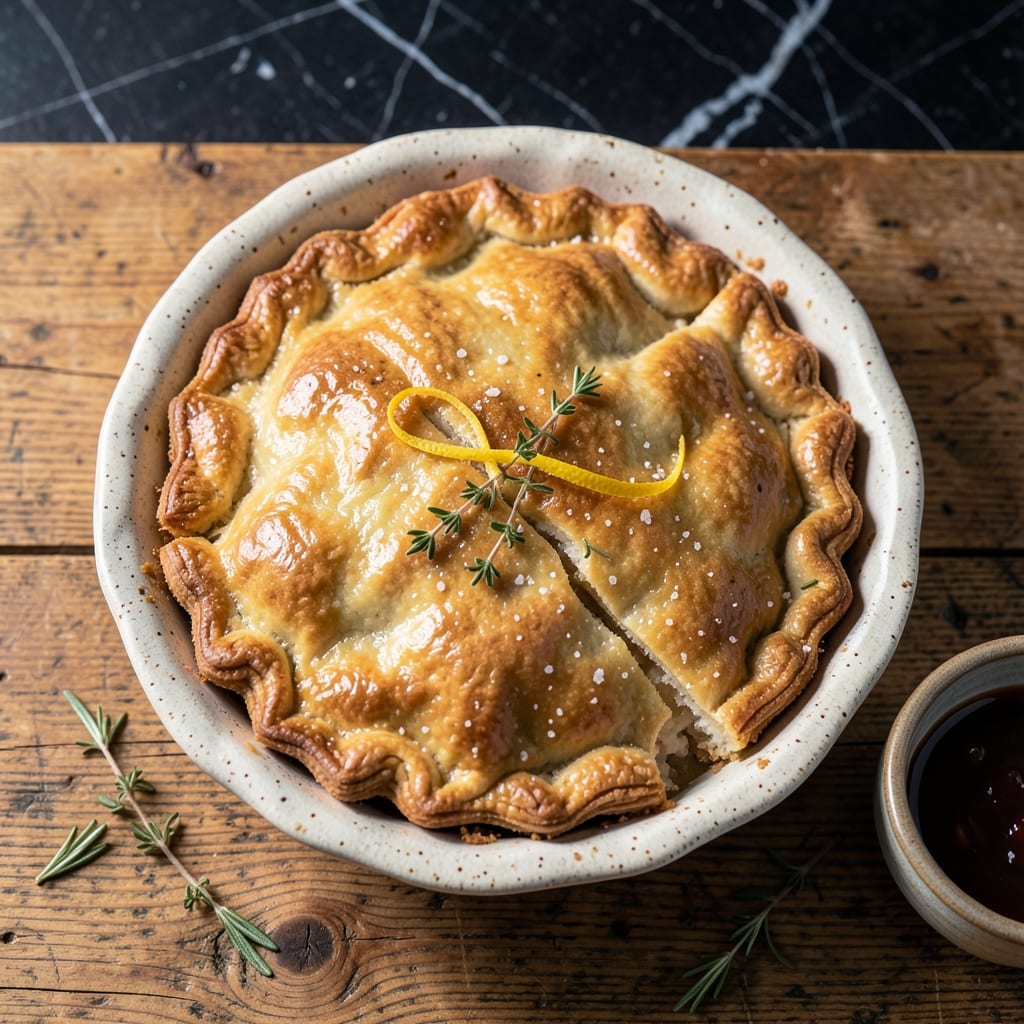
Achieving a flaky, buttery pot pie crust without shortening is absolutely possible with natural fats. This method delivers the same tender layers you expect from traditional recipes.
Cold butter and ice water are the keys to creating those signature flakes. The technique involves minimal handling to prevent toughness, ensuring a light, airy texture that holds up perfectly to hearty fillings.
The result is a golden, crisp crust that complements any pot pie filling without relying on processed fats. It bakes to a perfect buttery finish every time.
This approach proves that natural ingredients can create superior texture and flavor. The crust will be the star of your next pot pie.
Ingredients for Pot Pie Crust Recipe Without Shortening
Cold butter and minimal handling create that signature flaky texture without processed fats.
| Ingredient | Amount | Notes |
|---|---|---|
| All-Purpose Flour 🌾 | 2 ½ cups | Plus extra for dusting surface |
| Unsalted Butter 🧈 | 1 cup | Cold, cut into cubes |
| Ice Water 💧 | ½ cup | Plus more as needed |
| Sea Salt 🧂 | 1 tsp | Fine grain preferred |
| Granulated Sugar 🍚 | 1 tsp | Optional for color |
| Apple Cider Vinegar 🍏 | 1 tbsp | Or white vinegar |
| Large Egg 🥚 | 1 whole | For egg wash finish |
| Heavy Cream 🥛 | 1 tbsp | Optional for richer wash |
The butter is non-negotiable—use high-quality unsalted like Plugrá or Kerrygold for superior flavor and texture. Cold is key: straight from the fridge, cut into even cubes (about 1/2-inch). The flour should be all-purpose with moderate protein (10-12%) for the right balance of tenderness and structure. King Arthur is my go-to for consistency. Keep everything chilled, including your mixing bowl and rolling pin.
No unsalted butter? Salted works in a pinch—just omit the added salt. For a dairy-free version, coconut oil (solid, not melted) or vegan butter sticks like Miyoko’s can substitute 1:1. The vinegar tenderizes the gluten—lemon juice works too. If you’re out of egg for the wash, milk or cream gives a decent (if less shiny) finish.
The dough keeps 2-3 days wrapped tightly in the fridge, or freeze for 1 month (thaw overnight before rolling). Baked crusts stay crisp for 24 hours at room temperature in an airtight container. For make-ahead pie shells, par-bake and store unfilled—fill and finish just before serving.
Why You’ll Love This Recipe
- I’ll be real: I double the batch, bake one now, and freeze the rest for those “I need comfort food NOW” nights.
- One-Bowl Wonder: I mix everything in a single bowl—flour, cold butter, a pinch of sugar—no fancy tools, just my hands and five minutes.
- Buttery Perfection: The unsalted butter gives it that rich, flaky layers I crave, way better than any shortening-based crust I’ve tried.
- Pantry Staples: Between us, I always have flour, butter, and salt on hand, so this crust is ready whenever the pot pie craving hits.
Step-by-Step Instructions for Pot Pie Crust Without Shortening
Here’s the method. Straightforward, tested, works every time.
Step 1: Combine Dry Ingredients and Chill
In a large bowl, whisk together the 2.5 cups All-Purpose Flour, 1 tsp Sea Salt, and 1 tsp Granulated Sugar until evenly distributed. This ensures the salt and sugar are dispersed throughout the dough before adding the fat, preventing pockets of overly salty or sweet spots in the finished crust.
Place the bowl in the freezer for 10 minutes while you prepare the remaining ingredients. Chilling the flour mixture helps maintain the cold temperature of the butter as you work, which is crucial for creating flaky layers in your crust.
Step 2: Cut in the Cold Butter
Add the 1 cup Unsalted Butter (cut into ½-inch cubes) to the chilled flour mixture. Using a pastry cutter or your fingertips, work the butter into the flour until the mixture resembles coarse crumbs with pea-sized butter pieces visible throughout. The butter should remain cold and firm—if it starts to soften or melt, stop and return the bowl to the freezer for 5 minutes.
This step creates the flaky structure of your crust. The butter pieces will melt during baking, creating steam that separates the layers of dough, resulting in that coveted flaky texture. Larger butter pieces create more distinct layers, while smaller pieces create a more uniform, tender crust.
Step 3: Add Liquid Ingredients and Form the Dough
In a small bowl, combine the 0.5 cup Ice Water and 1 tbsp Apple Cider Vinegar. The vinegar tenderizes the gluten slightly, resulting in a more forgiving dough that’s easier to work with and less likely to shrink during baking.
Make a well in the center of the flour-butter mixture and pour in the liquid. Using a fork, gradually incorporate the flour mixture into the liquid until the dough just begins to come together. It will look shaggy and slightly dry—that’s perfect. Turn the dough out onto a lightly floured surface and gently knead it 3-4 times just until it forms a cohesive ball. Overworking the dough develops gluten, which makes the crust tough.
Step 4: Rest and Roll the Dough
Divide the dough into two equal portions, flatten each into a 1-inch thick disk, and wrap tightly in plastic wrap. Refrigerate for at least 1 hour (or up to 2 days). This resting period allows the gluten to relax and the butter to firm up, making the dough easier to roll out and less likely to shrink during baking.
When ready to use, lightly flour your work surface and rolling pin. Roll one disk of dough into a 12-inch circle, about ⅛-inch thick. The dough should be just large enough to fit into your pie dish with some overhang. For a double-crust pot pie, repeat with the second disk for the top crust.
Step 5: Finish with Egg Wash for Golden Crust
In a small bowl, whisk together the 1 whole Large Egg and 1 tbsp Heavy Cream until smooth. This egg wash will give your crust a beautiful golden color and a slight sheen. Brush the wash evenly over the top crust just before baking, being careful not to let it pool around the edges, as this can prevent proper browning.
For a perfectly baked crust, ensure your oven is fully preheated to the temperature specified in your pot pie recipe. The egg wash not only enhances the appearance but also creates a barrier that helps protect the crust from becoming soggy from the filling’s moisture.
Pro Tips For Making Pot Pie Crust Recipe Without Shortening
- Chill the Butter: Cut your unsalted butter into small cubes and refrigerate for 15 minutes before mixing—this prevents it from melting into the flour, which is the thing that matters most for flaky layers.
- Use Ice-Cold Water: I learned this the hard way: even slightly warm water can toughen the crust. Keep a bowl of ice water ready and measure from that to guarantee a tender texture.
- Don’t Overwork Dough: After burning three batches, I finally figured out that mixing just until the dough comes together is crucial. Overworking develops gluten, and your crust will be chewy instead of crisp.
- Add Vinegar for Tenderness: Sounds weird, but it works: replace 1 tablespoon of ice water with white vinegar to inhibit gluten formation, making the crust more forgiving and flaky.
Common Mistakes When Making pot pie crust recipe without shortening
Warm Butter Disaster
Using butter that’s too soft is the most common mistake. Your 1 cup Unsalted Butter must stay cold—if it softens, the dough absorbs it, ruining flakiness. I keep my cubes in the freezer until ready to use.
Overworking the Dough
Kneading too much develops gluten, creating a tough crust. Stop as soon as the dough comes together—it should look shaggy. I count my kneads: 3-4 times maximum on a floured surface.
Skipping the Rest
Rushing the 1-hour rest in the fridge makes rolling difficult. The gluten needs time to relax, and the butter must re-solidify. I often rest mine overnight for even better results.
Incorrect Measurements
Eyeballing the 0.5 cup Ice Water can lead to a dry or sticky dough. Use a liquid measuring cup and add slowly. I usually need about 2-3 extra tablespoons to reach the right consistency.
Uneven Rolling
Rolling to inconsistent thickness causes uneven baking. Aim for ⅛-inch thickness throughout. I use a ruler to check and rotate the dough frequently for evenness.
Neglecting the Egg Wash
Forgetting the 1 whole Large Egg and 1 tbsp Heavy Cream wash means a pale crust. Brush it on just before baking for that golden finish. I use a pastry brush for even coverage. 💛
Nutrition Facts
Frequently Asked Questions
Can I use margarine instead of butter?
No, margarine contains water and won’t create the same flaky layers. Stick with cold unsalted butter for best results. The higher fat content in butter is key for that perfect texture.
Why is the dough resting important?
Resting for 1 hour relaxes the gluten and rechills the butter. This prevents shrinkage and makes rolling easier. Skipping this step often leads to a tough crust.
How do I prevent a soggy bottom crust?
Pre-bake the bottom crust for 10 minutes before adding filling. Also, brush it with egg wash to create a moisture barrier. This keeps it crisp even with juicy fillings.
Can I make this dough in a food processor?
Yes, pulse the butter and flour until pea-sized crumbs form. Then add liquid just until combined. Be careful not to overprocess – the dough should look shaggy.

- Potato Patty Recipe No Egg: Crispy Edges Without the Binder - October 30, 2026
- Paula Deen’s Potato Chip Cookies Recipe: Salty-Sweet Crunch in Every Bite - October 30, 2026
- Potato Gnocchi Recipe Ideas: Pillowy Soft Dumplings With Rustic Charm - October 30, 2026