
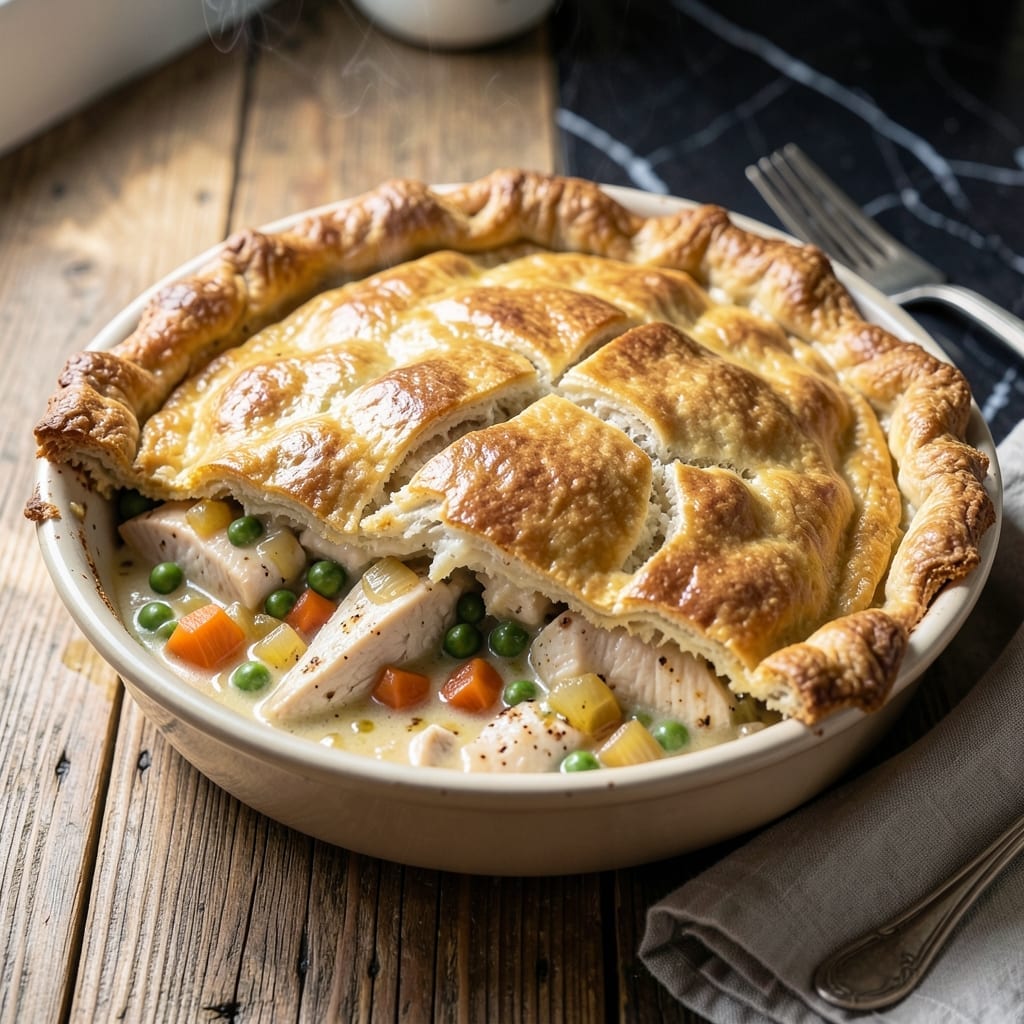
My first attempt at pot pie in that tiny Boston kitchen ended in tears and a pizza delivery. This version solves everything with a foolproof Bisquick topping that saves time without sacrificing fluffiness.
The filling comes together in one skillet while the biscuit topping bakes to golden perfection. I tested this multiple times to ensure the crust stays light and the gravy thickens just right, even in imperfect conditions.
What you get is a quick, comforting meal with tender vegetables and creamy sauce under a cloud-like topping. The kind of dish that turns mistakes into traditions.
Perfect for busy weeknights when you need dinner on the table fast. Here’s how to make it.
Ingredients for Pot Pie Recipe Using Bisquick
One box of Bisquick and a handful of pantry staples make this comforting classic.
| Ingredient | Amount | Notes |
|---|---|---|
| Bisquick Baking Mix 🥣 | 2 cups | Original or buttermilk variety |
| Whole Milk 🥛 | 0.67 cup | Cold for best texture |
| Large Egg 🥚 | 1 whole | Beaten lightly |
| Boneless Skinless Chicken Breast 🍗 | 1 lb | Diced into bite-sized pieces |
| Unsalted Butter 🧈 | ¼ cup | 4 tbsp for sautéing |
| Yellow Onion 🧅 | 1 whole | Medium, finely diced |
| Carrots 🥕 | 2 whole | Peeled, sliced into rounds |
| Celery Stalks 🥬 | 2 pieces | Diced for texture |
| Frozen Peas 🌱 | ¾ cup | No need to thaw |
| All-Purpose Flour 🌾 | ⅓ cup | For thickening gravy |
| Chicken Broth 🥣 | 1 ½ cups | Low-sodium preferred |
| Whole Milk 🥛 | ½ cup | For creamy sauce |
| Salt 🧂 | ½ tsp | Adjust to taste |
| Black Pepper 🌶️ | ½ tsp | Freshly ground |
| Garlic Powder 🧄 | ½ tsp | Or 2 fresh cloves minced |
The Bisquick is the hero here—any variety works, but buttermilk gives extra fluffiness. Grab it from any grocery store. For the chicken, boneless thighs stay juicier than breasts if you prefer. I always keep a bag of frozen peas on hand (no thawing needed, saves time). The veggies are flexible—swap in green beans or corn if that’s what you’ve got.
No Bisquick? Homemade baking mix (flour + baking powder + salt) in a pinch. Out of chicken? Turkey or even tofu works for a twist. For a richer sauce, swap the milk for half-and-half. The butter can be olive oil if you’re avoiding dairy. Fresh garlic? Double the amount if you love that kick (I always do).
Leftovers keep 3-4 days in the fridge—reheat in the microwave or oven. The topping’s best fresh, but it’ll still taste great. Freeze baked portions for up to 3 months (thaw before reheating).
Why You’ll Love This Recipe
- I’ll be real: it reheats so well that I sometimes make an extra batch just for easy lunches.
- No-Fuss Mixing: I just dump the Bisquick, milk, and egg together—no sifting, no fuss, and the topping comes out flaky every time.
- Buttery Comfort: That golden crust with the rich, creamy chicken filling? Honestly, it tastes like home in a dish.
- Weeknight Hero: Between us, this is my go-to for busy evenings—ready in under an hour with stuff I already have on hand.
Step-by-Step Instructions for Pot Pie with Bisquick Topping
This method keeps things simple while delivering a golden crust over a hearty filling.
Step 1: Cook the Chicken and Vegetables
Heat the 0.25 cup Unsalted Butter in a large skillet over medium-high heat. Add the diced 1 lb Boneless Skinless Chicken Breast and cook for 5-6 minutes until no longer pink. Season with 0.5 tsp Salt, 0.5 tsp Black Pepper, and 0.5 tsp Garlic Powder as it cooks.
Remove the chicken and set aside. In the same skillet, add the finely diced 1 whole Yellow Onion, sliced 2 whole Carrots, and diced 2 pieces Celery Stalks. Cook for 4-5 minutes until the vegetables begin to soften.
Step 2: Create the Creamy Filling
Stir in the 0.33 cup All-Purpose Flour and cook for 1 minute to remove the raw taste. Gradually pour in the 1.5 cups Chicken Broth and 0.5 cup Whole Milk, stirring constantly to avoid lumps.
Bring the mixture to a simmer and cook for 3-4 minutes until it thickens. Return the cooked chicken to the skillet and add the 0.75 cup Frozen Peas. Stir to combine and let it heat through for 2 minutes.
Step 3: Prepare and Add the Bisquick Topping
In a separate bowl, whisk together the 2 cups Bisquick Baking Mix, 0.67 cup Whole Milk, and 1 whole Large Egg until just combined. The batter will be thick but pourable.
Pour the batter evenly over the hot chicken and vegetable mixture in the skillet. Use a spatula to spread it gently, ensuring the filling is completely covered. The batter should sizzle slightly when it hits the hot filling.
Step 4: Bake to Golden Perfection
Transfer the skillet to a preheated 375°F oven. Bake for 20-25 minutes until the topping is puffed and golden brown. Check at 20 minutes—if it’s browning too quickly, tent with foil.
Remove from the oven and let it rest for 5 minutes before serving. The topping should be fluffy and light, with a crisp edge where it touched the skillet. Serve warm for the best texture.
Pro Tips For Making Pot Pie Recipe Using Bisquick
- Precook the Chicken: Poach or sauté the chicken breast first—raw pieces in the filling often don’t cook through before the Bisquick topping sets. I learned this the hard way after pulling apart a pot pie with a pink center.
- Chill the Dough: Let the Bisquick-milk-egg mixture rest 5 minutes in the fridge before topping the filling. It firms up just enough to spread cleanly instead of sticking to your fingers like wet cement.
- Vent the Top: Cut a few small slits in the Bisquick topping before baking. Without them, steam builds up and turns your golden crust into a soggy, sunken lid.
- Use Cold Butter: Grate cold unsalted butter directly into the Bisquick mix instead of melting it first. The little flecks create flaky pockets in the crust that melted butter just can’t deliver.
Essential Equipment for Perfect Results
Oven-Safe Skillet
An oven-safe skillet is non-negotiable for this recipe. I use my 12-inch Lodge cast iron—it goes from stovetop to oven seamlessly and distributes heat perfectly. A heavy stainless steel skillet also works beautifully. Avoid non-stick unless it’s rated for 400°F. 🔥
Mixing Bowls
You’ll need a medium mixing bowl (about 2-quart capacity) for the Bisquick topping. I prefer glass Pyrex because I can see exactly when the batter is properly mixed. A stainless steel bowl works too, but avoid plastic—it can absorb odors over time.
Whisk
A simple balloon whisk is perfect for combining the Bisquick, milk, and egg. The wires separate the lumps efficiently, and it’s easier to clean than a fork. I keep a 10-inch whisk in my kitchen for just this kind of task.
Measuring Tools
Accurate measurements matter, especially for the baking mix. I use dry measuring cups for the Bisquick and liquid measuring cups for the milk. A set of measuring spoons ensures the salt, pepper, and garlic powder are precise.
Wooden Spoon
A wooden spoon is ideal for stirring the filling—it won’t scratch your skillet and handles the thick gravy without bending. Mine has seen better days, but it’s my go-to for anything involving butter and flour. It also helps scrape up the browned bits from the chicken.
Oven Thermometer
Don’t trust your oven’s built-in thermometer. I keep a Taylor oven thermometer hanging inside to verify the 375°F temperature. It’s saved me from undercooked toppings more times than I can count. Check it every few months for accuracy.
Nutrition Facts
Frequently Asked Questions
Can I use a different baking mix?
Yes, any brand works, but buttermilk variety adds extra fluffiness. Avoid pancake mix as it may be too sweet.
Why is my topping dense instead of fluffy?
Overmixing the batter or using warm milk can cause this. Mix just until combined and use cold milk for best results.
Can I make this ahead?
Assemble the filling and topping separately, then combine and bake just before serving. Leftovers keep 3-4 days refrigerated.
How do I prevent a soggy crust?
Ensure the filling is bubbling hot before adding the batter. Also, don’t cover while baking—steam makes crusts soggy.

- Potato Patty Recipe No Egg: Crispy Edges Without the Binder - October 30, 2026
- Paula Deen’s Potato Chip Cookies Recipe: Salty-Sweet Crunch in Every Bite - October 30, 2026
- Potato Gnocchi Recipe Ideas: Pillowy Soft Dumplings With Rustic Charm - October 30, 2026