
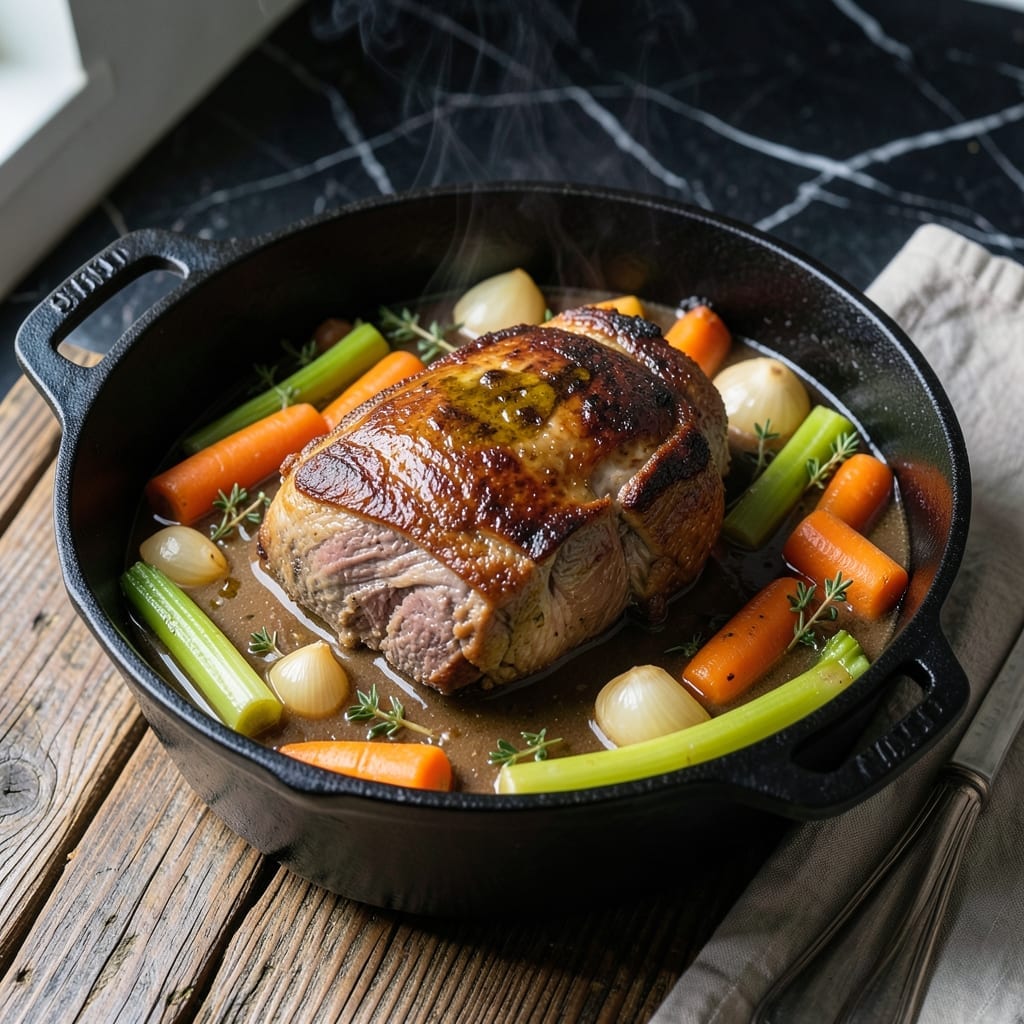
Sunday dinners call for dishes that transform tough cuts into meltingly tender perfection. This slow-braised pot roast delivers exactly that through time-honored techniques and rich beef broth.
The secret lies in the low and slow approach, allowing the meat to break down gradually while absorbing deep, savory flavors. Beef broth forms the foundation, ensuring every bite stays moist and packed with taste.
By the time it finishes, the roast falls apart effortlessly, swimming in a velvety sauce that soaks into every fiber. The aroma alone signals a meal worth the wait.
Serve with mashed potatoes or crusty bread to capture every drop of that rich, beefy goodness. This is comfort food at its most satisfying.
Ingredients for Pot Roast Recipe Beef Broth
Time-honored ingredients transform tough beef into meltingly tender perfection with rich, savory depth.
| Ingredient | Amount | Notes |
|---|---|---|
| Beef Chuck Roast 🥩 | 3 lb | Well-marbled, boneless preferred |
| Beef Broth 🥣 | 4 cups | Low-sodium preferred for control |
| Yellow Onion 🧅 | 2 whole | Large, quartered |
| Carrots 🥕 | 4 whole | Peeled, cut into chunks |
| Celery Stalks 🌿 | 3 whole | Cut into large pieces |
| Garlic Cloves 🧄 | 6 cloves | Smashed, peeled |
| Tomato Paste 🍅 | 2 tbsp | For depth of flavor |
| Red Wine 🍷 | 1 cup | Dry variety recommended |
| Worcestershire Sauce 💧 | 1 tbsp | Adds umami complexity |
| Dried Thyme 🌿 | 1 tsp | Crushed between fingers |
| Dried Rosemary 🍃 | 1 tsp | Crushed for better release |
| Bay Leaves 🍃 | 2 whole | Removed before serving |
| Kosher Salt 🧂 | 1 ½ tsp | Diamond Crystal preferred |
| Black Pepper 🌶️ | 1 tsp | Freshly ground |
| Olive Oil 🫒 | 2 tbsp | For searing roast |
The beef chuck roast is non-negotiable here. Look for extensive marbling—this fat renders down during the long braise, creating that signature tenderness. Costco or a trusted butcher will have the best selection. Avoid lean cuts like sirloin; they won’t break down properly. The beef broth should be high-quality (I prefer Better Than Bouillon paste) as it forms the liquid base for the entire dish.
No red wine? Substitute with additional beef broth plus 1 tbsp balsamic vinegar for similar depth. Fresh herbs can replace dried at a 3:1 ratio, but dried work perfectly here. If you’re out of tomato paste, 1/4 cup tomato sauce will do in a pinch. For a gluten-free version, ensure your Worcestershire sauce is anchovy-free (like Annie’s brand).
This tastes even better the next day. Store leftovers in an airtight container for up to 4 days in the fridge or freeze for 3 months. The sauce will thicken as it cools—simply reheat gently with a splash of water.
Why You’ll Love This Recipe
- Set It and Forget: I toss the chuck roast, onions, carrots, and celery into the pot with beef broth, then let the oven do the work for hours.
- Melt-in-Your-Mouth Good: The beef broth soaks into the chuck roast until every bite is ridiculously tender with deep, savory richness.
- Feeds the Week: This makes enough for Sunday dinner plus leftovers that taste even better in sandwiches or over mashed potatoes.
Step-by-Step Instructions for Pot Roast Beef Broth
Master the technique for fall-apart tender beef with rich, velvety braising liquid.
Step 1: Sear the Beef Chuck Roast
Pat the 3 lb Beef Chuck Roast dry with paper towels and season generously with the 1.5 tsp Kosher Salt and 1 tsp Black Pepper. Heat the 2 tbsp Olive Oil in a Dutch oven over medium-high heat until shimmering.
Sear the roast on all sides for 4-5 minutes per side until deeply browned. This creates the Maillard reaction, building complex flavors that will infuse the entire dish. Don’t rush—you want a dark, caramelized crust.
Step 2: Sauté the Aromatics
Remove the roast and set aside. In the same pot, add the 2 whole Yellow Onion, 4 whole Carrots, and 3 whole Celery Stalks. Cook for 5-6 minutes until the onions begin to soften and brown around the edges.
Add the 6 cloves Garlic Cloves, 2 tbsp Tomato Paste, 1 tsp Dried Thyme, and 1 tsp Dried Rosemary. Stir for 1-2 minutes until the tomato paste darkens slightly—this intensifies its sweetness and removes any raw flavor.
Step 3: Deglaze and Add Liquids
Pour in the 1 cup Red Wine and scrape up all the browned bits from the bottom of the pot with a wooden spoon. Let it simmer for 3-4 minutes until reduced by half.
Add the 1 tbsp Worcestershire Sauce, 4 cups Beef Broth, and 2 whole Bay Leaves. Return the seared roast to the pot, along with any accumulated juices. The liquid should come about halfway up the side of the roast.
Step 4: Braise to Tender Perfection
Bring the mixture to a simmer, then reduce the heat to low. Cover and cook for 3 to 3.5 hours, turning the roast every 45 minutes to ensure even cooking.
You’ll know it’s done when the beef shreds easily with a fork and the internal temperature reaches 195-200°F. The braising liquid will have transformed into a rich, silky sauce that coats the back of a spoon.
Step 5: Rest and Serve
Carefully remove the roast and transfer it to a cutting board. Discard the 2 whole Bay Leaves. Let the roast rest for 15 minutes before slicing or shredding—this allows the juices to redistribute for maximum tenderness.
Skim any excess fat from the surface of the braising liquid if desired. Serve the pot roast with the vegetables and sauce ladled generously over the top. The meat should be fork-tender with a deep, savory flavor in every bite.
Pro Tips For Making Pot Roast Recipe Beef Broth
- Sear the Chuck: I learned this the hard way—browning the beef chuck in batches over high heat with a little oil creates a deep fond that beef broth can’t replicate on its own.
- Cut Evenly: Chop your onions, carrots, and celery into uniform 1-inch pieces so they cook at the same rate and don’t turn to mush before the roast is tender.
- Skip the Boil: Resist the urge to boil the beef broth aggressively; a gentle simmer keeps the meat from toughening and lets flavors meld properly.
- Use Low Sodium: Start with low-sodium beef broth—you can always add salt later, but you can’t take it out once it’s in there.
Essential Equipment for Perfect Results
Dutch Oven Essentials
Invest in a 5-7 quart enameled cast iron Dutch oven—I swear by my Le Creuset for even heat distribution and retention. This is non-negotiable for proper braising. The heavy lid traps steam, creating the perfect environment for breaking down tough cuts. 🔥
Thermometer Accuracy
An instant-read thermometer like the ThermoWorks MK4 ensures you hit that perfect 195-200°F internal temp. I check multiple spots in the roast since thick cuts can have temperature variations. Don’t guess—this is the difference between tough and tender.
Wooden Spoon Magic
Use a high-heat silicone or wooden spoon for deglazing—it won’t scratch your Dutch oven’s surface. I keep a dedicated spoon just for this purpose. The flat edge helps scrape up all those flavorful browned bits that become the foundation of your sauce.
Tongs for Turning
A good pair of 12-inch locking tongs (I use OXO Good Grips) lets you turn the roast without piercing it. This preserves the juices inside the meat. Turn the roast every 45 minutes for even cooking and browning.
Fat Skimmer
A stainless steel fat skimmer removes excess grease from the braising liquid before serving. I skim after the roast is done but before reducing the sauce. This gives you control over the final richness—leave some for flavor, remove some for a cleaner sauce.
Resting Platform
Place your roast on a carving board with a well (like a John Boos maple board) to catch juices during resting. I let it rest for the full 15 minutes—this makes the difference between good and extraordinary pot roast. 💡
Nutrition Facts
Frequently Asked Questions
Can I use a slow cooker instead?
Yes! Sear the meat first, then transfer everything to a slow cooker. Cook on low for 8-10 hours or high for 5-6 hours. The result will be just as tender.
What if my sauce is too thin?
Simmer uncovered for 10-15 minutes after removing the meat. You can also mix 1 tbsp cornstarch with 1 tbsp water and stir in for a quicker thicken.
Is it safe to leave it cooking while I’m out?
For stovetop cooking, never leave it unattended. For slow cookers, it’s safe if your model is designed for it. Always follow manufacturer guidelines.
Can I add potatoes to the pot?
Add chunked potatoes during the last 1.5-2 hours of cooking so they don’t turn mushy. They’ll soak up all the rich flavors.

- Potato Patty Recipe No Egg: Crispy Edges Without the Binder - October 30, 2026
- Paula Deen’s Potato Chip Cookies Recipe: Salty-Sweet Crunch in Every Bite - October 30, 2026
- Potato Gnocchi Recipe Ideas: Pillowy Soft Dumplings With Rustic Charm - October 30, 2026