
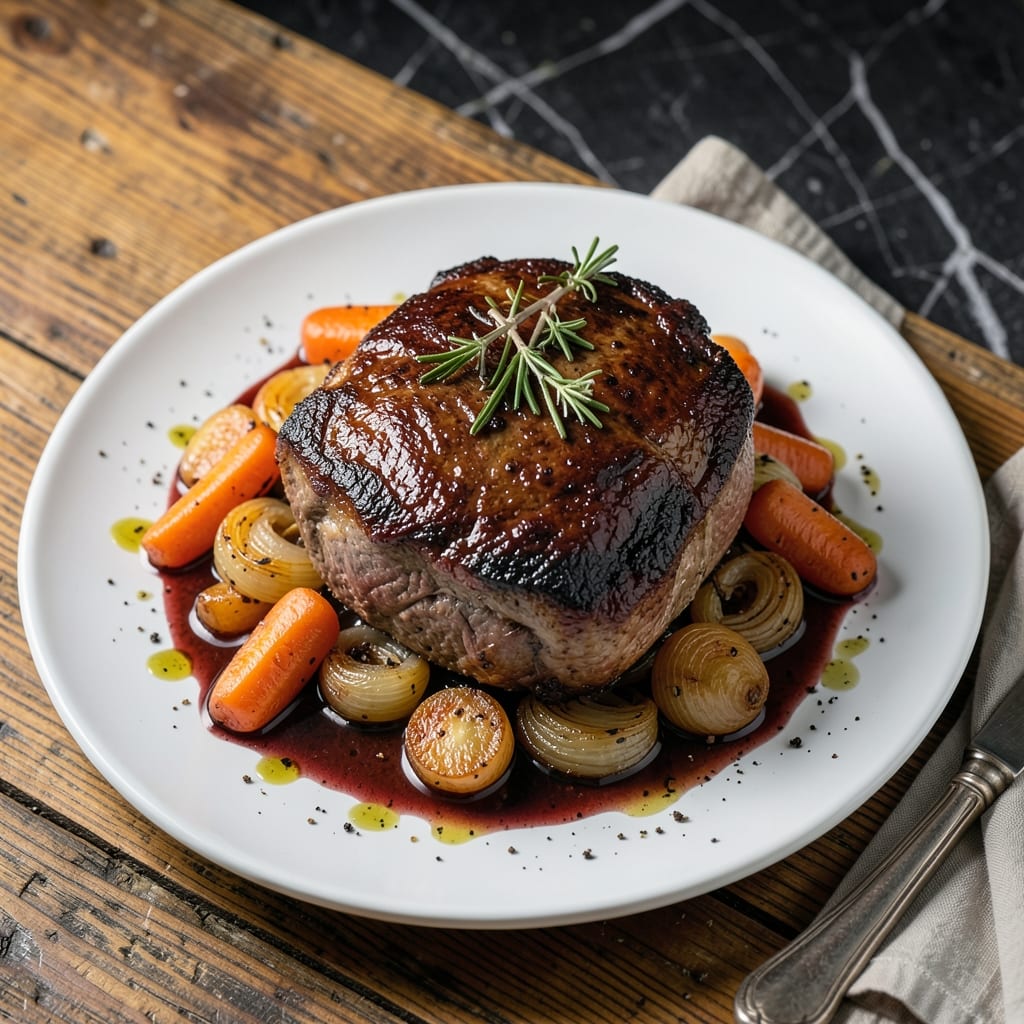
This slow-braised pot roast delivers the melting tenderness that defines New England comfort food at its finest. After years of testing in my tiny Boston kitchen, I’ve perfected the method for fall-off-the-bone results every time.
The secret lies in patient cooking and a flavorful liquid base. Low heat transforms tough cuts into something rich and succulent, while a wine-enhanced braising liquid builds depth with every passing hour.
What emerges is a dish that feels like a Sunday dinner tradition—tender meat, vegetables softened to perfection, and a sauce that begs to be soaked up with crusty bread.
Pair it with a bold red wine to elevate the experience even further.
Ingredients for Pot Roast Recipe Food and Wine
Pantry staples meet a few fresh picks for that classic slow-cooked perfection.
| Ingredient | Amount | Notes |
|---|---|---|
| Chuck Roast 🥩 | 3 lb | Well-marbled for best results |
| Kosher Salt 🧂 | 2 tsp | Diamond Crystal preferred |
| Black Pepper 🌶️ | 1 tsp | Freshly ground coarse |
| Olive Oil 🫒 | 2 tbsp | Divided for searing and braising |
| Yellow Onions 🧅 | 2 whole | Large, quartered |
| Carrots 🥕 | 4 whole | Peeled, cut into chunks |
| Celery Stalks 🌿 | 3 whole | Cut into large pieces |
| Garlic Cloves 🧄 | 6 cloves | Smashed, peeled |
| Dry Red Wine 🍷 | 2 cups | Bold, full-bodied variety |
| Beef Stock 🥣 | 2 cups | Low-sodium preferred |
| Tomato Paste 🍅 | 2 tbsp | For depth of flavor |
| Fresh Thyme Sprigs 🌿 | 4 whole | Plus extra for garnish |
| Fresh Rosemary Sprigs 🌿 | 2 whole | Stems removed before serving |
| Bay Leaves 🍃 | 2 whole | Dried, for aromatic base |
The chuck roast is non-negotiable here—Costco or Whole Foods have the best marbling for that melt-in-your-mouth texture. Look for a cut with visible fat streaks (that’s the good stuff, not the pre-cubed kind). Boston’s Market Basket is my go-to for affordable beef that still delivers. If you’re buying from the butcher, ask for a well-marbled piece from the shoulder—it’s the same cut, just more control over quality.
No red wine? Substitute with 1 cup beef stock plus 1 cup water and 1 tbsp balsamic vinegar. Fresh out of thyme? Dried thyme at one-third the amount works, but it won’t be as bright. The tomato paste can be from a can or those Trader Joe’s squeeze tubes (zero waste). If you’re missing celery, add an extra carrot—it’s about the aromatic base, not the exact veggie.
Leftovers taste even better the next day—store in the fridge for up to 4 days or freeze for 3 months. The sauce thickens as it cools, so reheat gently with a splash of water. Always remove the bay leaves before storing (they get bitter).
Why You’ll Love This Recipe
- Set It and Forget: I sear the chuck roast, toss in onions, salt, and pepper, then let the oven do the work for hours.
- Sunday or Wednesday: Honestly, it’s just as perfect for a lazy weekend as it is for a quick weeknight dinner.
- Leftover Magic: Between us, the leftovers make the best sandwiches—piled high on crusty bread with a little extra juice.
Step-by-Step Instructions for Pot Roast
Here’s the method for achieving fall-apart tender meat with rich, wine-infused flavor.
Step 1: Sear the Chuck Roast to Lock in Flavor
Pat the 3 lb Chuck Roast dry with paper towels—this is crucial for a good sear. Season all sides generously with the 2 tsp Kosher Salt and 1 tsp Black Pepper. I press the seasoning into the meat so it adheres well during cooking.
Heat 1 tbsp Olive Oil in a Dutch oven over medium-high heat until shimmering. Add the chuck roast and sear for 4-5 minutes per side until deeply browned. You’re looking for a rich, dark crust—this builds the foundation of flavor. Transfer the meat to a plate and set aside.
Step 2: Sauté the Aromatics for Depth
In the same Dutch oven, add the remaining 1 tbsp Olive Oil. Toss in the 2 whole Yellow Onions, 4 whole Carrots, and 3 whole Celery Stalks. Cook for 8-10 minutes, stirring occasionally, until the vegetables start to soften and develop golden edges.
Add the 6 cloves Garlic Cloves and 2 tbsp Tomato Paste, stirring constantly for 1-2 minutes until the tomato paste darkens slightly and becomes fragrant. This step intensifies the umami base of your braising liquid. Be careful not to let the garlic burn.
Step 3: Deglaze and Build the Braising Liquid
Pour in the 2 cups Dry Red Wine, scraping up all the browned bits from the bottom of the pot with a wooden spoon. These fond bits are packed with flavor. Bring to a simmer and cook for 3-4 minutes until the liquid reduces by about half.
Add the 2 cups Beef Stock, 4 whole Fresh Thyme Sprigs, 2 whole Fresh Rosemary Sprigs, and 2 whole Bay Leaves. Stir to combine, then return the seared chuck roast to the pot, along with any accumulated juices. The liquid should come about halfway up the meat.
Step 4: Braise Low and Slow to Tenderness
Cover the Dutch oven and transfer it to a preheated 325°F oven. Braise for 3 to 3½ hours, turning the chuck roast once halfway through. You’ll know it’s ready when the meat is fork-tender and easily pulls apart with a gentle tug.
I check the pot occasionally to ensure the liquid is at a gentle simmer, not a rolling boil. If it’s reducing too quickly, add a splash of water or stock. The low and slow method guarantees that connective tissue melts into gelatin, giving you that signature pot roast texture.
Once done, remove the chuck roast and skim any excess fat from the surface of the braising liquid before serving. The vegetables will be soft and infused with the rich, wine-based sauce.
Pro Tips For Making Pot Roast Recipe Food And Wine
- Sear It Hard: Use high heat and about 2 tablespoons of olive oil to get a deep brown crust on the chuck roast—this builds the flavor base for the whole dish.
- Salt the Night Before: Dry-brine the chuck roast with kosher salt 12-24 hours ahead; it seasons through and keeps the meat juicy during the long cook.
- Don’t Rush the Onions: Cook the yellow onions until they’re golden and soft before adding liquid—raw onions will turn the sauce bitter.
- Low and Slow Wins: After searing, drop the oven temp to 300°F and give it 3-4 hours; any hotter and the meat will toughen up before it tenderizes.
Make-Ahead Tips for Leftovers
Overnight Prep
I always prep my 3 lb Chuck Roast the night before—pat it dry, season with 2 tsp Kosher Salt and 1 tsp Black Pepper, then leave it uncovered in the fridge. This dries the surface for a better sear the next day. 💡
Vegetable Prep Ahead
Chop all your onions, carrots, and celery the evening before. Store them in separate containers to maintain freshness. This saves 20 minutes of chopping on cooking day.
Braising Liquid Prep
Mix your 2 cups Dry Red Wine, 2 cups Beef Stock, and 2 tbsp Tomato Paste in advance. Keep it refrigerated. This ensures your braising liquid is ready to go when you start cooking.
Slow Cooker Option
After searing, transfer everything to a slow cooker. Cook on low for 8-10 hours. I set mine before bed and wake up to tender, fall-apart meat. Perfect for busy mornings.
Freezing for Later
Cook the entire dish, then cool and freeze in portions. It reheats beautifully after 3 months. I use quart-sized freezer bags for easy storage and reheating. ❄️
Reheating Tips
Thaw overnight in the fridge, then reheat gently on the stove with a splash of water. Microwave works in a pinch—use 50% power and stir every 2 minutes until 165°F.
Nutrition Facts
Frequently Asked Questions
What’s the best cut for a tender result?
Chuck roast is ideal for its marbling and connective tissue that breaks down during slow cooking. Avoid lean cuts like sirloin—they’ll stay tough. Look for well-marbled pieces at your butcher for the best results.
Can I use a different liquid instead of wine?
Yes! Substitute with 1 cup beef stock plus 1 cup water and 1 tbsp balsamic vinegar for similar depth. The acidity mimics wine’s role in tenderizing the meat.
How do I know when it’s done?
The meat should pull apart easily with a fork at 195-205°F internal temperature. If it resists, give it more time—rushing leads to chewy results.
Can I make this in a slow cooker?
After searing, transfer everything to a slow cooker and cook on low for 8-10 hours. The texture will be just as tender, though the sauce may be thinner.

- Potato Patty Recipe No Egg: Crispy Edges Without the Binder - October 30, 2026
- Paula Deen’s Potato Chip Cookies Recipe: Salty-Sweet Crunch in Every Bite - October 30, 2026
- Potato Gnocchi Recipe Ideas: Pillowy Soft Dumplings With Rustic Charm - October 30, 2026