
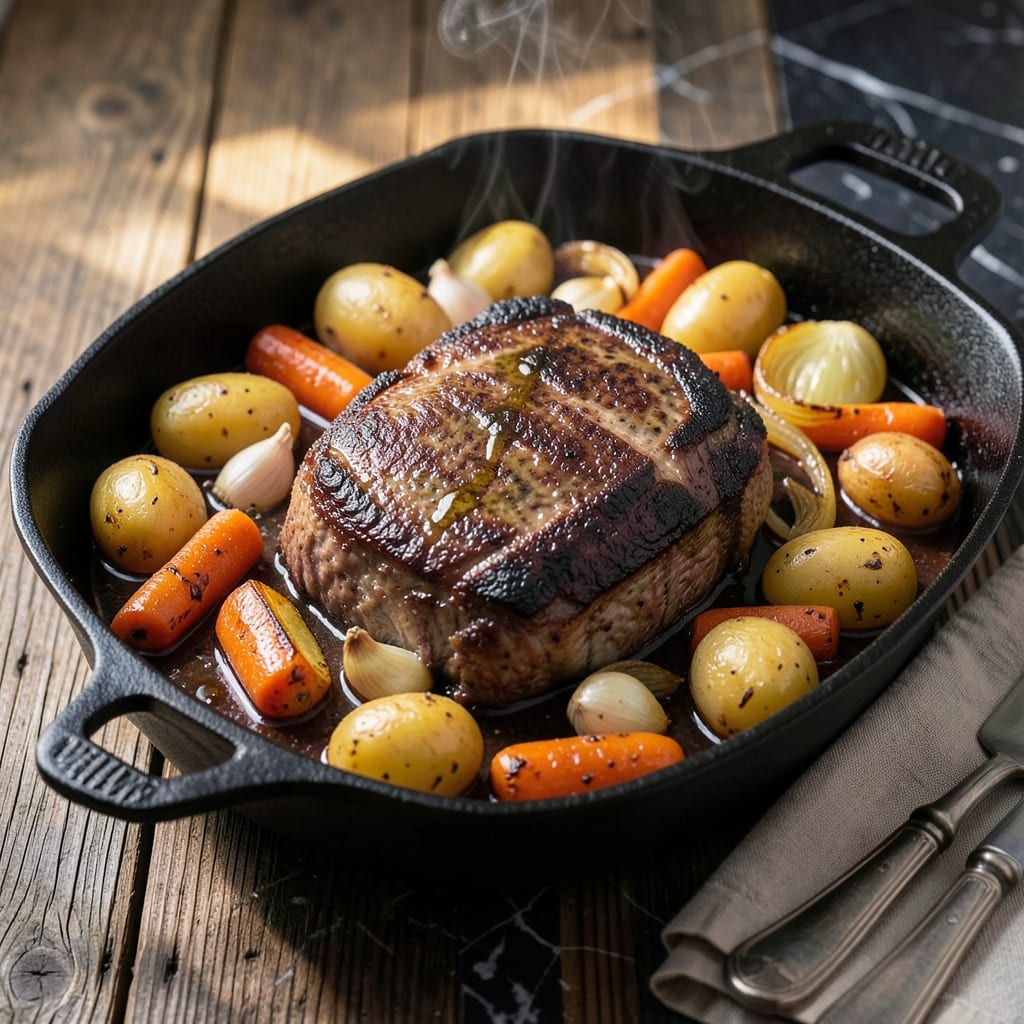
My Nonna’s pot roast was the first dish that taught me real comfort food isn’t fancy—it’s slow-cooked love in a pan. This method turns tough beef into melt-in-your-mouth perfection with almost no effort.
I’ve burned through my share of roasts learning the hard way: sear it hard, braise it low, and let time do the work. A roasting pan handles everything from browning to braising, so you’re not juggling pots.
The result is beef so tender it falls apart, swimming in a rich gravy that soaks into potatoes and carrots. It’s the kind of meal that turns a Sunday into a memory.
Perfect for feeding a crowd or meal prepping for the week.
Ingredients for Pot Roast Recipe in Roasting Pan
A few humble ingredients transform into Nonna’s legendary slow-cooked comfort in one pan.
| Ingredient | Amount | Notes |
|---|---|---|
| Chuck Roast 🥩 | 3 lb | Well-marbled for tenderness |
| Olive Oil 🫒 | 2 tbsp | Divided for searing and veggies |
| Yellow Onion 🧅 | 2 whole | Large, quartered |
| Garlic Cloves 🧄 | 6 cloves | Smashed, peeled |
| Carrots 🥕 | 4 whole | Peeled, cut into chunks |
| Yukon Gold Potatoes 🥔 | 2 lb | Quartered, skin-on |
| Beef Broth 💧 | 2 cups | Low-sodium preferred |
| Red Wine 🍷 | 1 cup | Dry variety like Cabernet |
| Tomato Paste 🍅 | 2 tbsp | For depth of flavor |
| Fresh Thyme Sprigs 🌿 | 4 whole | Or 1 tsp dried thyme |
| Fresh Rosemary Sprig 🌿 | 1 whole | Or 1 tsp dried rosemary |
| Bay Leaves 🍃 | 2 whole | Dried, for aroma |
| Kosher Salt 🧂 | 1 ½ tsp | Plus more to taste |
| Black Pepper 🌶️ | 1 tsp | Freshly ground |
| All-Purpose Flour 🌾 | 2 tbsp | For thickening gravy |
The chuck roast is non-negotiable here. Look for heavy marbling—that fat melts into the meat as it cooks, giving you that fall-apart texture. I grab mine from Costco for big batches or Whole Foods when I want grass-fed (worth the extra few bucks). The veggies are flexible—any potato works, but Yukon Golds hold their shape best. Carrots should be thick-cut so they don’t turn to mush. And yes, you can use pre-cut veggies (the good stuff, not the sad frozen kind).
No red wine? Extra beef broth with a splash of balsamic works in a pinch. Fresh herbs are ideal, but dried at one-third the amount is fine. If you’re out of tomato paste, those squeeze tubes at Trader Joe’s are a lifesaver. Swap the Yukon Golds for sweet potatoes if that’s what you’ve got. The flour for thickening? Cornstarch works too—just mix it with water first. And if your roast is smaller, just adjust the cooking time (don’t skip the sear though).
This reheats like a dream—tastes even better the next day. Store in the fridge for up to 4 days or freeze portions for 3 months. I like to shred the leftovers for sandwiches (trust me on this). The gravy thickens as it cools, so just warm it gently with a splash of water if needed.
Why You’ll Love This Recipe
- One Pan Magic: I toss the chuck roast, onions, garlic, and carrots in the pan and let the oven do the work—no babysitting required.
- Sunday or Wednesday: Between us, this feels fancy enough for company but unfussy enough for a regular night with the family.
- Leftovers for Days: I love that one roast means sandwiches, tacos, or stew for the rest of the week—no waste, just easy meals.
Step-by-Step Instructions for Pot Roast in Roasting Pan
Here’s the method that transforms tough cuts into fall-apart tender perfection every single time.
Step 1: Sear the Chuck Roast for Deep Flavor
Pat the 3 lb chuck roast dry with paper towels—this is crucial for a good sear. Season it generously with the 1.5 tsp kosher salt and 1 tsp black pepper on all sides. Heat 1 tbsp olive oil in your roasting pan over medium-high heat until it shimmers.
Sear the roast for 4-5 minutes per side until you achieve a deep brown crust. Don’t rush this step. You’re building layers of flavor that will infuse the entire dish. Once seared, transfer the chuck roast to a plate and set aside.
Step 2: Build the Aromatic Vegetable Base
In the same pan, add the remaining 1 tbsp olive oil. Add the 2 whole yellow onion (quartered), 4 whole carrots (peeled and chunked), and 6 cloves garlic cloves (smashed). Sauté for 5-7 minutes until the onions begin to soften and develop light caramelization.
Stir in the 2 tbsp tomato paste and cook for 1 minute until it darkens slightly. This step intensifies its flavor and prevents a raw taste in the finished dish. The paste should coat the vegetables evenly and smell rich and concentrated.
Step 3: Deglaze and Add Braising Liquid
Pour in the 1 cup red wine to deglaze the pan, scraping up all the browned bits from the bottom with a wooden spoon. These fond bits are pure flavor. Let the wine simmer for 2-3 minutes until it reduces by about half.
Add the 2 cups beef broth, 4 whole fresh thyme sprigs, 1 whole fresh rosemary sprig, and 2 whole bay leaves. Stir to combine, then return the chuck roast to the pan along with any accumulated juices. The liquid should come about halfway up the roast.
Step 4: Braise with Vegetables Until Tender
Add the 2 lb Yukon Gold potatoes (quartered, skin-on) to the pan, nestling them around the roast. Cover the pan tightly with a lid or foil. Transfer to a preheated 325°F oven and braise for 2.5 to 3 hours.
Check at 2.5 hours—the roast is done when it shreds easily with a fork and the potatoes are tender when pierced. If the liquid level seems low during cooking, add ½ cup water to prevent drying out. This long, slow cook transforms the tough chuck roast into melt-in-your-mouth tenderness.
Step 5: Thicken the Gravy and Serve
Remove the roast and vegetables to a serving platter. Skim excess fat from the braising liquid, then place the pan on the stovetop over medium heat. Whisk in the 2 tbsp all-purpose flour and simmer for 3-5 minutes until the gravy thickens to your desired consistency.
Pour the thickened gravy over the roast and vegetables. Discard the thyme, rosemary, and bay leaves before serving. The gravy should be rich, glossy, and coat the back of a spoon. Serve warm to six eager diners.
Pro Tips For Making Pot Roast Recipe In Roasting Pan
- Sear the Chuck: I learned this the hard way—browning the chuck roast in the pan with 2 tablespoons of olive oil before roasting adds a depth of flavor that skipping this step just can’t match.
- Cut Even Chunks: Slice your carrots and onions into uniform, 2-inch pieces so they cook at the same rate as the roast—no one wants half-burnt garlic or undercooked carrots.
- Don’t Drown It: Resist the urge to add too much liquid; a pot roast steams in its own juices, and excess broth just makes it boil instead of roast.
- Rest Before Slicing: Give the roast a solid 15-20 minutes under foil after pulling it from the oven—this keeps all those juices inside where they belong.
Common Mistakes When Making Perfect Results
Skipping the Sear
I learned this the hard way with that 2019 pot pie disaster: skipping the sear means missing out on the Maillard reaction that builds deep, caramelized flavors. Always sear the 3 lb chuck roast for 4-5 minutes per side until it develops a deep brown crust. 🔥
Overcrowding the Pan
When searing, resist the urge to add everything at once. Overcrowding lowers the pan temperature, causing the meat to steam instead of brown. Work in batches if needed, and don’t add the veggies until after the roast is seared.
Not Enough Liquid
Your braising liquid should come about halfway up the roast. If it’s too low, the meat will dry out. Use the full 2 cups beef broth and 1 cup red wine, and check levels during cooking, adding ½ cup water if needed.
Rushing the Braise
Low and slow is non-negotiable. Braising at 325°F for 2.5 to 3 hours ensures the connective tissue breaks down into gelatin. Pull it out too soon, and you’ll end up with tough, chewy beef instead of that melt-in-your-mouth texture.
Forgetting to Skim Fat
After braising, skim the excess fat from the liquid before thickening. This keeps your gravy rich but not greasy. I use a spoon to skim the surface, then whisk in the 2 tbsp all-purpose flour for a smooth, velvety finish.
Using the Wrong Cut
Chuck roast is the star here—its marbling renders down beautifully. Lean cuts like sirloin tip won’t give you the same tenderness. Look for well-marbled pieces at your local market or butcher.
Nutrition Facts
Frequently Asked Questions
Do I need to brown the meat first?
Yes, searing the chuck roast for 4-5 minutes per side is essential. This creates a flavorful crust and deepens the taste of the final dish. Don’t skip this step, even if you’re short on time.
Can I use a different cut of beef?
Chuck roast is ideal for its marbling, but brisket or short ribs work too. Avoid lean cuts like sirloin—they won’t break down as tenderly during the 2.5 to 3 hour braise.
How do I prevent the gravy from being greasy?
Skim the fat from the braising liquid before thickening. Use a spoon to remove excess fat from the surface, then whisk in 2 tbsp flour for a smooth, velvety gravy.

- Potato Patty Recipe No Egg: Crispy Edges Without the Binder - October 30, 2026
- Paula Deen’s Potato Chip Cookies Recipe: Salty-Sweet Crunch in Every Bite - October 30, 2026
- Potato Gnocchi Recipe Ideas: Pillowy Soft Dumplings With Rustic Charm - October 30, 2026