
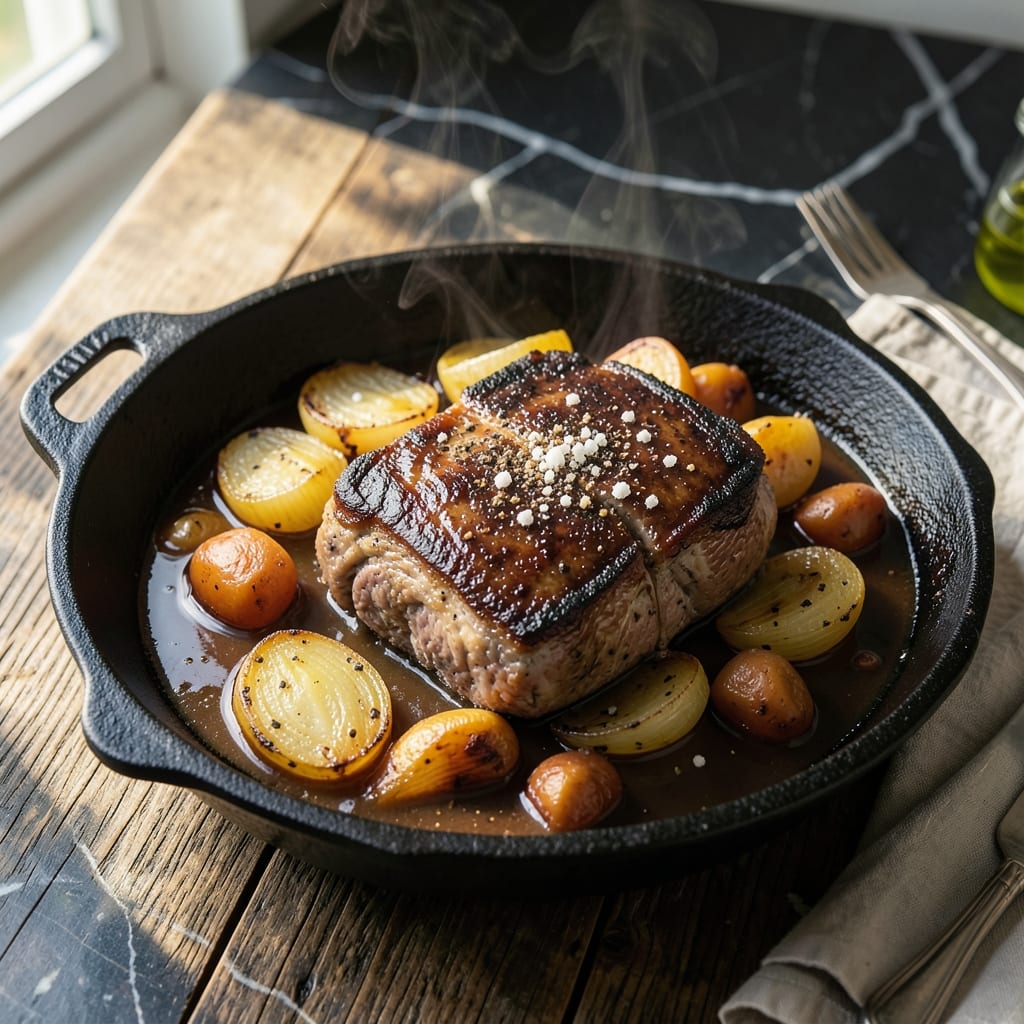
There’s something deeply comforting about a pot roast braised in a Dutch oven, filling the kitchen with rich, savory aromas. This method transforms tough cuts into fall-apart tender meat with minimal effort.
I developed this recipe after realizing my tiny Boston apartment couldn’t accommodate a slow cooker. The Dutch oven approach gives the same results with better control over browning and flavor development.
You’ll achieve perfectly caramelized vegetables and a sauce so rich it begs to be soaked up with crusty bread. The secret lies in proper searing and a long, gentle braise in the oven.
This is New England comfort food at its finest—tender beef, root vegetables, and a depth of flavor that only comes from patient cooking.
Ingredients for Pot Roast Recipe No Crock Pot
This is New England comfort food—tender beef, root vegetables, and rich braising liquid.
| Ingredient | Amount | Notes |
|---|---|---|
| Chuck Roast 🥩 | 3 lb | Well-marbled, boneless preferred |
| Kosher Salt 🧂 | 1 ½ tsp | Diamond Crystal brand recommended |
| Freshly Ground Black Pepper 🌶️ | 1 tsp | Coarse grind preferred |
| All-Purpose Flour 🌾 | ¼ cup | For dredging meat |
| Olive Oil 🫒 | 2 tbsp | Divided for searing and browning |
| Yellow Onion 🧅 | 1 whole | Large, chopped into chunks |
| Garlic Cloves 🧄 | 4 cloves | Smashed or roughly chopped |
| Carrots 🥕 | 4 whole | Peeled, cut into 2-inch pieces |
| Celery Stalks 🥬 | 3 whole | Cut into large chunks |
| Yukon Gold Potatoes 🥔 | 1 ½ lb | Peeled, cut into large chunks |
| Parsnips 🥕 | 2 whole | Peeled, cut into chunks |
| Dry Red Wine 🍷 | 1 ½ cups | Bold variety like Cabernet Sauvignon |
| Beef Stock 🥩 | 2 cups | Low-sodium preferred |
| Tomato Paste 🍅 | 2 tbsp | For depth of flavor |
| Fresh Thyme Sprigs 🌿 | 3 whole | Plus 1 tsp leaves for garnish |
| Bay Leaves 🍃 | 2 whole | Dried, for braising liquid |
The chuck roast is non-negotiable here. Costco has great marbling, but any supermarket with a decent butcher counter will work. Look for pieces with visible fat streaks—that’s flavor. I always grab an extra pound since leftovers reheat beautifully. The wine should be something you’d actually drink. Trader Joe’s has solid $5 bottles that work perfectly (no need for the fancy stuff).
No red wine? Beef broth with a splash of balsamic vinegar gets you 90% there. Out of thyme? Dried thyme at half the amount works, but fresh really shines. The tomato paste can be swapped with crushed tomatoes (just reduce the beef stock by a quarter cup). Yukon Golds are my go-to for potatoes—they hold their shape better than russets during the long braise.
This tastes even better the next day—3-4 days in the fridge, 3 months frozen. Portion leftovers into containers for easy lunches. The braising liquid turns into an incredible sauce, so don’t toss it. Skim the fat after chilling for a richer gravy.
Why You’ll Love This Recipe
- One Pan Wonder: I sear the chuck roast in olive oil right in my Dutch oven—no extra dishes, just golden-brown edges.
- Rich, Deep Flavor: The flour crust locks in juices while the salt and pepper create that classic, savory bite I crave.
- Sunday Supper Ready: Honestly, it’s my go-to for feeding a crowd or just prepping lunches for the week.
- Budget Stretcher: A cheap cut of chuck turns into something special, and leftovers taste even better the next day.
Step-by-Step Instructions for Dutch Oven Braised Pot Roast With Root Vegetables
Here’s the method that turns tough chuck roast into fall-apart tender perfection.
Step 1: Season and Sear the Chuck Roast
Pat the 3 lb chuck roast completely dry with paper towels—this is crucial for a good sear. Season generously with the 1.5 tsp kosher salt and 1 tsp freshly ground black pepper on all sides, pressing the seasoning into the meat so it adheres well.
Dredge the roast in the 0.25 cup all-purpose flour, shaking off any excess. The flour creates a beautiful crust and thickens the braising liquid later. Heat 1 tbsp olive oil in a large Dutch oven over medium-high heat until shimmering. Sear the roast for 4-5 minutes per side until deeply browned—don’t rush this step; a dark crust equals deep flavor.
Step 2: Sauté Aromatics and Deglaze the Pan
Transfer the seared roast to a plate. In the same Dutch oven, add the remaining 1 tbsp olive oil and reduce heat to medium. Add the yellow onion, carrots, celery stalks, garlic cloves, and tomato paste, cooking for 5-6 minutes until the vegetables soften and the tomato paste darkens slightly.
This step builds the flavor foundation for your braise. The fond (browned bits) left from searing the roast will dissolve into the vegetables, creating an incredibly rich base. Stir occasionally to prevent burning, and watch for the tomato paste to turn a deeper red—this indicates the raw flavor has cooked out.
Step 3: Braise with Wine and Stock
Pour in the 1.5 cups dry red wine and scrape up all the browned bits from the bottom of the pot with a wooden spoon. Bring to a simmer and cook for 3-4 minutes until the wine reduces by about half. This burns off the alcohol while concentrating the flavor.
Return the roast to the Dutch oven along with any accumulated juices. Add the 2 cups beef stock, fresh thyme sprigs, and bay leaves. The liquid should come about halfway up the roast—add a splash of water if needed. Bring to a gentle simmer, then cover and transfer to a 325°F oven.
Step 4: Add Vegetables and Finish Braising
After the roast has braised for 1.5 hours, add the Yukon Gold potatoes and parsnips to the pot, nestling them around the meat. These root vegetables soak up the braising liquid beautifully. Cover and return to the oven for another 1 to 1.5 hours, until the roast is fork-tender and the vegetables are easily pierced with a knife.
Check occasionally during the last hour—the braise is done when the chuck roast shreds easily with a fork and the potatoes are tender all the way through. If the liquid reduces too much, add a bit of water to keep the vegetables partially submerged.
Step 5: Rest and Serve
Carefully transfer the roast to a cutting board and tent loosely with foil. Skim any excess fat from the surface of the braising liquid, then adjust the seasoning with additional salt and pepper if needed. The sauce should be rich and deeply flavored—taste it and don’t be afraid to add a pinch more salt if it needs it.
Let the roast rest for 15-20 minutes before slicing or pulling apart. This allows the juices to redistribute, ensuring every bite is moist and flavorful. Serve the pot roast with the braised vegetables and a generous spoonful of the sauce ladled over the top.
Pro Tips For Making Pot Roast Recipe No Crock Pot
- Sear It Hard: I learned this the hard way—get your olive oil smoking hot before adding the floured chuck roast, and don’t touch it for at least 3 minutes per side to develop that deep crust.
- Salt the Night Before: After burning three roasts by rushing the seasoning, I now salt the chuck generously and let it sit uncovered in the fridge overnight for even seasoning and better texture.
- Skip the Overcrowding: Resist the urge to cram everything into the pan at once—sear the roast in batches if needed to avoid steaming the meat instead of browning it.
- Use a Heavy Pot: Sounds weird, but it works: a thick-bottomed Dutch oven holds heat better for even cooking, and I was skeptical until I tried it and got perfectly tender meat every time.
Make-Ahead Tips for This pot roast recipe no crock pot
Overnight Prep
I always prep the chuck roast the night before—pat it dry, season with the 1.5 tsp kosher salt and 1 tsp black pepper, then dredge in 0.25 cup flour. Store uncovered in the fridge to dry-brine and develop a better crust. This also saves 20 minutes on cooking day. 💡
Vegetable Prep
Chop all your root vegetables (onion, carrots, celery, potatoes, parsnips) the day before. Store them in a large bowl covered with a damp paper towel in the fridge. The damp towel prevents browning while keeping them crisp. I learned this trick in my tiny Boston kitchen.
Braising Liquid
Mix your 1.5 cups red wine and 2 cups beef stock with the 2 tbsp tomato paste the night before. This blend develops more depth as it sits. Just give it a stir before adding to the Dutch oven. The flavors meld beautifully overnight.
Morning Assembly
In the morning, your seared chuck roast goes straight into the Dutch oven with the prepped vegetables and braising liquid. This cuts your active cooking time to just 10 minutes before the oven does its magic. I set mine up while my coffee brews.
Make-Ahead Cooking
You can fully cook this dish 1-2 days ahead. After braising, cool completely, then refrigerate in the Dutch oven. Reheat covered at 300°F for 45-60 minutes. The flavors only improve with time. 💛
Freezing Tips
Portion cooled pot roast into airtight containers with some braising liquid. Freeze for up to 3 months. Thaw overnight in the fridge before reheating on the stovetop with a splash of water. This tastes almost as good as the original.
Nutrition Facts
Frequently Asked Questions
What cut of beef works best?
Chuck roast is ideal for its marbling and connective tissue that breaks down beautifully. A well-marbled 3 lb piece ensures tender, flavorful results. Avoid lean cuts like sirloin—they’ll dry out during the long braise.
Can I skip the wine?
Yes! Substitute the 1.5 cups red wine with extra beef stock plus 1 tbsp balsamic vinegar for acidity. The vinegar mimics wine’s depth without the alcohol. This swap works in a pinch.
Why rest the meat before serving?
Resting for 15-20 minutes lets juices redistribute throughout the roast. Slicing too soon causes all those flavorful juices to spill onto the cutting board, leaving the meat dry.
How do I know when it’s done?
The roast is ready when it shreds easily with a fork and reaches an internal temperature of 195-200°F. The vegetables should be tender when pierced with a knife. Total braising time is about 2.5-3 hours.

- Potato Patty Recipe No Egg: Crispy Edges Without the Binder - October 30, 2026
- Paula Deen’s Potato Chip Cookies Recipe: Salty-Sweet Crunch in Every Bite - October 30, 2026
- Potato Gnocchi Recipe Ideas: Pillowy Soft Dumplings With Rustic Charm - October 30, 2026