
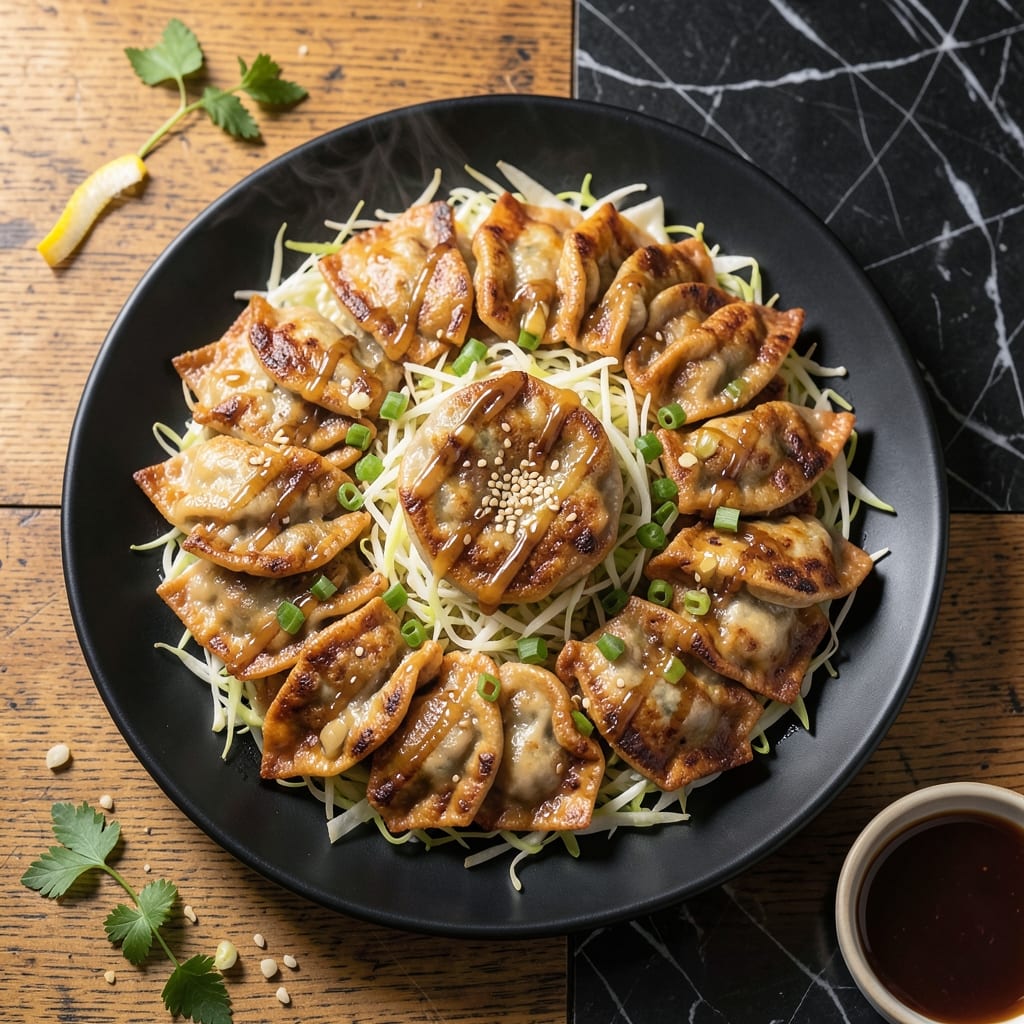
There’s a secret to achieving juicy beef pot stickers with a perfectly crisp bottom and tender top. This method combines pan-searing and steaming to create that signature texture every time.
I’ve refined this recipe to ensure the filling stays moist while the wrapper develops a golden, shatteringly crisp crust. The key lies in the cooking sequence and proper heat control.
The result is a dumpling that’s crisp where it meets the pan and soft where it’s steamed, with a savory beef filling that’s packed with flavor. No shortcuts—just a proven technique.
Ready to make restaurant-quality pot stickers at home? Here’s how to get it right.
Ingredients for Pot Stickers Recipe Beef
Fresh beef, vibrant aromatics, and crisp wrappers create restaurant-quality dumplings at home.
| Ingredient | Amount | Notes |
|---|---|---|
| Ground Beef 🥩 | 1 lb | 80/20 fat ratio preferred |
| Napa Cabbage 🥬 | 2 cups | Finely shredded, salted and drained |
| Green Onions 🧅 | 4 whole | Thinly sliced, white and green parts |
| Garlic Cloves 🧄 | 3 cloves | Minced finely for filling |
| Fresh Ginger 🌿 | 1 tbsp | Grated or minced fine |
| Soy Sauce 🫒 | 2 tbsp | Low-sodium preferred for control |
| Sesame Oil 🫒 | 1 tsp | Toasted for depth of flavor |
| Rice Vinegar 🍚 | 1 tbsp | Or substitute apple cider vinegar |
| Pot Sticker Wrappers 🥟 | 30 pieces | Round, thawed if frozen |
| Neutral Oil 🫒 | 2 tbsp | For pan-frying pot stickers |
| Salt 🧂 | ½ tsp | Kosher or sea salt preferred |
| Black Pepper 🌶️ | ¼ tsp | Freshly ground for best flavor |
| Water 💧 | ½ cup | For steaming pot stickers |
The beef foundation needs fat for juiciness—80/20 ground chuck is ideal. For the cabbage, Napa has the right sweetness and texture, but green cabbage works too. Most Asian markets carry pot sticker wrappers in the freezer section (thicker than wonton wrappers). If using frozen, thaw completely before assembling to prevent tearing.
No Napa cabbage? Regular cabbage or shredded Brussels sprouts can substitute—just salt and drain well to remove excess moisture. Green onion can be swapped with chives at double the amount. Short on soy sauce? Tamari or coconut aminos work in a pinch. The sesame oil adds depth, but if you’re out, a dash of oyster sauce (if not strict vegetarian) can help.
Filling can be prepped 1 day ahead and refrigerated. Assembled dumplings freeze beautifully on a tray before cooking—store in bags for up to 3 months. Cook from frozen, adding a minute or two to the steaming time.
Why You’ll Love This Recipe
- Minimal Chopping Required: I just toss the ground beef, cabbage, and green onions together—no fancy knife work needed.
- Umami Bomb: The garlic and ginger give these pot stickers that deep, savory kick I crave every time.
- Freezer Friendly: I make a double batch and freeze half for those nights I need dinner in 10 minutes flat.
- Feeds a Crowd: One pound of beef stretches into dozens of dumplings—my kids devour them, and leftovers? Rare.
Step-by-Step Instructions for Beef Pot Stickers
Master the technique for crispy bottoms and juicy interiors with these straightforward steps.
Step 1: Prepare the Juicy Filling
In a large bowl, combine the 1 lb Ground Beef with 2 cups Napa Cabbage, 4 whole Green Onions, 3 cloves Garlic Cloves, and 1 tbsp Fresh Ginger. The cabbage should be finely shredded and drained to prevent a soggy filling.
Add 2 tbsp Soy Sauce, 1 tsp Sesame Oil, 1 tbsp Rice Vinegar, 0.5 tsp Salt, and 0.25 tsp Black Pepper. Mix thoroughly with your hands or a fork until the ingredients are evenly distributed. The mixture should feel slightly sticky—that’s how you know it’ll stay together when cooking.
Step 2: Assemble the Pot Stickers
Place a Pot Sticker Wrapper on a clean surface. Add about 1 tablespoon of the filling to the center of each wrapper. Don’t overfill, or they’ll burst while cooking. Use all 30 pieces Pot Sticker Wrappers for this recipe.
Dip your finger in water and moisten the edge of the wrapper. Fold the wrapper in half over the filling to create a half-moon shape. Press the edges firmly to seal, then create small pleats along the sealed edge by pinching and folding. This crimping technique helps them hold their shape and creates those signature ruffled edges.
Step 3: Pan-Fry for Crispy Bottoms
Heat 1 tbsp Neutral Oil in a large non-stick skillet over medium-high heat. When the oil shimmers, carefully place the pot stickers in the pan, flat-side down. Don’t overcrowd the pan—work in batches if needed. Cook for 2-3 minutes until the bottoms turn golden brown.
You’ll hear a gentle sizzle when they’re cooking properly. Resist the urge to move them around too much—let them develop that crispy crust. If they start to brown too quickly, reduce the heat slightly.
Step 4: Steam for Juicy Interiors
Once the bottoms are golden, carefully add 0.5 cup Water to the pan. Immediately cover with a tight-fitting lid. The water will sizzle and steam the pot stickers. Cook for 6-8 minutes until the water has mostly evaporated.
Remove the lid and cook for another 1-2 minutes to crisp the bottoms again. The pot stickers should have a crispy, golden bottom and a tender, juicy filling. The wrappers will turn slightly translucent when properly steamed.
Step 5: Serve with Crispy Side Down
Transfer the pot stickers to a serving platter, crispy-side up. The contrast between the crispy bottom and tender top is what makes this dish special. If any stick to the pan, use a thin spatula to gently release them.
Serve immediately while hot. The filling should be moist and flavorful, with the cabbage adding a subtle crunch. These are best enjoyed fresh, but you can keep them warm in a low oven if needed.
Pro Tips For Making Pot Stickers Recipe Beef
- Pre-cook the Beef: Brown the ground beef first and drain the fat—this keeps your pot stickers from turning greasy and falling apart.
- Salt the Cabbage: Toss the shredded napa cabbage with 1 tsp salt, let it sit for 10 minutes, then squeeze out all the water. I learned this the hard way after my first batch turned into soggy dumplings.
- Skip the Overcrowding: Give each pot sticker at least an inch of space in the pan. After burning three batches, I finally figured out they steam better when not packed together.
- Use a Lid: Cover the pan for the first 4-5 minutes of cooking—this traps steam and ensures the filling cooks through without drying out. Sounds obvious, but it actually changes the outcome.
Flavor Customization for This pot stickers recipe beef
Spicy Kick
Add 1 tsp chili garlic sauce or ½ tsp red pepper flakes to the filling mixture for heat. For extra depth, stir in 1 tbsp gochujang—it adds a fermented, spicy-sweet complexity. I love this variation when I want more warmth. 🌶️
Umami Boost
Enhance the savory notes with 1 tbsp hoisin sauce or 1 tsp fish sauce in the filling. Mushroom powder (1 tsp) is another great way to deepen the umami profile without overpowering the beef.
Herb Infusion
Fresh herbs can brighten the filling. Try 2 tbsp chopped cilantro or 1 tbsp finely minced Thai basil. These add a pop of color and freshness that pairs beautifully with the sesame and soy. 💛
Crunchy Texture
For added texture, mix ¼ cup finely chopped water chestnuts or 2 tbsp toasted sesame seeds into the filling. The water chestnuts stay crisp even after cooking, giving a pleasant surprise in every bite.
Sweet Balance
A touch of sweetness rounds out the flavors. Stir in 1 tsp brown sugar or 1 tbsp grated carrot to the filling. The sugar caramelizes slightly during cooking, adding subtle depth.
Citrus Zing
Brighten the filling with 1 tsp lime zest or 1 tbsp orange juice. The acidity cuts through the richness of the beef, making each bite more vibrant and balanced.
Nutrition Facts
Frequently Asked Questions
Can I use ground turkey instead of beef?
Yes, ground turkey works well as a leaner alternative. Use the same 1 lb amount and consider adding 1 tbsp extra oil to keep the filling moist. The flavor will be milder, so boost seasoning slightly.
Why do my pot stickers stick to the pan?
This usually means the pan wasn’t hot enough initially or they were moved too soon. Heat 1 tbsp oil over medium-high heat until shimmering, then don’t disturb for 2-3 minutes to form a crust.
How do I know when they’re done cooking?
The bottoms should be golden brown and crispy, while the wrappers turn slightly translucent. The filling reaches 160°F when fully cooked. Steam for 6-8 minutes to ensure this.
Can I air fry instead of pan-fry?
Yes! Brush with oil and air fry at 375°F for 8-10 minutes, shaking halfway. Add 2 tbsp water to the basket to create steam. The texture will differ slightly but still be delicious.

- Potato Patty Recipe No Egg: Crispy Edges Without the Binder - October 30, 2026
- Paula Deen’s Potato Chip Cookies Recipe: Salty-Sweet Crunch in Every Bite - October 30, 2026
- Potato Gnocchi Recipe Ideas: Pillowy Soft Dumplings With Rustic Charm - October 30, 2026