
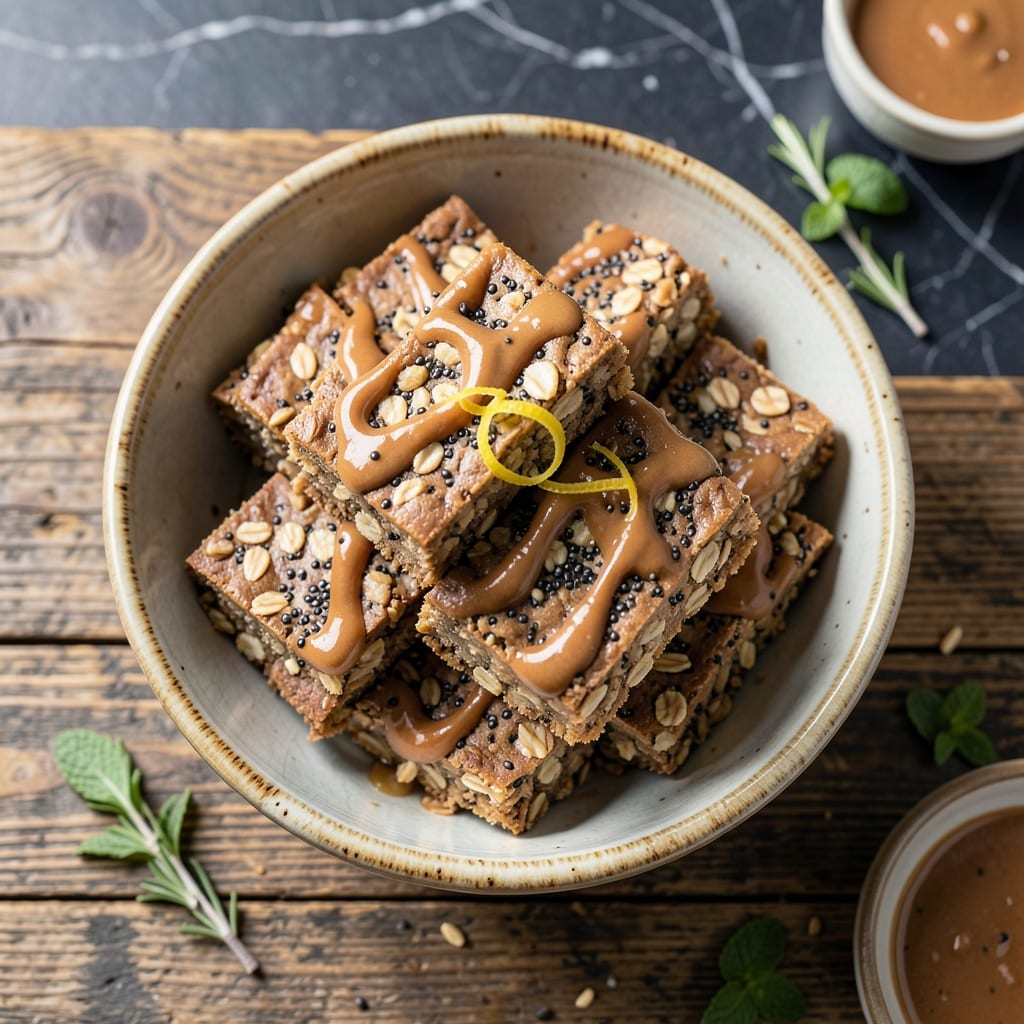
I developed this recipe for busy mornings when we need energy without turning on the oven. It combines hearty oats, nut butter, and natural sweeteners for a satisfying snack that comes together in 15 minutes.
David, my official taste-tester, was skeptical about no-bake bars at first. But after trying this version with crispy edges and chewy centers, he declared it a keeper. The secret is pressing the mixture firmly before chilling.
These bars hold their shape perfectly and deliver sustained energy for hours. They’re ideal for school lunches, post-workout fuel, or afternoon pick-me-ups when you need something substantial but healthy.
Store in the refrigerator for up to two weeks, or freeze for longer storage. This recipe adapts easily to dietary needs—swap ingredients to make it vegan or gluten-free as needed.
Ingredients for Power Bar Recipe No Bake
Pantry staples plus a few extras create these chewy, satisfying bars in minutes.
| Ingredient | Amount | Notes |
|---|---|---|
| Rolled Oats 🌾 | 3 cups | Old-fashioned, not instant |
| Creamy Peanut Butter 🥜 | 1 cup | Natural or regular variety |
| Honey 🍯 | ½ cup | Or maple syrup for vegan |
| Vanilla Extract 🌿 | 2 tsp | Pure vanilla for best flavor |
| Chia Seeds 🌱 | 2 tbsp | Optional for extra fiber |
| Flaxseeds 🌿 | 2 tbsp | Ground or whole |
| Chopped Almonds 🌰 | ½ cup | Or any nut of choice |
| Dried Cranberries 🍇 | ½ cup | Or raisins, chopped dates |
| Dark Chocolate Chips 🍫 | ½ cup | Mini chips work best |
| Sea Salt 🧂 | ¼ tsp | For balancing sweetness |
| Cinnamon 🌶️ | 1 tsp | Ground, for warmth |
| Coconut Oil 🥥 | 2 tbsp | Melted, for binding |
The oats are the base, so old-fashioned rolled oats give the best texture—skip the instant kind, which turns mushy. I grab mine in bulk at Whole Foods or Sprouts. The peanut butter matters too: natural is great, but regular works fine (just stir it well). For the dried fruit, look for plump cranberries—they add chew without being too sweet.
No peanut butter? Almond or cashew butter swaps in perfectly. Skip the honey? Maple syrup or agave keeps it vegan. Want extra crunch? Pepitas or sunflower seeds work instead of almonds. The chocolate chips can be milk or dark—whatever you prefer. If the mixture feels too dry, a splash of almond milk brings it together.
Press these firmly into the pan (a glass jar helps compact them). They’ll keep in the fridge for up to 2 weeks, or freeze for 3 months. Slice before chilling for easier cutting later.
Why You’ll Love This Recipe
- No Oven Needed: I just mix, press, and chill—no baking required.
- Sweet & Nutty: The peanut butter and honey combo is ridiculously good with the oats.
- Grab-and-Go Fuel: I toss these in my bag for hikes or when I’m running late to work.
- Budget Stretcher: Rolled oats and peanut butter are cheap, and one batch lasts me all week.
Step-by-Step Instructions for No Bake Power Bars
Here’s the method. Straightforward, tested, works every time.
Step 1: Combine Wet Ingredients Until Smooth
In a large microwave-safe bowl, melt the 2 tbsp Coconut Oil for 20-30 seconds until just liquid. Add the 1 cup Creamy Peanut Butter and 0.5 cup Honey, then stir vigorously until the mixture becomes completely smooth and glossy.
This step ensures the binding agents are properly emulsified. I always check that there are no streaks of oil separating from the peanut butter—this guarantees the bars will hold together. Stir in the 2 tsp Vanilla Extract last to preserve its aromatic qualities.
Step 2: Fold in Dry Components for Texture
Add all 3 cups Rolled Oats, 2 tbsp Chia Seeds, 2 tbsp Flaxseeds, 1 tsp Cinnamon, and 0.25 tsp Sea Salt to the wet mixture. Using a wooden spoon or silicone spatula, fold everything together until the oats are evenly coated and no dry pockets remain.
The mixture should look slightly sticky but still hold its shape when pressed. Here’s the thing—I test the consistency by squeezing a handful; if it stays together, it’s ready for the next additions. If it’s too dry, I add a drizzle more honey.
Step 3: Incorporate Mix-Ins for Flavor Bursts
Gently fold in the 0.5 cup Chopped Almonds, 0.5 cup Dried Cranberries, and 0.5 cup Dark Chocolate Chips. Distribute them evenly throughout the mixture, taking care not to overmix and crush the add-ins.
I like to reserve a small handful of chocolate chips to press into the top after shaping for a professional finish. The cranberries and almonds should be visible in every portion, ensuring each bar delivers consistent texture and flavor in every bite.
Step 4: Press Firmly and Chill for Structure
Line an 8×8-inch baking dish with parchment paper, leaving overhang on the sides for easy removal. Transfer the mixture to the dish and press down firmly and evenly with the back of a spoon or your hands (lightly wet them to prevent sticking).
This is the moment that matters: press hard—really pack it in. The more compact the mixture, the better the bars will hold together. Refrigerate for at least 2 hours or until completely firm. I know it’s hard to wait, but this chilling time is non-negotiable for clean slices.
Once set, lift the parchment to remove the slab and cut into 12 equal bars. Store in an airtight container in the refrigerator for up to 2 weeks.
Pro Tips For Making Power Bar Recipe No Bake
- Chill Before Cutting: I learned this the hard way—slicing the bars straight after mixing gives you a crumbly mess. Pop them in the fridge for at least 2 hours so they hold their shape.
- Toast the Oats: Sounds weird, but it works: Spread the rolled oats on a tray and toast them in a 350°F oven for 8-10 minutes until golden. It adds a nutty depth that raw oats just can’t match.
- Warm the Honey: After burning three batches of bars that wouldn’t stick together, I finally figured out that warming the honey for 20 seconds in the microwave makes it blend smoothly with the peanut butter.
- Press Firmly: My grandmother swore by this, and she was right: Pack the mixture into the pan with the back of a spoon or a spatula, pressing down hard—this keeps the bars from falling apart later.
Storing and Reheating power bar recipe no bake
Refrigerator Storage
These bars keep beautifully in the fridge for up to 2 weeks. I store mine in an airtight container with parchment between layers to prevent sticking. The flavors actually deepen over time as the oats absorb moisture. 💡
Freezer Storage
For longer storage, freeze individual bars wrapped in plastic wrap then placed in a ziplock bag. They’ll keep for 3 months without freezer burn. I always label with the date—I learned this the hard way after finding mystery bars in the back of my freezer.
Room Temperature
While they can sit out for 2-3 hours in a cool kitchen, I don’t recommend leaving them longer. The peanut butter can soften, making the bars lose their shape. Perfect for packing in lunchboxes with an ice pack.
Reviving Firmness
If your bars soften, pop them back in the fridge for 30 minutes to firm up. This works especially well if you’ve used natural peanut butter, which can separate at room temperature. David swears by this trick for his mid-afternoon snack attacks.
Slice Before Chilling
For easiest portioning, score the bars before they fully set. Once chilled, you can break them along these lines. This prevents the crumbly edges that happen when cutting fully firm bars.
Nutrition Facts
Frequently Asked Questions
Can I use quick oats instead of rolled?
Stick with rolled oats for the best texture. Quick oats can make bars mushy since they absorb moisture faster. If that’s all you have, reduce the chilling time to 1 hour to prevent sogginess.
How do I make these vegan?
Swap honey for maple syrup or agave. Use vegan chocolate chips and ensure your peanut butter has no added honey. The texture remains identical with these changes.
Why won’t my bars hold together?
Usually means the mixture wasn’t pressed firmly enough. Pack it tightly into the pan, then refrigerate for the full 2 hours. If still crumbly, add 1-2 tbsp more melted coconut oil next time.
Can I add protein powder?
Yes, but use 1/4 cup maximum and add 1-2 tbsp extra liquid (almond milk works) to compensate for dryness. Too much protein powder can make bars dense and dry.

- Pudding Recipe With Egg Yolks: Silky Smooth Custard in Minutes - November 3, 2026
- Pudding Pops Recipe Cook and Serve: Silky Frozen Treats Without the Machine - November 3, 2026
- Protein Ice Cream Recipe Blender Xanthan Gum: Ultra Creamy Texture Without the Guilt - November 3, 2026