
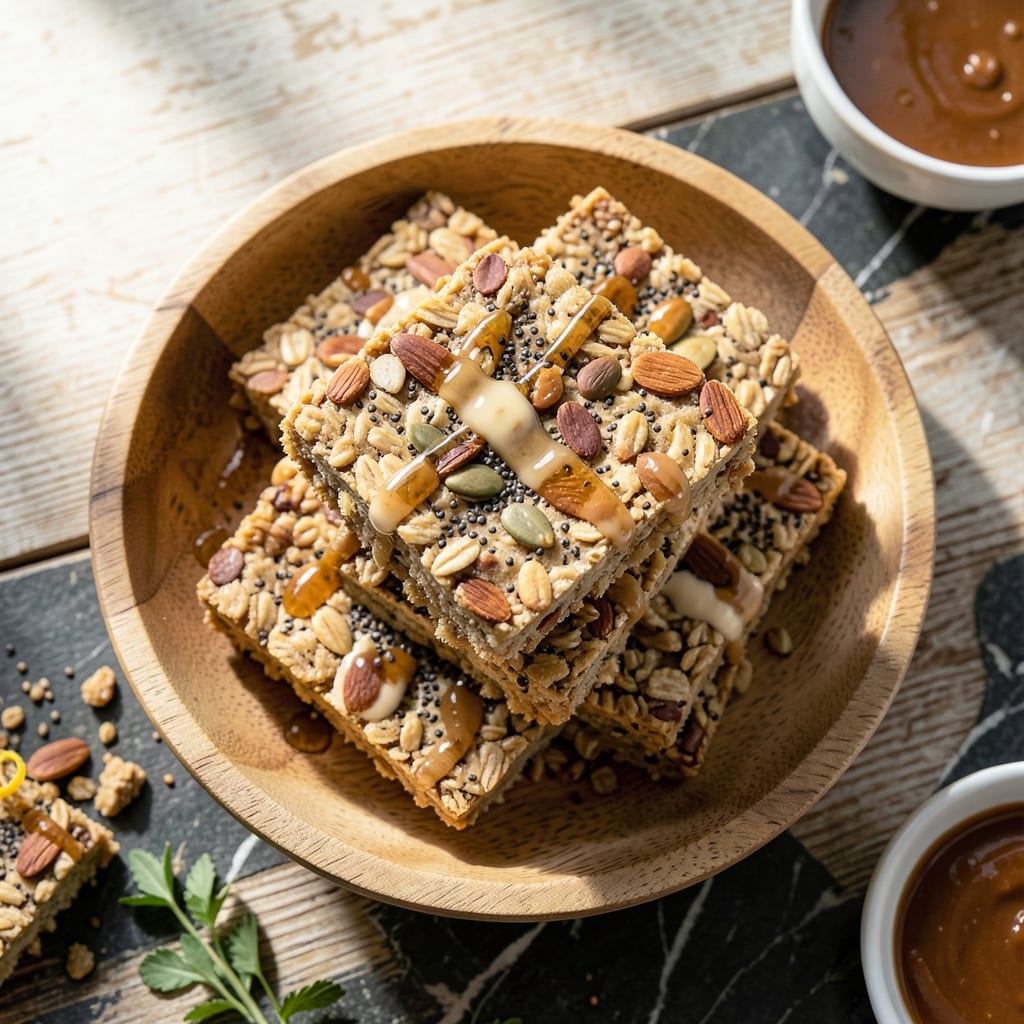
I developed this no-bake protein granola bar to deliver sustained energy without the oven. The combination of oats, nut butter, and protein powder creates a chewy texture that holds together perfectly.
This recipe comes together in 10 minutes with simple pantry staples. The key is pressing the mixture firmly into the pan before chilling, which ensures clean cuts later.
Each bar packs a protein punch from nuts, seeds, and powder, making it ideal for post-workout fuel or a mid-afternoon pick-me-up. The natural sweetness balances the nutty flavors beautifully.
Let the mixture set for at least 2 hours in the refrigerator for best results. These bars keep well for a week, making them perfect for meal prep.
Ingredients for Protein Granola Bar Recipe No Bake
Pantry staples plus protein powder create these chewy, no-bake energy bars in minutes.
| Ingredient | Amount | Notes |
|---|---|---|
| Old-Fashioned Rolled Oats 🌾 | 3 cups | Certified gluten-free if needed |
| Creamy Natural Peanut Butter 🥜 | ¾ cup | Unsweetened, well-stirred |
| Vanilla Protein Powder 💪 | ½ cup | Whey or plant-based |
| Honey 🍯 | ⅓ cup | Raw or pure preferred |
| Chia Seeds 🌱 | 2 tbsp | For binding and omega-3s |
| Flaxseeds 🌿 | 2 tbsp | Ground or whole |
| Sliced Almonds 🌰 | ½ cup | Lightly toasted for crunch |
| Pumpkin Seeds 🎃 | ¼ cup | Pepitas, unsalted |
| Mini Dark Chocolate Chips 🍫 | ⅓ cup | Optional for sweetness |
| Vanilla Extract 🌿 | 1 tsp | Pure vanilla for best flavor |
| Sea Salt 🧂 | ¼ tsp | Fine grain for even distribution |
| Cinnamon 🌶️ | ½ tsp | Ground, for warmth |
The oats are the backbone here. Bob’s Red Mill old-fashioned rolled oats have the perfect texture—steel-cut are too tough, quick oats too mushy. For the nut butter, I swear by Crazy Richard’s (just peanuts, nothing else). Protein powder is where you can customize: vanilla whey works, but Orgain or Vega plant-based blends hold up just as well for vegan versions.
No peanut butter? Almond or cashew butter at a 1:1 ratio. Swap honey for maple syrup or agave if you need vegan. Out of chia seeds? Ground flaxseed at the same amount works for binding. The chocolate chips are totally optional (I skip them half the time), but if you’re adding them, Enjoy Life brand is my go-to for clean ingredients.
These bars firm up in the fridge in about 2 hours, but overnight is even better. Store them in an airtight container with parchment between layers—they’ll keep for 1 week at room temp or 2 weeks refrigerated. Freeze for up to 3 months if you’re batch-prepping (just thaw 10 minutes before eating).
Why You’ll Love This Recipe
- No Oven Needed: I just mix, press, and chill—no baking, no waiting for the oven to preheat.
- Peanut Butter Bliss: The creamy peanut butter and honey combo tastes like a candy bar, but with protein to back it up.
- Grab-and-Go Fuel: I toss these in my bag for post-gym snacks or when the kids need a quick breakfast.
- Budget-Friendly Batch: A big pan of these costs pennies per bar and lasts all week in the fridge.
Step-by-Step Instructions for Protein Granola Bars
Here’s the foolproof method I use for perfectly chewy, no-bake bars every time.
Step 1: Toast the Nuts and Seeds
Preheat your oven to 350°F. Spread the 0.5 cup Sliced Almonds and 0.25 cup Pumpkin Seeds on a baking sheet. Toast for 5-7 minutes until they’re lightly golden and fragrant. Watch them closely—they go from perfect to burnt quickly.
This step intensifies their flavor and adds a satisfying crunch to your bars. Let them cool completely before mixing with other ingredients. I like to give them a quick stir halfway through toasting for even browning.
Step 2: Prepare the Wet Mixture
In a large microwave-safe bowl, combine the 0.75 cup Creamy Natural Peanut Butter and 0.33 cup Honey. Microwave in 30-second bursts, stirring between each, until the mixture is smooth and runny—about 1-2 minutes total.
Stir in the 1 tsp Vanilla Extract, 0.25 tsp Sea Salt, and 0.5 tsp Cinnamon. The mixture should be glossy and pourable. If your peanut butter was particularly thick, you might need to microwave an additional 15-20 seconds to achieve the right consistency.
Step 3: Combine All Ingredients
Add the 3 cups Old-Fashioned Rolled Oats, 0.5 cup Vanilla Protein Powder, 2 tbsp Chia Seeds, and 2 tbsp Flaxseeds to the wet mixture. Stir with a sturdy spoon until everything is evenly coated—the mixture will be thick and sticky.
Fold in the toasted Sliced Almonds and Pumpkin Seeds, then the 0.33 cup Mini Dark Chocolate Chips. I wait until this point to add the chocolate chips to prevent them from melting in the warm mixture. Distribute them evenly for pockets of sweetness in every bite.
Step 4: Press and Set
Line an 8×8-inch baking dish with parchment paper, leaving an overhang on the sides for easy removal. Transfer the mixture to the dish and press it down firmly with a spatula or your hands (wet your hands slightly to prevent sticking).
The key to chewy bars is pressing the mixture very firmly into an even layer. Use the back of a measuring cup to compact it further if needed. Refrigerate for at least 2 hours or until completely set—the bars should hold their shape when sliced.
Step 5: Slice and Store
Lift the set mixture from the pan using the parchment paper overhang and transfer to a cutting board. Cut into 12 equal bars with a sharp knife. For clean slices, run your knife under hot water and wipe it dry between cuts.
Store the bars in an airtight container in the refrigerator for up to 2 weeks, or wrap individually and freeze for up to 3 months. They’re best served slightly cool for that perfect chewy texture.
Pro Tips For Making Protein Granola Bar Recipe No Bake
- Warm the Honey: Heat the honey for 15-20 seconds in the microwave before mixing—it blends into the peanut butter far more smoothly and prevents that annoying clumping I used to fight with.
- Toast the Oats: Spread the rolled oats on a baking sheet and toast in a 350°F oven for 8-10 minutes until golden. I learned this the hard way—raw oats make the bars taste flat.
- Chill Completely: Resist the urge to slice early; these need at least 2 hours in the fridge. After one too many crumbly attempts, I now set a timer and walk away.
- Press Hard: Use the bottom of a glass to pack the mixture into the pan with serious pressure—this is what keeps them from falling apart when you cut them. Sounds obvious, but my first few batches were a mess until I did this.
Storing and Reheating Leftovers
Room Temperature Storage
These bars keep beautifully at room temperature for up to 1 week when stored properly. I use an airtight container with parchment paper between layers to prevent sticking. The oats and seeds absorb some moisture over time, making them slightly softer. 💡
Refrigerator Storage
For longer freshness, refrigerate your bars in an airtight container for up to 2 weeks. The cooler temperature maintains that perfect chewy texture we love. I find they’re even more delicious when chilled overnight first.
Freezing for Longevity
To freeze, wrap individual bars tightly in plastic wrap, then place in a freezer bag. They’ll stay fresh for up to 3 months at 0°F. When ready to eat, let them thaw at room temperature for about 10 minutes.
Reheating Not Needed
These no-bake bars are meant to be enjoyed straight from storage. If you prefer them slightly warmer, microwave for 10-15 seconds to take the chill off. But honestly, they taste great cold from the fridge too.
Portion Control
For easy grab-and-go snacks, pre-portion the bars before storing. I wrap mine individually in beeswax wrap for quick access during busy mornings. This also helps prevent the bars from drying out.
Texture Maintenance
If your bars lose their chewiness, place a slice of bread in the storage container. The bars will absorb the bread’s moisture and soften right up within 24 hours.
Nutrition Facts
Frequently Asked Questions
Can I use almond butter instead of peanut butter?
Yes, any nut butter works in a 1:1 ratio. Almond butter adds a slightly sweeter flavor. Just ensure it’s creamy and well-stirred before measuring.
Why do my bars crumble when cutting?
This usually means the mixture wasn’t pressed firmly enough. Use a measuring cup to compact it tightly in the pan, then chill for the full 2 hours before slicing.
How can I make these vegan?
Swap honey for maple syrup and use plant-based protein powder. Ensure your chocolate chips are dairy-free. The texture remains the same with these substitutions.
Can I add dried fruit to the mixture?
Try 1/4 cup of chopped dried apricots or cranberries. Add them with the chocolate chips at the end to avoid overmixing.

- Pudding Recipe With Egg Yolks: Silky Smooth Custard in Minutes - November 3, 2026
- Pudding Pops Recipe Cook and Serve: Silky Frozen Treats Without the Machine - November 3, 2026
- Protein Ice Cream Recipe Blender Xanthan Gum: Ultra Creamy Texture Without the Guilt - November 3, 2026