
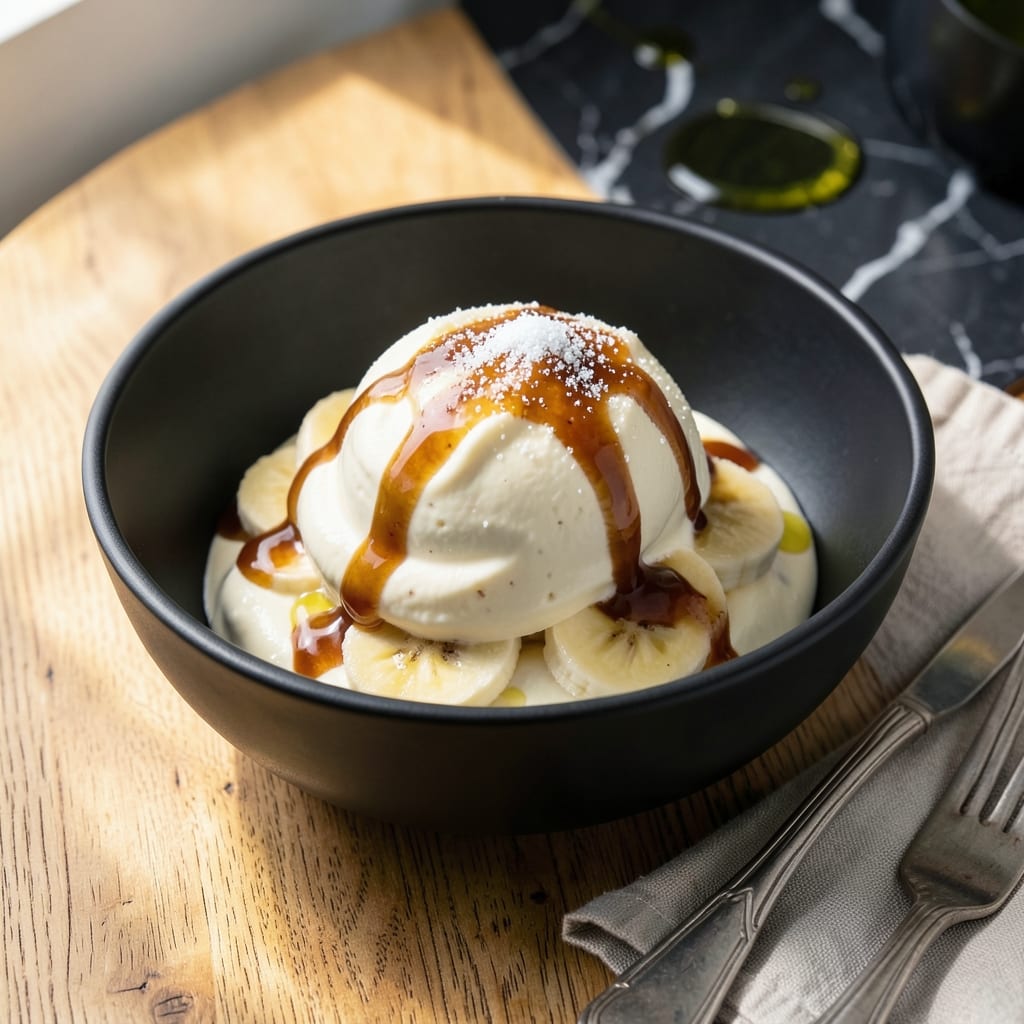
This protein ice cream delivers ultra-creamy results without any special equipment. I developed this method after realizing not everyone has a Ninja Creami, yet still wants that smooth, rich texture with high protein content.
The secret lies in using xanthan gum and careful blending to create a velvety consistency. Simple ingredients like protein powder, frozen bananas, and milk come together in minutes, proving you don’t need expensive gadgets for restaurant-quality frozen treats.
What you get is a dessert that satisfies sweet cravings while packing a protein punch. The texture rivals traditional ice cream, with none of the icy crystals that plague most homemade versions.
Perfect for post-workout recovery or a guilt-free indulgence. Here’s how to make it.
Ingredients for Protein Ice Cream Recipe No Ninja Creami
Ten simple ingredients create this ultra-creamy frozen treat without special equipment.
| Ingredient | Amount | Notes |
|---|---|---|
| Protein Powder 💪 | 1 cup | Vanilla or unflavored whey |
| Frozen Bananas 🍌 | 2 whole | Sliced before freezing |
| Milk 🥛 | ½ cup | Any variety, including dairy-free |
| Xanthan Gum 🧪 | ¼ tsp | Essential for creaminess |
| Vanilla Extract 🌿 | 1 tsp | Pure for best flavor |
| Granulated Sweetener 🍚 | 1 tbsp | Optional, adjust to taste |
| Salt 🧂 | 0.125 tsp | Enhances all flavors |
| Ice Cubes ❄️ | ½ cup | For blending texture |
| Greek Yogurt 🥣 | ¼ cup | Plain, full-fat preferred |
| Cocoa Powder 🍫 | 1 tbsp | Optional for chocolate version |
The xanthan gum is non-negotiable here—it’s what turns this from icy slush into that dreamy, scoopable texture. NOW Foods or Bob’s Red Mill are reliable brands at Whole Foods or Amazon. For protein powder, I swear by Optimum Nutrition Gold Standard (vanilla works perfectly). The bananas need to be rock-solid frozen, so slice them before freezing for easier blending (trust me on this).
No xanthan gum? Guar gum works at the same ratio, but it’s thicker so use slightly less. Swap protein powder flavors—chocolate or strawberry both work great. Milk can be any kind, but whole milk or oat milk gives the richest texture. Skip the sweetener if your protein powder is already sweet, or use monk fruit or stevia for a sugar-free option.
This keeps in the freezer for about 1 month, but honestly it’s best fresh. Let it sit at room temp for 5-10 minutes before scooping if it’s too firm. Freeze in single portions so you can grab and go post-workout.
Why You’ll Love This Recipe
- No Blender Needed: I just mix everything in a bowl and freeze—no fancy gadgets, just my whisk and some elbow grease.
- Creamy Vanilla Dream: The frozen bananas blend with vanilla and protein powder for a rich, smooth texture that tastes like real deal ice cream.
- Meal Prep Hero: I make a big batch on Sunday and grab a scoop all week for a quick, guilt-free treat.
- Budget-Friendly Protein: Honestly, it’s cheaper than store-bought protein bars and way more satisfying with ingredients I already have.
Step-by-Step Instructions for Protein Ice Cream
No fancy machine needed—just a blender and this method for ultra-creamy results.
Step 1: Prep the Frozen Base
Slice the 2 whole Frozen Bananas into ½-inch coins before freezing if you haven’t already. This step ensures they blend smoothly without leaving chunky bits. I always freeze them overnight so they’re rock-solid—that’s the secret to that thick, soft-serve texture.
Add the frozen banana slices to your blender first. They’ll start breaking down immediately and help pull the other ingredients into the mix. This order prevents the 1 cup Protein Powder from sticking to the bottom and clumping.
Step 2: Add Liquid and Thickening Agents
Pour in the 0.5 cup Milk and 0.25 cup Greek Yogurt. The milk adds the liquid needed to get things moving, while the yogurt contributes fat for that luxurious mouthfeel. I use full-fat yogurt because it makes the final texture noticeably creamier.
Next, add the 0.25 tsp Xanthan Gum—this is non-negotiable for that smooth, scoopable consistency. Sprinkle it directly over the other ingredients rather than into the dry protein powder to prevent clumping. Then add the 1 tsp Vanilla Extract, 1 tbsp Granulated Sweetener, and 0.125 tsp Salt for balanced flavor.
Step 3: Boost Flavor and Texture
For a chocolate version, add the 1 tbsp Cocoa Powder. I like to sift it first to avoid any lumps, but if you’re in a hurry, just break up any clumps with your fingers. The cocoa deepens the flavor without making it overly sweet.
Drop in the 0.5 cup Ice Cubes—this is the trick to making it extra thick right out of the blender. The ice helps lower the temperature further, giving you that perfect frozen consistency without needing to refreeze. If your blender struggles, pause and scrape down the sides as needed.
Step 4: Blend to Creamy Perfection
Start blending on low to break up the frozen bananas, then gradually increase to high. Use a tamper if your blender has one to push ingredients toward the blades. You’ll know it’s ready when the mixture is smooth, thick, and looks like soft-serve ice cream—this should take 30-60 seconds depending on your blender’s power.
If it’s too thick, add a splash more milk, 1 tablespoon at a time, until it blends easily. If it’s too thin, add a few more ice cubes and blend again. The xanthan gum works its magic during this process, so don’t rush it—let it fully incorporate.
Taste and adjust sweetness if needed. The Granulated Sweetener can be increased by ½ tablespoon increments if you prefer it sweeter, but I find the bananas add plenty of natural sweetness.
Step 5: Serve Immediately or Freeze for Later
Pour the mixture into bowls and dig in right away for a soft-serve texture. If you prefer a firmer consistency, transfer it to a freezer-safe container and freeze for 1-2 hours. Let it sit at room temperature for 5-10 minutes before scooping to make it easier.
This recipe serves 2, but it’s so good you might not want to share. The protein powder keeps it satisfying, while the bananas and yogurt make it taste indulgent. For best results, eat within 24 hours—after that, it can get a bit icy, though still delicious.
Pro Tips For Making Protein Ice Cream Recipe No Ninja Creami
- Pre-Freeze Your Bananas: Slice and freeze your bananas for at least 4 hours—I learned this the hard way when my first batch turned into a sad, soupy mess because the bananas weren’t cold enough.
- Add Xanthan Gum Last: Mix the xanthan gum into the liquid ingredients just before blending, or it’ll clump into weird little balls that no amount of stirring will fix.
- Skip the Over-Blending: Pulse the mixture in short bursts rather than letting the blender run continuously—after burning out two blenders, I finally realized this keeps the texture creamy instead of grainy.
- Use Cold Milk: Chill your milk overnight or at least 2 hours before using it, because warm milk turns the protein powder into a lumpy disaster that even extra blending won’t save.
Serving Suggestions for protein ice cream recipe no ninja creami
Bowl Presentation
Serve in chilled glass bowls for an elegant touch that keeps the treat cold longer. I love using vintage Fostoria glass from thrift stores—it makes even simple desserts feel special. The transparency showcases the creamy texture beautifully. 💫
Topping Bar
Set up a DIY topping station with 1 tbsp each of crushed nuts, mini chocolate chips, and sprinkles. Drizzle with sugar-free caramel or melted peanut butter for extra decadence. Kids and adults alike love customizing their bowls.
Fruit Pairings
Fresh strawberries or raspberries add a bright contrast to the rich base. Toss them in 1 tsp lemon juice to prevent browning. Banana slices work too, but freeze them first for a firmer texture.
Coffee Accompaniment
Pair with a cold brew or iced latte to balance the sweetness. The bitterness of coffee cuts through the richness perfectly. I recommend Stumptown or La Colombe for quality cold brew concentrate.
Waffle Cone Option
For a portable treat, scoop into homemade protein waffle cones. Use 1 scoop per cone and top with 1 tsp of your favorite toppings. These hold up better than regular cones against the thicker texture.
Garnish Ideas
A dusting of cocoa powder or a sprinkle of sea salt elevates the presentation. Add a mint leaf for a pop of color. These small touches make it look like a gourmet dessert. ✨
Nutrition Facts
Frequently Asked Questions
Can I use a regular blender instead?
Yes! A standard blender works perfectly for this 30-60 second process. Use the tamper to push ingredients down.
Why do I need xanthan gum?
It prevents icy crystals and creates that smooth, scoopable texture. Skip it and you’ll get a slushy mess instead of creamy soft-serve.
What if I don’t have frozen bananas?
Use 1 cup frozen mango or peaches as a substitute. They add natural sweetness and creaminess.
Can I make this dairy-free?
Swap the milk for almond or oat milk and use coconut yogurt. The texture stays just as rich.

- Pudding Recipe With Egg Yolks: Silky Smooth Custard in Minutes - November 3, 2026
- Pudding Pops Recipe Cook and Serve: Silky Frozen Treats Without the Machine - November 3, 2026
- Protein Ice Cream Recipe Blender Xanthan Gum: Ultra Creamy Texture Without the Guilt - November 3, 2026