
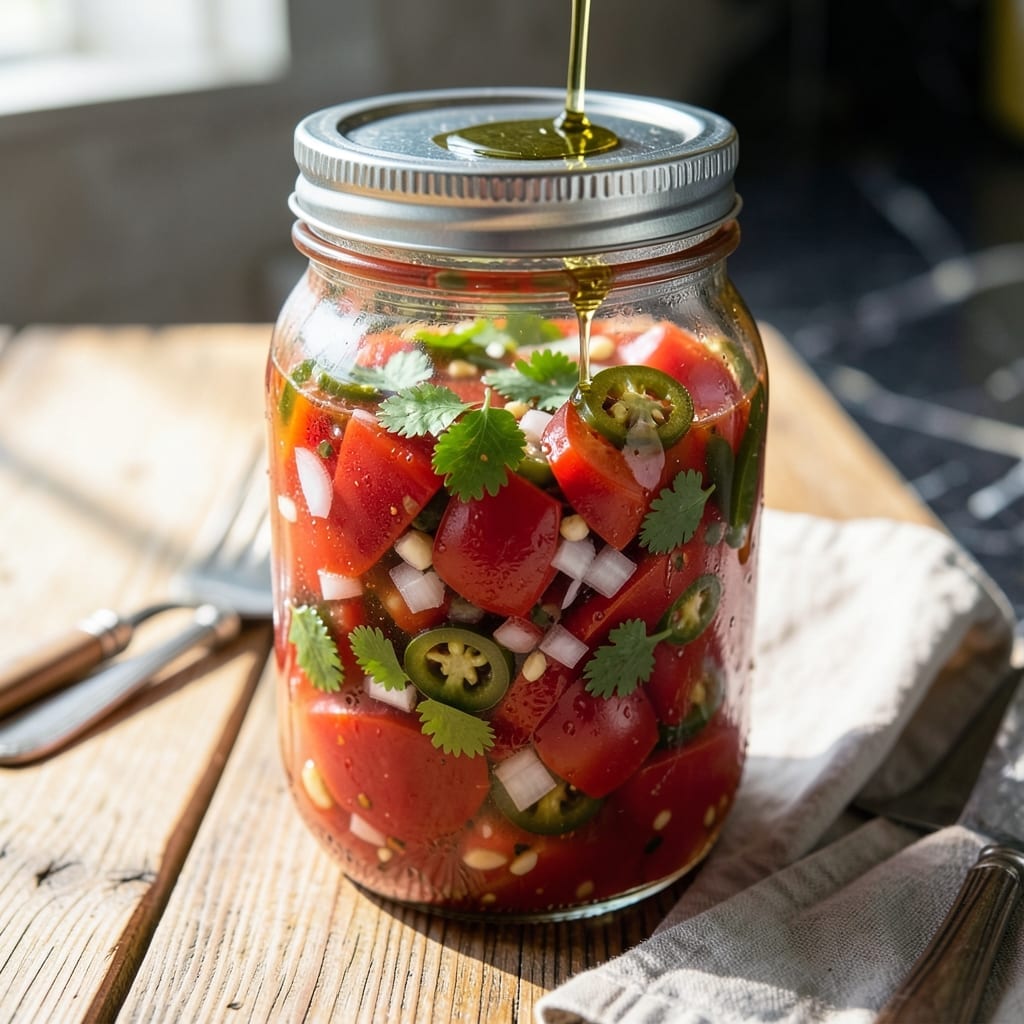
There’s nothing quite like the taste of fresh garden salsa preserved at the peak of ripeness. This method ensures your hard-earned harvest stays vibrant and flavorful for months to come.
I developed this canning process after too many summers watching my tomato bounty go to waste. The key is balancing acidity for safety while maintaining that bright, just-picked flavor we all love.
What you’ll get is shelf-stable salsa that tastes as fresh as the day it was made. The canning process locks in the perfect blend of tomatoes, peppers, and spices without preservatives.
Make a big batch and you’ll have summer in a jar all year long. Here’s how to do it right.
Ingredients for Recipe for Canning Homemade Salsa
Fresh tomatoes, peppers, and herbs come together for vibrant, shelf-stable salsa you’ll love all year.
| Ingredient | Amount | Notes |
|---|---|---|
| Roma Tomatoes 🍅 | 10 lb | Fresh, ripe, cored and peeled |
| Jalapeño Peppers 🌶️ | 1 lb | Seeds removed for mild heat |
| White Onions 🧅 | 2 whole | Medium size, finely diced |
| Fresh Cilantro 🌿 | 1 cup | Chopped, packed tightly |
| Garlic Cloves 🧄 | 8 cloves | Peeled and minced |
| Bottled Lemon Juice 🍋 | 1 cup | For safe acidity level |
| White Vinegar 💧 | ½ cup | 5% acidity for preservation |
| Pickling Salt 🧂 | ¼ cup | Non-iodized for canning |
| Ground Cumin 🌿 | 2 tbsp | Freshly ground preferred |
| Dried Oregano 🍃 | 1 tbsp | Mexican oregano if available |
The tomatoes are everything here—Roma or paste tomatoes have the right meat-to-seed ratio for canning. Hit up your local farmers market at peak season for the best flavor. Jalapeños can be adjusted for heat (keep seeds for spicy, remove for mild). I always grab my pickling salt from Ball or Mrs. Wages at the grocery store—regular salt can cloud your salsa.
Out of jalapeños? Serrano peppers at half the amount work great for extra heat. No fresh cilantro? Dried cilantro at one-third the amount in a pinch (though fresh is better). The vinegar is non-negotiable for safety—never reduce the amount. If you’re out of white vinegar, apple cider vinegar with 5% acidity works too.
Finished salsa keeps at room temperature for 12-18 months unopened. Once opened, refrigerate and use within 1 week. Always check your lids sealed properly before storing—if they pop when pressed, reprocess immediately (or refrigerate and use within 3 days).
Why You’ll Love This Recipe
- Minimal Chopping Required: I just quarter the tomatoes and roughly chop the onions—no fancy knife skills needed.
- Fresh Garden Taste: The cilantro and garlic make it taste like summer in a jar, bright and zesty.
- Pantry Staple: I can it in batches so I’ve got salsa ready for tacos, chips, or casseroles all year.
- Saves Big: Roma tomatoes are cheap in season, and one big batch costs less than store-bought.
Step-by-Step Instructions for Canning Homemade Salsa
This tested method ensures your garden-fresh salsa stays vibrant and safe for months.
Step 1: Prep and Chop All Vegetables
Core, peel, and chop the 10 lb Roma Tomatoes into ½-inch pieces. I use a serrated knife for this—it cuts through the flesh cleanly without crushing. Remove seeds from the 1 lb Jalapeño Peppers for milder heat, then finely dice them along with the 2 whole White Onions.
Mince the 8 cloves Garlic Cloves and chop the 1 cup Fresh Cilantro packed tightly. Here’s the thing—uniform pieces ensure even cooking and a consistent texture in every jar. This is the foundation of your salsa, so take your time with the prep.
Step 2: Combine and Simmer the Salsa Base
In a large stockpot, combine all the chopped vegetables, the 1 cup Bottled Lemon Juice, 0.5 cup White Vinegar, 0.25 cup Pickling Salt, 2 tbsp Ground Cumin, and 1 tbsp Dried Oregano. Stir well to distribute the seasonings evenly.
Bring the mixture to a boil over medium-high heat, then reduce to medium and simmer for 20-25 minutes. You want the salsa to thicken slightly and the tomatoes to soften. Stir occasionally to prevent sticking, especially as it reduces. The aroma will tell you when it’s ready—rich, tangy, and irresistibly fresh.
Step 3: Verify Acidity and Adjust if Needed
Safety first with home canning. After simmering, check the acidity level. The bottled lemon juice and white vinegar should provide enough acidity, but if your tomatoes were particularly sweet, add an extra splash of vinegar. This step ensures your salsa is safe for long-term storage.
Taste and adjust seasoning if needed, but remember that flavors will concentrate slightly during canning. If it tastes balanced now, it will be perfect after processing. Don’t add fresh herbs at this stage—they can introduce bacteria.
Step 4: Sterilize Jars and Fill with Salsa
While the salsa simmers, wash and sterilize your canning jars and lids in boiling water for 10 minutes. Keep them hot until ready to fill. Using a jar lifter, fill each hot jar with the hot salsa, leaving ½-inch headspace at the top.
Remove air bubbles by running a clean knife or bubble tool around the inside of each jar. Wipe the rims clean with a damp cloth—this ensures a proper seal. Place the lids on the jars and screw on the bands until fingertip-tight (not too tight).
Step 5: Process in a Water Bath for Safe Preservation
Place the filled jars in a water bath canner, making sure they’re completely covered by 1-2 inches of water. Bring to a rolling boil, then process pint jars for 15 minutes. Start timing once the water returns to a full boil after adding the jars.
After processing, carefully remove the jars and place them on a towel-lined countertop. Don’t tighten the lids or disturb them. You’ll hear that satisfying “pop” as the jars seal—this means success. Let them cool completely, then check the seals before storing in a cool, dark place. Your homemade salsa will keep for up to 12-18 months.
Pro Tips For Making Recipe For Canning Homemade Salsa
- Roast the Veggies: I learned this the hard way—raw tomatoes make watery salsa. Roast the Roma tomatoes, jalapeños, and onions at 425°F for 20-25 minutes first to deepen the flavor and remove excess moisture.
- Seed the Jalapeños: Skip the seeds if you want milder heat, but leave some in for a spicier kick. Wear gloves—I was skeptical until I tried it and ended up with burning hands for hours.
- Acidify Properly: Sounds weird, but it works: add 1/4 cup of bottled lime juice or vinegar per pint jar to guarantee safe canning and brighten the flavor. My grandmother swore by this, and she was right.
- Simmer Before Jarring: After blending, simmer the salsa for 10-15 minutes to meld the flavors and thicken slightly. This isn’t the prettiest method, but it’s the tastiest—your future self will thank you.
Dietary Considerations for This Dish
Vegan Friendly
This recipe is naturally vegan and plant-based, containing no animal products whatsoever. The combination of tomatoes, peppers, onions, and spices creates a flavorful condiment that fits perfectly into any vegan diet. I love that it’s free from dairy, eggs, and meat without any substitutions needed. 🌱
Gluten Free
All ingredients in this salsa are inherently gluten-free. There are no grains, flours, or thickeners used in the recipe. Just be sure to check your spice labels—some brands add anti-caking agents that may contain gluten. I always use McCormick or Penzeys for peace of mind.
Low Sodium Option
To reduce sodium, you can cut the pickling salt by half or use a salt-free seasoning blend. I’ve had success with Mrs. Dash as a substitute. The lemon juice and vinegar will still preserve the salsa safely while keeping the sodium content lower.
Sugar Free
This recipe contains no added sugars, making it sugar-free by default. The natural sweetness comes solely from the tomatoes and peppers. For those monitoring sugar intake, this is a great condiment option that won’t spike blood sugar levels.
Allergen Free
This salsa is free from the top 8 allergens: milk, eggs, fish, shellfish, tree nuts, peanuts, wheat, and soy. It’s processed in my kitchen where no cross-contamination occurs. Always check your spice labels if you have severe allergies, as manufacturing facilities may vary.
Nightshade Considerations
If you’re avoiding nightshades, this recipe won’t work as tomatoes and peppers are both nightshade vegetables. However, you could experiment with a tomato-free salsa verde using tomatillos, which are not nightshades, though that would require a different canning process.
Nutrition Facts
Frequently Asked Questions
How long does canned salsa last?
Unopened jars keep for 12-18 months in a cool, dark place. Once opened, refrigerate and use within 1 week for best quality. Always check for proper sealing before storage.
Can I use regular vinegar instead of white vinegar?
Yes, as long as it has 5% acidity. Apple cider vinegar works too. Never reduce the amount—acidity is critical for safe canning.
Why did my salsa turn out watery?
Tomatoes vary in juiciness. Simmer longer next time to evaporate excess liquid. For thicker results, add 1-2 tbsp tomato paste during cooking.
Do I need to peel the tomatoes?
Yes, for best texture. Blanching in boiling water for 30-60 seconds makes peeling easy. Skipping this step can result in tough bits in your salsa.

- Beefaroni Recipe With Tomato Soup: One-Pot Nostalgic Comfort - September 28, 2026
- Bread Recipe KitchenAid Mixer: Foolproof Loaf With Perfect Rise - September 28, 2026
- BBQ Oysters Recipe Grill: Smoky Garlic Butter Bliss - September 28, 2026