
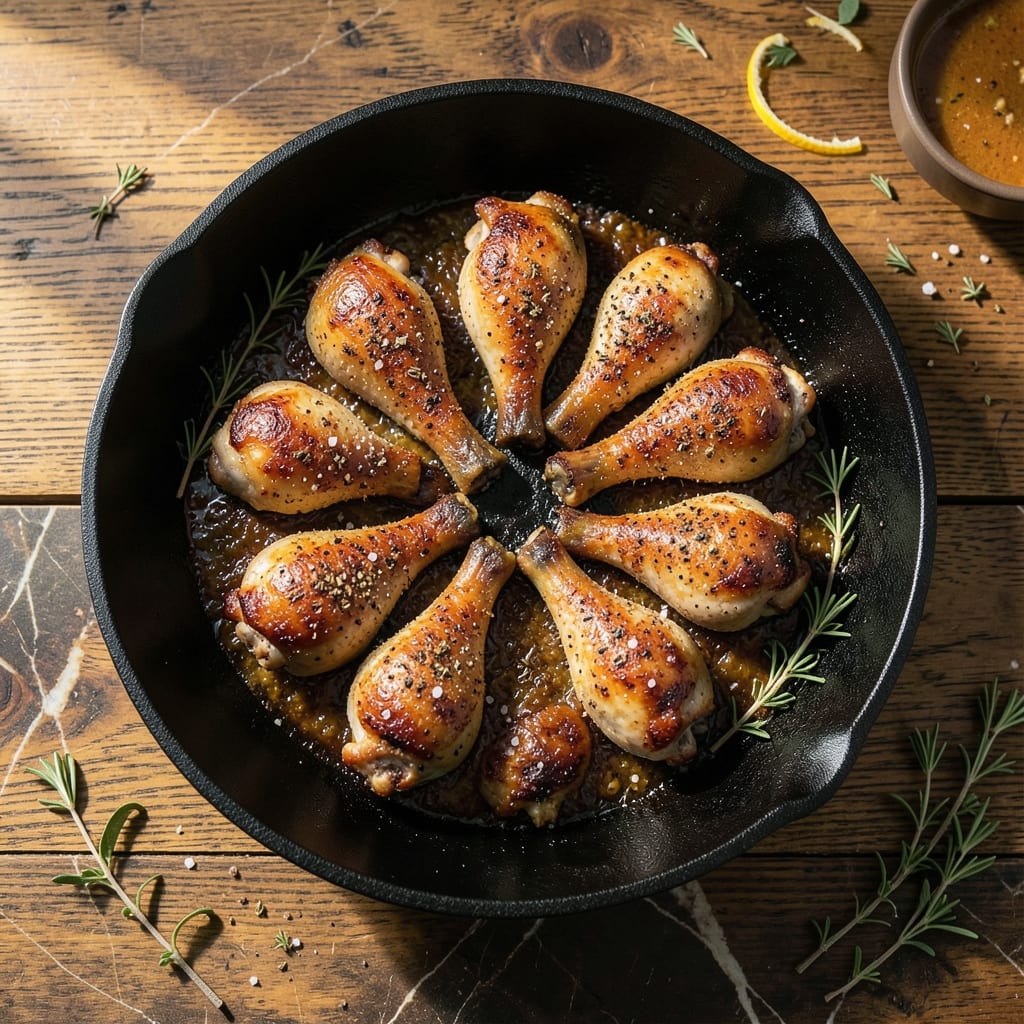
This stovetop method delivers crispy chicken legs with golden skin and rich pan juices. I developed this technique to achieve oven-quality results without the wait.
The key is cooking the chicken in batches to avoid crowding the pan. This ensures even browning and that signature crispy texture. Seasoning is simple—just salt, pepper, and your choice of herbs.
You’ll end up with legs that are tender inside with shatteringly crispy skin outside. The pan juices reduce into a savory sauce perfect for drizzling.
Ready in under 45 minutes, this method transforms an everyday protein into something special. The results speak for themselves.
Ingredients for Recipe for Chicken Legs on Stove Top
Simple pantry staples plus fresh herbs create this stovetop masterpiece with shatteringly crisp skin.
| Ingredient | Amount | Notes |
|---|---|---|
| Chicken Legs 🍗 | 8 pieces | Skin-on, bone-in, patted dry |
| Kosher Salt 🧂 | 2 tsp | Diamond Crystal preferred |
| Freshly Ground Black Pepper 🌶️ | 1 tsp | Coarse grind for texture |
| Garlic Powder 🧄 | 1 tsp | Not garlic salt |
| Smoked Paprika 🌶️ | 1 tsp | For depth of flavor |
| Dried Thyme 🌿 | 1 tsp | Crushed between fingers |
| Olive Oil 🫒 | 3 tbsp | Divided, high smoke point |
| Unsalted Butter 🧈 | 2 tbsp | For basting and pan juices |
| Fresh Rosemary Sprigs 🌿 | 2 whole | Optional, for aroma |
| Fresh Parsley 🌿 | ¼ cup | Chopped, for garnish |
| Lemon 🍋 | 1 whole | Juiced, for brightness |
The chicken legs are non-negotiable—skin-on, bone-in for that crispy result. Whole Foods or Costco have great options, but any grocery store will do. Pat them very dry before seasoning (this is key for crispiness). For the salt, Diamond Crystal kosher is the gold standard in professional kitchens due to its consistent texture and clean flavor.
No smoked paprika? Regular paprika with a pinch of cayenne works in a pinch. Dried thyme can be swapped for dried oregano or marjoram at equal amounts. Fresh rosemary not on hand? Skip it—the dried herbs already pack plenty of flavor. For extra richness, add 1 more tbsp of butter to the pan juices.
Leftovers keep 3-4 days in the fridge, though the skin loses crispness. Reheat in a skillet over medium to revive the texture. The pan juices can be frozen for up to 3 months—perfect for quick sauces later.
Why You’ll Love This Recipe
- One Pan Wonder: I just season, sear, and cover—no oven, no fuss, and the stovetop does all the heavy lifting.
- Smoky Depth: That smoked paprika and garlic powder combo gives the skin a rich, almost barbecue-like flavor without the grill.
- Feeds the Crew: I throw in a double batch for Sunday dinner, and it’s just as good cold in lunchboxes the next day.
- Budget Stretcher: Here’s what sold me—chicken legs stay cheap, but with these spices, they taste like a million bucks.
Step-by-Step Instructions for Chicken Legs on Stove Top
Achieve perfectly crispy skin and savory depth with this proven stovetop method.
Step 1: Season the Chicken Legs Thoroughly
Pat the 8 pieces chicken legs completely dry with paper towels—this is essential for crispy skin. In a small bowl, combine the 2 tsp kosher salt, 1 tsp freshly ground black pepper, 1 tsp garlic powder, 1 tsp smoked paprika, and 1 tsp dried thyme. Crush the dried thyme between your fingers as you add it to release its aroma.
Rub the seasoning mixture evenly over all surfaces of the chicken legs, pressing gently so it adheres well. The smoked paprika adds a subtle depth that complements the natural richness of the dark meat. Let the seasoned chicken sit at room temperature for 15-20 minutes while you prepare the pan.
Step 2: Sear the Chicken for Maximum Crispiness
Heat 2 tbsp olive oil in a large, heavy skillet (cast iron works best) over medium-high heat until the oil shimmers. Carefully place the chicken legs in the pan skin-side down, being mindful of splattering oil. You should hear a satisfying sizzle when the chicken hits the pan.
Cook undisturbed for 8-10 minutes until the skin is deep golden brown and crispy. Resist the urge to move the pieces—this allows the skin to develop that coveted crunch. The skin should release easily from the pan when it’s properly crisped. If your pan isn’t large enough for all pieces, cook in batches to avoid crowding.
Step 3: Finish Cooking and Baste with Aromatics
Flip the chicken legs and reduce heat to medium. Add the remaining 1 tbsp olive oil, 2 tbsp unsalted butter, and 2 whole fresh rosemary sprigs to the pan. As the butter melts, tilt the pan slightly and baste the chicken with the hot butter using a spoon, focusing on the skin side.
The rosemary will infuse the butter with its piney aroma while the chicken finishes cooking. Continue cooking for another 10-12 minutes, basting occasionally, until the chicken reaches an internal temperature of 175°F and the juices run clear when pierced.
Step 4: Rest and Garnish for Serving
Transfer the chicken legs to a serving platter, leaving the pan juices behind. Squeeze the juice of 1 whole lemon over the chicken—this bright acidity cuts through the richness and enhances the crispiness of the skin. Let the chicken rest for 5 minutes to allow the juices to redistribute.
Sprinkle with 0.25 cup fresh parsley chopped just before serving. The parsley adds a fresh, green contrast to the golden chicken. Serve immediately with some of the savory pan juices spooned over the top for maximum flavor in every bite.
Pro Tips For Making Recipe For Chicken Legs On Stove Top
- Pat Them Dry: I learned this the hard way—skip this and your chicken will steam instead of sear. Grab a paper towel and dry those legs thoroughly before seasoning; it’s the only way to get that crispy skin with smoked paprika.
- Start Hot, Finish Low: Crank the heat to medium-high for the first 5 minutes to lock in the garlic powder and paprika flavors, then drop to medium-low to cook through without burning the spices.
- Season Twice: Hit the legs with kosher salt and pepper before cooking, then give them another light dusting of smoked paprika halfway through—I was skeptical until I tried it, but it builds deeper flavor.
- Skip the Crowding: Resist the urge to fit all the legs in one pan; they’ll steam instead of brown. Use two pans or cook in batches—your future self will thank you when that skin stays crispy.
Pro Cooking Tips for recipe for chicken legs on stove top
Pan Selection Matters
I always reach for my 12-inch Lodge cast iron skillet for this dish. Its even heat distribution and retention are unmatched for achieving that perfect crispy skin. A heavy stainless steel pan works too, but avoid nonstick surfaces—they can’t handle the high heat needed for proper browning. 🔥
Don’t Crowd the Pan
Cook in batches if needed. Overcrowding causes steam to build up, which softens the skin instead of crisping it. I can fit 4 chicken legs comfortably in my 12-inch skillet with room to spare. This also prevents temperature drops when adding the chicken.
Internal Temperature Check
Use an instant-read thermometer to check for 175°F at the thickest part of the leg, avoiding the bone. Dark meat is safe at 165°F, but the extra 10°F renders more fat, creating juicier, more flavorful results. I keep my ThermoWorks Mk4 handy for this.
Basting Technique
When basting with butter, tilt the pan and use a spoon to pour the hot butter over the chicken repeatedly. This adds layers of flavor while promoting even browning. I focus on the skin side, where it matters most. The rosemary in the butter adds an aromatic touch.
Resting is Key
Let the chicken rest for 5 minutes after cooking. This allows the juices to redistribute throughout the meat. Skipping this step means those precious juices will end up on your cutting board instead of in your chicken. The skin stays crispier too. 💡
Crispiness Preservation
If making ahead, undercook the chicken by 5°F, then finish in a 400°F oven for 5-7 minutes before serving. This revives the crispiness better than any other method I’ve tried. Serve immediately for the best texture.
Nutrition Facts
Frequently Asked Questions
What pan works best for stovetop chicken legs?
A cast iron skillet is ideal for even heating and crispy skin. A heavy stainless steel pan also works well. Avoid nonstick as it can’t handle the medium-high heat needed for proper browning.
How do I know when the chicken is done?
Use a meat thermometer to check for 175°F in the thickest part. Dark meat is safe at 165°F, but the extra 10°F makes it juicier. Juices should run clear when pierced.
Can I make this ahead of time?
Yes! Undercook by 5°F, then finish in a 400°F oven for 5-7 minutes before serving. This method revives the crispiness better than reheating in a pan.
Why does my chicken skin soften instead of crisp?
Overcrowding the pan causes steam buildup. Cook in batches with space between pieces. Also, pat legs very dry before seasoning to ensure maximum crispiness.

- Blue Zone Recipe Ideas: Longevity-Boosting Meals for Vibrant Living - September 28, 2026
- Beefaroni Recipe With Tomato Soup: One-Pot Nostalgic Comfort - September 28, 2026
- Bread Recipe KitchenAid Mixer: Foolproof Loaf With Perfect Rise - September 28, 2026