
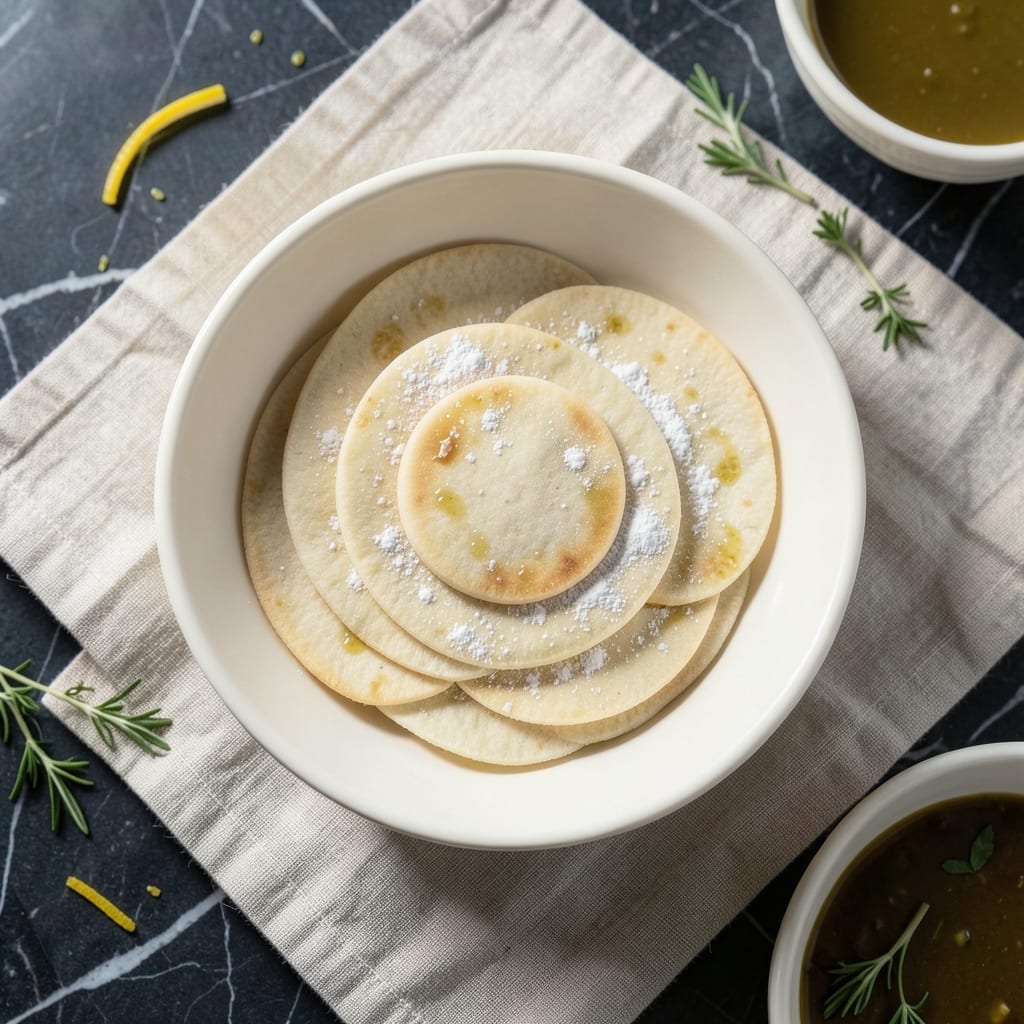
There is a quiet reverence in crafting communion wafers at home, a tradition that connects us to centuries of sacred practice. This recipe honors that heritage with simple, pure ingredients and a method refined through generations of faithful preparation.
The process requires patience and precision, as the thin dough must be rolled to exact specifications before baking. The result is a delicate, unbleached wafer that meets the spiritual and practical needs of communion services.
What emerges from the oven are crisp, neutral-flavored wafers that hold deep symbolic meaning. Their simplicity allows the sacred ritual to remain the focus, while their homemade nature adds a personal touch to the observance.
Whether preparing for a small gathering or regular services, this method ensures consistent, respectful results that honor the tradition.
Ingredients for Recipe for Communion Wafers
Pure, simple ingredients honor the sacred tradition of this reverent practice.
| Ingredient | Amount | Notes |
|---|---|---|
| Unbleached All-Purpose Flour 🌾 | 2 cups | Sifted for even texture |
| Water 💧 | ½ cup | Lukewarm, about 110°F |
| Olive Oil 🫒 | 1 tbsp | Light or extra-virgin |
| Salt 🧂 | ¼ tsp | Fine sea salt preferred |
| Baking Powder 🧂 | 0.125 tsp | Ensures proper rise |
The flour must be unbleached and high-quality—King Arthur or Bob’s Red Mill are reliable choices. Sifting removes any lumps and ensures an even, delicate texture in the final wafers. Water temperature is critical; too hot damages the gluten, too cold inhibits proper dough formation. Use a kitchen thermometer for precision (worth the extra minute).
No olive oil? Melted coconut oil or vegetable oil can substitute, but may alter flavor subtly. For a more traditional approach, omitting oil entirely works—just expect slightly drier wafers. The salt enhances flavor without overpowering; kosher salt at half the amount is acceptable if fine sea salt isn’t available.
Store wafers in an airtight container at room temperature for up to 2 weeks. For longer preservation, freeze for 3 months. Keep the dough covered with a damp cloth while rolling to prevent drying. Consistency is key—measure ingredients precisely for uniform results.
Why You’ll Love This Recipe
- 5-Minute Dough: I mix flour, water, olive oil, and a pinch of salt—no yeast, no waiting, just roll and bake.
- Subtle Crisp: The baking powder gives them a light bite, and the olive oil adds a whisper of richness without overpowering.
- Sacred or Snack: Honestly, I keep a batch in the freezer for Sunday services and midweek tea time.
- Pantry Staples: Between us, I already have everything on hand—no special trips to the store.
Step-by-Step Instructions for Communion Wafers
This traditional process requires precision and patience for sacrament-worthy results.
Step 1: Combine Dry Ingredients for Uniform Consistency
In a medium mixing bowl, whisk together all 2 cups Unbleached All-Purpose Flour, 0.25 tsp Salt, and 0.125 tsp Baking Powder until fully incorporated. The flour must be sifted beforehand to eliminate lumps and ensure a smooth, even texture in the final wafers.
This initial dry mix creates the foundation for your dough. I always whisk for at least 30 seconds to guarantee the leavening agent distributes evenly, which prevents uneven rising during baking. The mixture should appear uniform with no visible streaks of salt or baking powder.
Step 2: Incorporate Wet Components Gradually
Create a well in the center of your dry ingredients. Pour in all 0.5 cup Water (maintained at approximately 110°F) and 1 tbsp Olive Oil. Using a wooden spoon, begin stirring from the center outward, drawing in the dry ingredients progressively.
The dough will initially appear shaggy but should come together into a cohesive ball within 2-3 minutes of stirring. If the mixture feels too dry, resist adding more water—the precise ratio is critical for achieving the proper thin, crisp texture characteristic of communion wafers.
Step 3: Knead and Rest the Dough
Turn the dough onto a lightly floured surface and knead for 8-10 minutes until smooth and elastic. The surface should feel slightly tacky but not sticky; if it adheres to your hands, dust with a small amount of additional flour, though sparingly to maintain the correct consistency.
Once smooth, form the dough into a ball, wrap it tightly in plastic wrap, and let it rest at room temperature for 30 minutes. This resting period allows the gluten to relax, making the dough easier to roll out thinly without springing back. The rested dough should feel pliable and smooth to the touch.
Step 4: Roll and Cut the Wafers
Divide the rested dough into 4 equal portions (for this recipe’s yield). Working with one portion at a time, roll the dough on a lightly floured surface to a thickness of 1/16 inch or less. The thinner the dough, the crispier the final wafers will be.
Use a round cutter (traditionally about 1.5 inches in diameter) to cut out the wafers. Place them on a parchment-lined baking sheet, spacing them ½ inch apart to allow for minimal expansion. Re-roll the scraps only once to avoid overworking the dough, which can yield tough wafers.
Step 5: Bake to Crisp Perfection
Preheat your oven to 375°F. Bake the wafers for 6-8 minutes or until the edges turn light golden brown. The centers should remain pale but appear dry to the touch. Watch closely during the final 2 minutes—communion wafers can go from perfectly baked to over-browned quickly.
Remove the baking sheet from the oven and let the wafers cool completely on the pan. They will crisp further as they cool. Once at room temperature, transfer to an airtight container. Properly baked wafers should have a delicate, crisp texture that holds its shape without being brittle.
Pro Tips For Making Recipe For Communion Wafers
- Roll Them Thin: Use a pasta machine or rolling pin to get the dough paper-thin—about 1/16th of an inch. I learned this the hard way after my first batch came out more like crackers than wafers.
- Rest the Dough: Let the dough sit covered for 10-15 minutes before rolling. This relaxes the gluten and prevents it from shrinking back like an elastic band when you try to flatten it.
- Skip the Overmixing: Mix just until the dough comes together—overworking it develops too much gluten, and you’ll end up with tough wafers instead of delicate ones.
- Heat the Pan First: Make sure your skillet or griddle is fully preheated over medium-low before adding the dough. After burning my first batch, I realized a cool pan means uneven cooking and bitter spots.
Make-Ahead Tips for This Dish
Dough Preparation
I always prepare the dough up to 2 days ahead and refrigerate it tightly wrapped in plastic. This allows the gluten to relax fully, making it much easier to roll thinly. Just let it come to room temperature for 30 minutes before rolling. 💪
Pre-Rolled Sheets
For convenience, roll out the dough into thin sheets on parchment paper, then stack with parchment between layers. Store in the fridge for up to 48 hours. This saves time on baking day while maintaining the delicate texture.
Baking in Batches
The dough can also be pre-portioned and shaped into small balls, then refrigerated. When ready to bake, roll each ball thinly and proceed. This method works well for large batches needed for multiple services.
Freezing Wafers
Baked wafers freeze beautifully for up to 3 months in airtight containers. Separate layers with parchment to prevent sticking. Thaw at room temperature for 1-2 hours before use. ❄️
Room Temperature Storage
Keep finished wafers in an airtight container at room temperature for up to 2 weeks. Add a silica gel packet to absorb any moisture and maintain crispness. Check occasionally for any softening.
Day-Of Tips
If preparing the morning of, complete all steps through rolling and cutting. Leave the cut wafers on parchment-lined trays covered with a clean towel until ready to bake. This final method ensures absolute freshness.
Nutrition Facts
Frequently Asked Questions
What’s the ideal thickness for rolling?
Aim for 1/16 inch or thinner. This ensures a delicate, crisp texture. Use a pasta machine for precise control if available.
How do I prevent cracking while rolling?
Let the dough rest for 30 minutes before rolling. If it resists, cover with a damp cloth for 5 minutes to relax the gluten.
Can I use a different flour?
Stick to unbleached all-purpose for authenticity. Bread flour may make them too chewy. For gluten-free, try a 1:1 blend but expect texture changes.
Why do my wafers turn out tough?
Overworking the dough is the usual culprit. Knead just until smooth and avoid re-rolling scraps more than once.

- BBQ Chicken Bowl Recipe Rice: Smoky Sweetness Over Fluffy Grains - September 28, 2026
- Beef Cutlet Recipe Ideas: Crispy Breaded Patties With Bold Seasonings - September 28, 2026
- Bluefin Tuna Recipe Ideas: Sushi-Grade Seared and Sesame-Crusted - September 28, 2026