
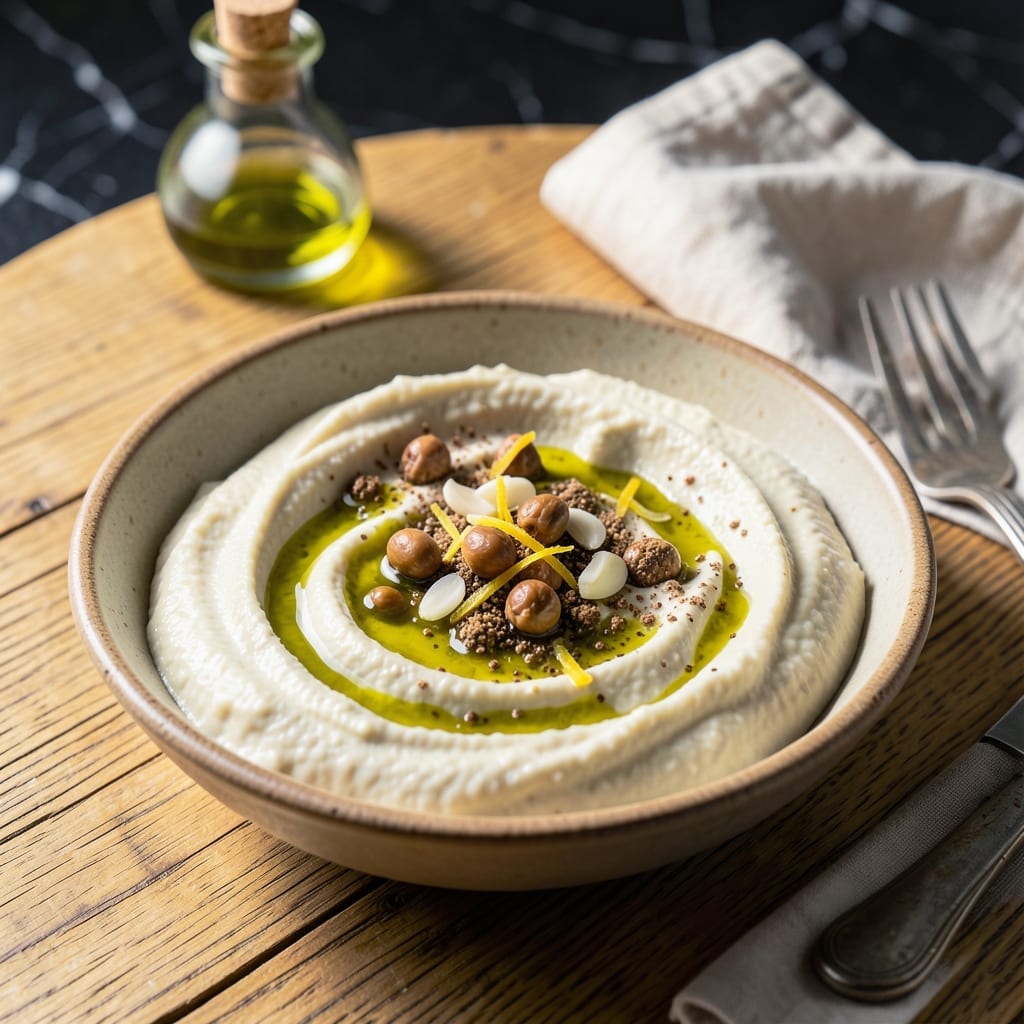
This tahini-free hummus delivers the same creamy texture you love, using just a few pantry staples. The secret lies in blending the chickpeas thoroughly while incorporating olive oil for richness.
With a touch of lemon zest for brightness, this version proves you don’t need tahini for authentic flavor. The result is a smooth, velvety spread perfect for dipping or sandwiches.
Ingredients for Recipe for Homemade Hummus Without Tahini
Pantry staples turn into this creamy, velvety spread with just a blender.
| Ingredient | Amount | Notes |
|---|---|---|
| Canned Chickpeas 🥫 | 2 cans | 15 oz each, drained and rinsed |
| Extra-Virgin Olive Oil 🫒 | ½ cup | Plus extra for drizzling |
| Lemon Juice 🍋 | ¼ cup | Freshly squeezed preferred |
| Lemon Zest 🍋 | 1 tbsp | Finely grated for brightness |
| Garlic Cloves 🧄 | 3 cloves | Peeled and minced |
| Ground Cumin 🌿 | 1 tsp | Toasted for depth |
| Sea Salt 🧂 | 1 tsp | Adjust to taste |
| Ground Black Pepper 🌶️ | ¼ tsp | Freshly ground preferred |
| Ice Cold Water 💧 | ¼ cup | For blending smoothness |
The chickpeas are doing all the heavy lifting here. Goya or Eden Organic have the creamiest texture straight from the can—no need to peel them (unless you’re feeling fancy). I always grab mine from Trader Joe’s or Whole Foods for consistency. The olive oil needs to be high-quality extra-virgin—it’s what gives this spread its richness without tahini. Look for vibrant green color and a fruity aroma.
No fresh lemon? Bottled works in a pinch (but fresh is brighter). Swap cumin for ground coriander at the same amount if you prefer a different flavor profile. Garlic powder can replace fresh at one-third the amount. For extra creaminess, add a spoonful of aquafaba (that chickpea water you drained). Want heat? A pinch of cayenne or smoked paprika blends in beautifully.
Keeps in the fridge for 5 days in an airtight container. A thin layer of olive oil on top prevents browning. Freezes well for 3 months—portion into ice cube trays for easy single servings. Always give it a stir before serving as it thickens when chilled.
Why You’ll Love This Recipe
- 5-Minute Blend: I just dump everything in the food processor—chickpeas, olive oil, lemon, garlic—and it’s done before I can even set the table.
- Bright & Zesty: The lemon zest cuts through the creaminess with this little pop that makes it way more exciting than store-bought.
- Weeknight Hero: I slather it on sandwiches, dip veggies, or toss it with pasta, and it feels like a real meal without the fuss.
- Pantry Savior: A can of chickpeas, a few staples, and I’ve got a protein-packed spread ready for days—no last-minute grocery runs.
Step-by-Step Instructions for Creamy Chickpea Spread With Lemon Zest
Here’s the method I use to achieve silky-smooth texture without tahini every time.
Step 1: Prep the Chickpeas for Maximum Creaminess
Drain and rinse the 2 cans Canned Chickpeas thoroughly under cold water to remove any excess sodium or canning liquid. I always give them an extra rinse to ensure no metallic taste lingers. For the creamiest texture, I recommend peeling the chickpeas—it takes a few minutes but makes a noticeable difference.
Shake them dry in a colander, then transfer to your food processor. If you’re short on time, you can skip peeling, but your hummus might have a slightly grainier texture. The drier the chickpeas are before blending, the better your final result will be.
Step 2: Blend the Base Ingredients Until Smooth
Add the 3 cloves Garlic Cloves, 1 tsp Ground Cumin, 1 tsp Sea Salt, and 0.25 tsp Ground Black Pepper to the food processor with the chickpeas. Pulse a few times to break up the garlic and start combining the spices with the beans. This prevents having chunks of raw garlic in your final spread.
With the processor running, slowly drizzle in the 0.5 cup Extra-Virgin Olive Oil through the feed tube. Then add the 0.25 cup Lemon Juice and 1 tbsp Lemon Zest. Blend for 2-3 minutes until completely smooth, scraping down the sides as needed. The mixture will look thick at this stage—that’s normal.
Step 3: Achieve the Perfect Creamy Consistency
With the processor still running, gradually add the 0.25 cup Ice Cold Water, 1 tablespoon at a time. This is the secret to ultra-creamy hummus without tahini. The cold water helps emulsify the mixture, creating that signature smooth texture we all love.
Stop to scrape the sides and taste after each addition. You might not need all the water—add just enough until you reach your desired consistency. I usually use about 3-4 tablespoons of the 0.25 cup for my preferred thickness. The hummus should be creamy but still hold its shape on a spoon.
Step 4: Rest and Adjust Seasoning
Transfer the hummus to a serving bowl and let it rest for 5-10 minutes. This allows the flavors to meld together. I always give it a final taste at this point and adjust the Sea Salt if needed—sometimes a pinch more brings out all the flavors beautifully.
Drizzle with a little extra Extra-Virgin Olive Oil and sprinkle with additional Lemon Zest for a fresh, bright finish. The surface might look slightly separated after resting, but a quick stir brings it back to perfect creaminess. Serve at room temperature for the best texture and flavor.
Pro Tips For Making Recipe For Homemade Hummus Without Tahini
- Reserve Chickpea Liquid: Don’t drain all the liquid—save about ¼ cup from the can. It adds creaminess and helps smooth out the texture when blending.
- Zest Before Juicing: Grate the lemon zest first, then juice it. Sounds obvious, but I learned this the hard way after wasting half a lemon trying to zest a juiced rind.
- Soften Raw Garlic: If using raw garlic, let the minced cloves sit in the lemon juice for 5 minutes before blending. It mellows the harshness without losing flavor.
- Blend While Drizzling: Add the olive oil slowly while the food processor runs. It emulsifies better and gives that silky finish you want in hummus.
Pro Cooking Tips for Perfect Results
Blender Selection
Use a high-powered blender like Vitamix or Ninja for the smoothest texture. I’ve found these handle chickpeas better than most food processors. The stronger motor prevents the mixture from getting stuck or overheating. 💡
Peeling Chickpeas
For ultra-smooth results, peel each chickpea by rolling it between your fingers. It takes about 10 minutes but removes the tough outer skin. I do this while watching TV—it’s oddly satisfying and worth the effort for special occasions.
Temperature Matters
Always use ice cold water when thinning the mixture. The temperature shock helps emulsify the oils and creates a creamier texture. Room temperature water can make your hummus grainy or oily.
Scrape Frequently
Stop and scrape the sides of your blender every 30-45 seconds. Chickpeas tend to stick to the walls, and you want every bit incorporated. I use a silicone spatula to avoid scratching my blender jar.
Resting Time
Let your hummus rest for at least 10 minutes after blending. This allows the flavors to develop and the texture to stabilize. I’ve noticed the lemon and garlic flavors become more pronounced after resting. ✨
Storage Tip
Press plastic wrap directly onto the surface before refrigerating. This prevents a skin from forming and keeps the top layer fresh. I always smooth it out to remove any air pockets for the best results.
Frequently Asked Questions
Can I use dried chickpeas instead of canned?
Soak 1 cup dried chickpeas overnight, then cook until very soft (1-2 hours). Canned are more convenient but dried can yield a creamier texture.
Why is my hummus grainy?
Graininess usually means the chickpeas weren’t blended long enough or were too dry. Add 1-2 tablespoons ice cold water and blend for another 1-2 minutes. Scrape the sides frequently for even texture.
How do I fix bland-tasting hummus?
Boost flavor with more lemon juice, garlic, or salt to taste. A drizzle of high-quality olive oil or sprinkle of smoked paprika adds depth. Always adjust seasoning after resting.
Can I make this ahead of time?
Yes! It tastes even better after 24 hours in the fridge. Store in an airtight container with plastic wrap pressed on the surface to prevent drying.
Nutrition Facts

- BBQ Sausage Recipe Oven: Smoky Depth Without the Grill - September 28, 2026
- BBQ Chicken Bowl Recipe Rice: Smoky Sweetness Over Fluffy Grains - September 28, 2026
- Beef Cutlet Recipe Ideas: Crispy Breaded Patties With Bold Seasonings - September 28, 2026