
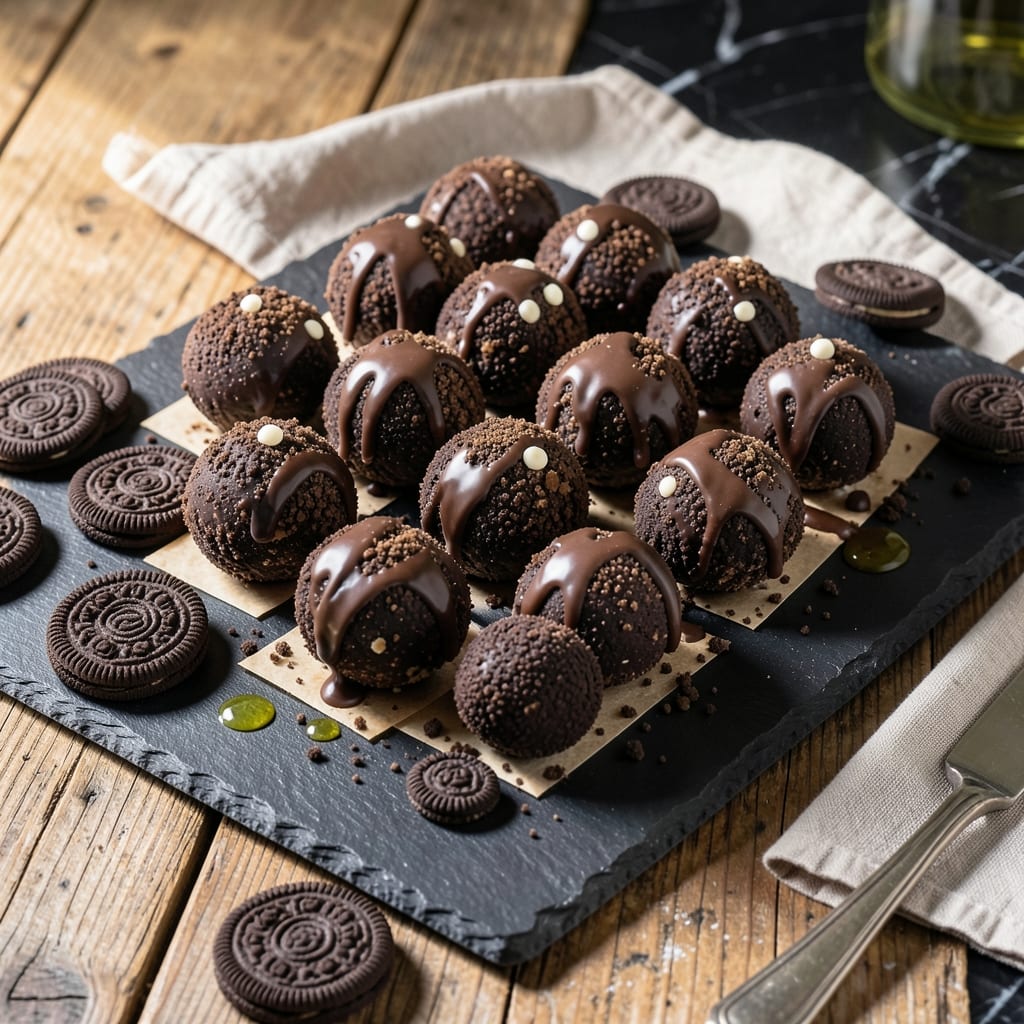
These truffle-like treats deliver rich chocolate flavor without turning on the oven. I developed this method after years of testing no-bake desserts, and the secret lies in the perfect ratio of crushed cookies to cream cheese.
The mixture comes together in minutes, then sets in the fridge while you prepare the chocolate coating. Each bite offers a creamy center with a firm chocolate shell—exactly what you expect from a classic confection.
What makes this recipe special is its versatility. You can customize the coating with white chocolate, sprinkles, or crushed nuts for different occasions and preferences.
Perfect for parties, gifts, or satisfying that chocolate craving. The result is always impressive.
Ingredients for Recipe Oreo Balls
A handful of pantry staples transforms into these decadent no-bake chocolate treats. Nothing complicated here.
| Ingredient | Amount | Notes |
|---|---|---|
| Oreo Cookies 🍪 | 36 whole | Regular or Double Stuf, finely crushed |
| Cream Cheese 🧀 | 8 oz | Full-fat, softened to room temperature |
| Semi-Sweet Chocolate Chips 🍫 | 2 cups | High-quality for smooth melting |
| White Chocolate Chips 🏳️ | 1 cup | Optional for decorative drizzle |
| Unsalted Butter 🧈 | 2 tbsp | For thinning chocolate coating |
| Vanilla Extract 🌿 | 1 tsp | Pure extract for best flavor |
| Powdered Sugar 🧂 | ½ cup | Optional for dusting finished truffles |
| Crushed Nuts 🥜 | ½ cup | Pecans or almonds for garnish |
| Rainbow Sprinkles 🌈 | ¼ cup | For colorful decoration |
| Sea Salt 🧂 | ¼ tsp | Flaky type for finishing touch |
The Oreos are the foundation here. Regular or Double Stuf both work, but avoid the low-fat versions—they don’t crush as well. I grab mine from Target or any grocery store; just check the package for freshness. The cream cheese needs to be full-fat (trust me on this) and properly softened—cold cream cheese makes the mixture lumpy. For the chocolate, Ghirardelli or Guittard chips melt the smoothest.
Need to swap something? Golden Oreos make a fun twist, or use gluten-free cookies if needed. No cream cheese? Mascarpone at double the amount (but it’s pricier). For the coating, milk chocolate chips work if you prefer it sweeter, and coconut oil instead of butter keeps it dairy-free. The vanilla can be skipped, but I wouldn’t—it adds depth to the chocolate.
These keep beautifully in the fridge for 1 week or freeze for 3 months in an airtight container. If stacking, use parchment between layers to prevent sticking. Bring to room temperature before serving for the best texture (worth the 10-minute wait).
Why You’ll Love This Recipe
- No-Bake Magic: Five ingredients, one bowl, and zero oven time. I’ve made these in my pajamas at 10 p.m. with no regrets.
- Creamy Crunch Heaven: That first bite where the crisp Oreo shell meets the velvety cream cheese center? Ridiculously good.
- Party or Pajamas: I’ve served these at birthday parties and eaten half the batch alone on the couch. They work for both.
- Stays Fresh: Honestly, they taste even better the next day—if they last that long. One batch gives me treats for the whole week.
Step-by-Step Instructions for Oreo Balls
This no-bake method delivers decadent truffles with minimal effort and maximum flavor.
Step 1: Crush Oreo Cookies and Combine with Cream Cheese
Place all 36 whole Oreo Cookies in a food processor and pulse until finely crushed into uniform crumbs. You want the texture to resemble wet sand—no large chunks remaining. If you don’t have a food processor, seal the cookies in a zip-top bag and crush with a rolling pin.
Transfer the crumbs to a mixing bowl and add the 8 oz Cream Cheese and 1 tsp Vanilla Extract. Use a silicone spatula or your hands to mix until fully combined and the mixture holds together when pressed. The cream cheese should be completely incorporated with no visible streaks.
Step 2: Form and Chill the Truffle Centers
Scoop the mixture into 1-inch balls (about 1 tablespoon each) and roll between your palms into smooth spheres. If the mixture feels too sticky, dampen your hands slightly with water to prevent clumping. For uniform shaping, use a cookie scoop for portioning.
Place the rolled truffles on a parchment-lined baking sheet. Here’s the thing—this step requires patience. Refrigerate the truffles for at least 30 minutes or until firm. This chilling prevents the centers from crumbling when dipped in chocolate later.
Step 3: Melt Chocolate for Coating
In a microwave-safe bowl, combine the 2 cups Semi-Sweet Chocolate Chips and 2 tbsp Unsalted Butter. Microwave in 30-second intervals, stirring between each, until fully melted and smooth. This gradual method prevents scorching.
Let the chocolate cool for 5 minutes at room temperature. It should still be fluid but not hot to the touch. If it’s too thick, add 1 teaspoon of the reserved melted butter to thin it slightly. The ideal dipping consistency is thin enough to coat but thick enough to cling.
Step 4: Dip and Decorate the Truffles
Working one at a time, dip each chilled truffle into the melted chocolate, using a fork to roll it gently for full coverage. Let excess chocolate drip off before placing it back on the parchment-lined sheet. I’ve found that tilting the fork slightly helps the excess slide off cleanly.
Immediately sprinkle with your choice of toppings: 0.5 cup Crushed Nuts, 0.25 cup Rainbow Sprinkles, or a pinch of 0.25 tsp Sea Salt. For a decorative touch, melt the 1 cup White Chocolate Chips and drizzle over the set truffles. Work quickly—the chocolate sets fast.
Return the truffles to the refrigerator for another 15-20 minutes to harden completely. The chocolate shell should be firm and glossy when fully set.
Pro Tips For Making Recipe Oreo Balls
- Chill Before Dipping: Pop the rolled Oreo balls in the fridge for at least 30 minutes—any less and they’ll crumble or slide right off your fork when dipping in melted chocolate.
- Crush Finely: Pulse the Oreos into fine crumbs, not chunks. I learned this the hard way after biting into a half-cookie hidden in my “smooth” truffle filling.
- Melt Chocolate Slowly: Use a double boiler or microwave in 20-second bursts, stirring between each. After burning two batches, I finally figured out that direct high heat turns chocolate grainy fast.
- Add Butter to Chocolate: Stir 1 teaspoon of unsalted butter into your melted chocolate chips—it makes the coating smoother and easier to work with, especially if your kitchen runs cool.
Pro Cooking Tips for This Dish
Perfect Crumb Texture
Use a food processor for the finest, most uniform crumbs—I pulse 36 Oreos in 5-second bursts until they resemble wet sand. This ensures a smooth, professional texture. Avoid over-processing into paste.
Cream Cheese Secrets
Your 8 oz cream cheese must be full-fat and truly room temperature. I leave mine out for 1-2 hours before starting. Cold cream cheese creates lumps that ruin the truffle’s creamy center.
Chilling Smart
After rolling, refrigerate the centers for 30-45 minutes. This prevents collapse when dipping. I use a cookie scoop for perfectly even 1-inch balls every time. 💡
Chocolate Melting
Melt 2 cups chocolate chips with 2 tbsp butter in 30-second intervals, stirring between each. This prevents scorching. Let it cool 5 minutes before dipping—hot chocolate will melt your centers.
Dipping Technique
Use a fork to roll truffles in chocolate, not your fingers. Tap the fork gently on the bowl’s edge to remove excess. Place on parchment, then immediately add toppings before the chocolate sets.
Setting Time
After decorating, refrigerate for 15-20 minutes until the chocolate is firm and glossy. I often make these the night before—they taste even better after 24 hours in the fridge. 🔥
Nutrition Facts
Frequently Asked Questions
Do I need to bake these?
No, these are completely no-bake! The mixture sets in the fridge during 30 minutes of chilling.
Can I make these ahead?
Store in an airtight container in the fridge for up to 1 week or freeze for 3 months. Bring to room temperature before serving.
Why did my coating turn out lumpy?
This usually happens if the chocolate wasn’t fully melted or cooled properly. Always melt in 30-second intervals and let it cool for 5 minutes before dipping.
Can I use different cookies?
Yes! Golden Oreos, gluten-free cookies, or even graham crackers work well. Adjust sweetness to taste.

- Pina Colada Dip Recipe Red Lobster: Tropical Creaminess With Toasted Coconut - October 12, 2026
- Pickled Sweet Cherry Peppers Recipe Canning: Tangy Heat for Pantry Staples - October 12, 2026
- Peppercorn Sauce Recipe Vegan: Rich Umami Depth Without Cream - October 12, 2026