
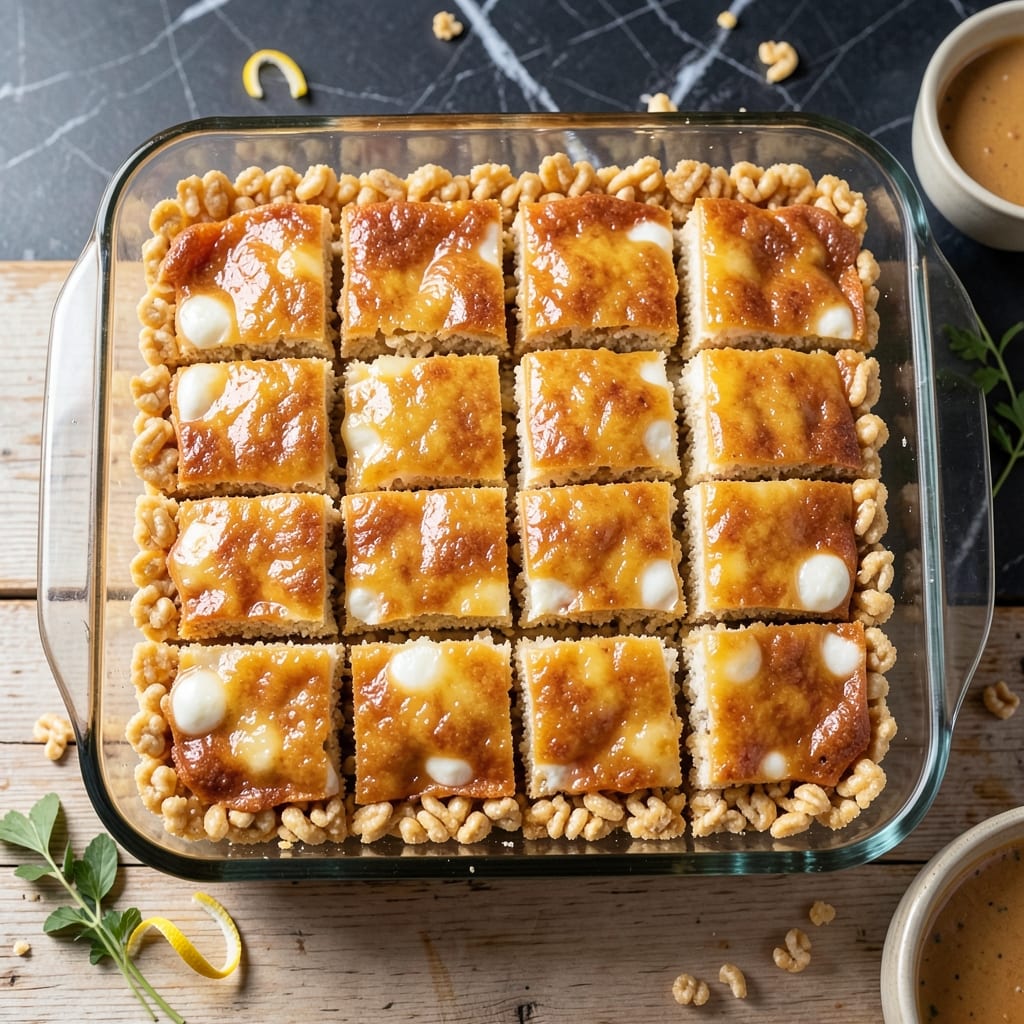
There’s nothing quite like the nostalgic crunch of homemade rice krispie treats, and this version brings back that classic flavor we all remember. The secret lies in using Jet-Puffed marshmallows for that signature fluffy texture.
This recipe stays true to tradition with just a handful of simple ingredients and a no-bake process that’s nearly foolproof. The marshmallows melt into a smooth, sticky perfection that holds the cereal together without losing its iconic snap.
You’ll end up with squares that are crispy on the outside, gooey in the middle, and impossible to resist. The crosshatched pattern on top adds that final touch of homemade charm.
Perfect for bake sales, lunchboxes, or an afternoon pick-me-up. Here’s how to make them just like you remember.
Ingredients for Rice Krispie Treats Recipe Jet Puffed
Six simple ingredients deliver that nostalgic crunch and gooey perfection you remember.
| Ingredient | Amount | Notes |
|---|---|---|
| Rice Krispies Cereal 🥣 | 6 cups | Classic original variety |
| Jet-Puffed Marshmallows ✨ | 10 oz | Mini or regular size |
| Unsalted Butter 🧈 | ¼ cup | Melted for binding |
| Vanilla Extract 🌿 | 1 tsp | Pure extract preferred |
| Salt 🧂 | ¼ tsp | Fine sea salt |
| Cooking Spray 💨 | 1 can | For greasing pan |
The marshmallows are non-negotiable here—Jet-Puffed gives that signature fluffy texture you can’t replicate with store brands. I grab mine from Walmart or Target (the big bags are perfect for this). The cereal matters too: original Rice Krispies snap right, while generics can get soggy. Unsalted butter lets you control the salt, and trust me, you’ll taste the difference.
No Jet-Puffed? Kraft marshmallows work in a pinch, but the texture won’t be quite as light. Swap the vanilla for almond extract if you want a different twist (use half the amount). Out of cooking spray? Butter the pan instead—just as effective. The salt might seem small, but it balances all that sweetness perfectly.
These keep 2-3 days at room temp in an airtight container (if they last that long). For longer storage, freeze for up to 6 weeks—just thaw before serving. Press them into the pan while still warm for that classic crosshatched pattern.
Why You’ll Love This Recipe
- One Pot Wonder: I melt the butter, toast the Jet-Puffed marshmallows, and fold in the Rice Krispies—all in the same saucepan. One less dish to wash.
- That Vanilla Snap: The vanilla extract cuts through the sweetness, giving the treats this warm, bakery-like depth that makes them irresistible.
- Party or Pajamas: I’ve taken them to bake sales and eaten them in my sweatpants at midnight—equally satisfying.
- Budget Stretcher: A box of cereal and a bag of Jet-Puffed marshmallows feed a crowd for under five bucks. Honestly, it’s my go-to for last-minute gatherings.
Step-by-Step Instructions for Rice Krispie Treats
This classic method delivers perfectly gooey, crunchy treats with minimal effort and maximum nostalgia.
Step 1: Prepare Your Workspace and Ingredients
Lightly coat a 9×13-inch baking pan with the cooking spray, ensuring every surface is covered. This prevents sticking when you press the mixture in later. Set the pan aside and measure out your 6 cups Rice Krispies Cereal into a large mixing bowl.
I like to have all ingredients prepped before starting—this recipe moves quickly once the marshmallows melt. Measure the 0.25 tsp Salt and 1 tsp Vanilla Extract and place them near your stove for easy access.
Step 2: Melt Butter and Marshmallows Together
In a large pot, melt the 0.25 cup Unsalted Butter over low heat. Once melted, add all 10 oz Jet-Puffed Marshmallows. Stir constantly with a silicone spatula or wooden spoon to prevent burning. The marshmallows will begin to melt and combine with the butter.
Watch for the mixture to become completely smooth with no visible marshmallow lumps. This usually takes 5-7 minutes. Remove from heat immediately once melted—the residual heat will continue cooking the mixture. Stir in the vanilla extract and salt until fully incorporated.
Step 3: Combine With Cereal for Even Coating
Pour the melted marshmallow mixture over the 6 cups Rice Krispies Cereal in your mixing bowl. Using the same spatula, gently fold the cereal into the marshmallow mixture until every piece is evenly coated. Be thorough but gentle—you want each cereal piece covered without crushing them.
This step requires patience. The mixture will be thick and sticky, but keep folding until no dry cereal remains visible. The cereal should glisten with the marshmallow coating, and the entire mixture should hold together when pressed.
Step 4: Press and Shape the Treats
Transfer the cereal mixture to your prepared 9×13-inch baking pan. Using your spatula or lightly greased hands, press the mixture evenly into the pan. Apply firm, even pressure to create a uniform layer—this ensures your treats hold their shape when cut.
I press down gently at first, then increase pressure to really compact the mixture. The top should be smooth and level with the edges of the pan. If the mixture sticks to your hands, wet them slightly with water or reapply cooking spray.
Step 5: Cool, Cut, and Serve
Let the treats cool in the pan at room temperature for at least 30 minutes. This cooling time allows the marshmallow to set properly, making the treats easier to cut and handle. If you’re impatient, you can refrigerate for 15 minutes, but room temperature works best.
Once set, use a sharp knife to cut into 16 even squares. For clean cuts, dip the knife in hot water between slices. Serve immediately, or store in an airtight container at room temperature for up to 3 days.
Pro Tips For Making Rice Krispie Treats Recipe Jet Puffed
- Melt Slowly: Keep the heat low when melting the Jet-Puffed marshmallows with butter—high heat will turn them rubbery. I learned this the hard way after ruining two batches.
- Use Fresh Cereal: Stale Rice Krispies won’t give you that signature snap, crackle, or pop. Check the box date and give it a quick smell if you’re unsure.
- Skip the Overmixing: Once the marshmallow mixture meets the cereal, fold just until coated. Overworking it makes the treats dense and chewy instead of light and crisp.
- Butter Your Tools: Grease your spatula and the pan with a little extra unsalted butter before pressing the mixture in. Sounds weird, but it works—no sticking, and cleanup is a breeze.
Creative Variations of rice krispie treats recipe jet puffed
Chocolate Lovers
Add 1 cup semi-sweet chocolate chips to the melted marshmallow mixture. Stir until fully melted before combining with cereal. I use Ghirardelli chips for their rich flavor. The chocolate makes these extra decadent while keeping that signature crunch. 🍫
Peanut Butter Twist
Mix in ½ cup creamy peanut butter with the melted marshmallows for a nutty twist. I recommend Jif Natural for its smooth texture. This variation adds protein and satisfies both sweet and salty cravings in one bite.
For extra crunch, sprinkle ½ cup chopped peanuts over the mixture before pressing into the pan.
Fruity Cereal Swap
Replace 2 cups Rice Krispies with 2 cups Fruity Pebbles for a colorful, fruity take. The marshmallows will turn pastel shades, making these perfect for birthday parties. Press gently to avoid crushing the colorful cereal pieces. 🌈
Cinnamon Sugar Dust
After cutting into squares, dust the tops with a mix of 1 tbsp cinnamon and ¼ cup granulated sugar. This adds a warm, spiced note that pairs beautifully with the marshmallow sweetness. I use Penzeys cinnamon for the best flavor.
Coconut Crunch
Stir in 1 cup toasted coconut flakes with the cereal for a tropical twist. Toast the coconut in a dry pan over medium heat for 3-4 minutes until golden. The coconut adds chewiness and a subtle nutty flavor.
Nutrition Facts
Frequently Asked Questions
Can I use mini marshmallows instead of regular?
Yes! Mini marshmallows melt faster, so reduce melting time to 3-4 minutes. They work perfectly and may distribute more evenly in the cereal mixture.
Why did my treats turn out hard?
Overcooking the marshmallow mixture or pressing too hard when shaping causes this. Keep heat on low and press just enough to compact.
How do I make them extra gooey?
Add an extra 1-2 cups of marshmallows or use slightly less cereal. Also, let them cool only 15-20 minutes before cutting for maximum stickiness.
Can I make these without butter?
Yes, substitute with ¼ cup coconut oil or margarine. The flavor will differ slightly, but they’ll still hold together well.

- Pina Colada Dip Recipe Red Lobster: Tropical Creaminess With Toasted Coconut - October 12, 2026
- Pickled Sweet Cherry Peppers Recipe Canning: Tangy Heat for Pantry Staples - October 12, 2026
- Peppercorn Sauce Recipe Vegan: Rich Umami Depth Without Cream - October 12, 2026