
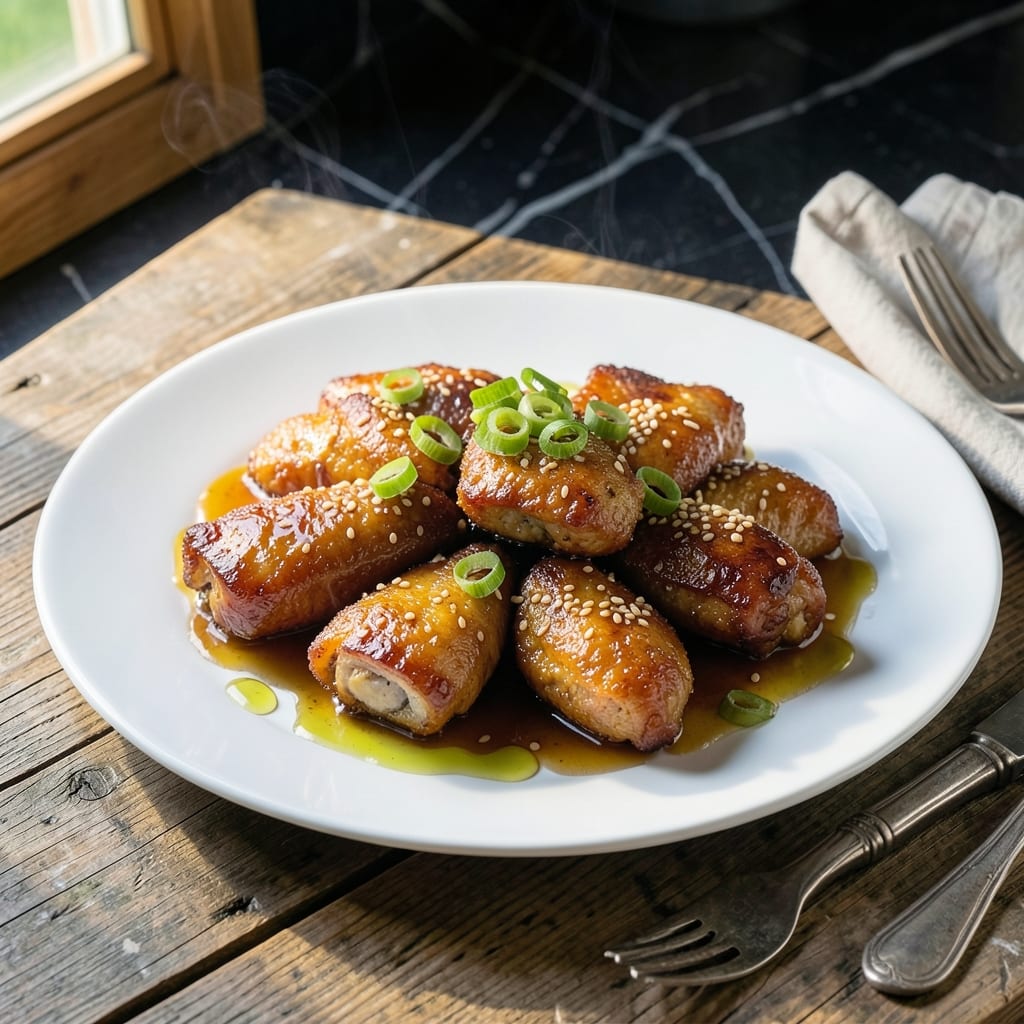
I developed this recipe after too many takeout nights, craving that sweet-sticky sesame flavor without the delivery wait. The solution came down to one simple technique that changes everything.
This method uses everyday ingredients and a straightforward process that anyone can master. The chicken stays tender while the sauce reduces to a glossy, sweet and sticky glaze that coats every piece perfectly.
In 30 minutes, you’ll have a dish that rivals takeout, with better flavor and ingredients you recognize. The aroma alone will have everyone gathered around the table before it’s even ready.
Serve over rice with steamed vegetables for a complete meal that feels special but comes together effortlessly.
Ingredients for Sesame Chicken Recipe Easy
Everyday ingredients create that takeout magic right in your own kitchen quickly.
| Ingredient | Amount | Notes |
|---|---|---|
| Boneless Skinless Chicken Thighs 🍗 | 1 ½ lb | Cut into bite-sized pieces |
| Soy Sauce 🥢 | ½ cup | Low-sodium preferred |
| Honey 🍯 | ⅓ cup | For sweet glaze |
| Rice Vinegar 🍶 | 2 tbsp | Balances sweetness |
| Sesame Oil 🫒 | 1 tbsp | Toasted variety preferred |
| Garlic Cloves 🧄 | 4 cloves | Minced for sauce |
| Fresh Ginger 🌿 | 1 tbsp | Grated or minced |
| Cornstarch 🌾 | 2 tbsp | For thickening sauce |
| Sesame Seeds 🌰 | 2 tbsp | Toasted for garnish |
| Green Onions 🧅 | 3 whole | Sliced for topping |
| Vegetable Oil 🫒 | 2 tbsp | For frying chicken |
| Red Pepper Flakes 🌶️ | ½ tsp | Optional for heat |
| Water 💧 | ¼ cup | For cornstarch slurry |
The chicken thighs are key here—bone-in takes longer, but boneless skinless cooks fast and stays tender. Costco has great bulk packs, or grab from your regular supermarket. For soy sauce, Kikkoman low-sodium is my go-to (less salty than regular). The sesame oil should be toasted for that deep, nutty flavor—look for it in the Asian aisle at Walmart or any grocery store.
No honey? Maple syrup or agave at a 1:1 ratio works fine. Out of rice vinegar? Apple cider vinegar in a pinch (slightly different tang). No fresh ginger? Ground ginger at one-quarter the amount. If you’re avoiding gluten, swap soy sauce for tamari. The cornstarch can be arrowroot powder at the same ratio—just as effective for thickening that glossy glaze.
The sauce keeps beautifully in the fridge for up to 5 days. Store in an airtight container—reheat gently on the stove with a splash of water. Sesame seeds and green onions are best added fresh, so keep them separate until serving. Leftovers taste even better the next day (that glaze really soaks in).
Why You’ll Love This Recipe
- One Pan Wonder: I toss everything in a skillet and let the soy sauce and honey work their magic while I set the table.
- Sweet-Savory Balance: The honey and rice vinegar create this sticky, tangy glaze that clings to every piece of chicken.
- Meal Prep Hero: I double the batch and pack it for lunch—it tastes even better the next day.
- Budget Friendly: Chicken thighs stay juicy and cost half what breasts do, and a little sesame oil goes a long way.
Step-by-Step Instructions for Sweet and Sticky Sesame Chicken
This straightforward method delivers perfectly crispy chicken with a glossy, finger-licking glaze.
Step 1: Coat and Fry the Chicken
Cut the 1.5 lb boneless skinless chicken thighs into bite-sized pieces and pat them dry with paper towels. This removes excess moisture so the chicken browns properly instead of steaming. Toss the chicken with 2 tbsp cornstarch until evenly coated—the starch creates that essential crispy exterior.
Heat 2 tbsp vegetable oil in a large skillet over medium-high heat. When the oil shimmers, add the chicken in a single layer, being careful not to overcrowd the pan. Cook undisturbed for 3-4 minutes until golden brown on the bottom, then flip and cook another 2-3 minutes until crispy and cooked through. Transfer to a paper towel-lined plate to drain excess oil.
Step 2: Build the Glaze Base
In the same skillet, reduce heat to medium and add 4 cloves minced garlic cloves and 1 tbsp grated fresh ginger. Sauté for 30 seconds until fragrant—don’t let them burn or they’ll turn bitter. Immediately pour in 0.5 cup soy sauce, 0.33 cup honey, and 2 tbsp rice vinegar, stirring to combine.
The mixture will bubble vigorously as it comes to a simmer. Let it cook for 2 minutes to meld the flavors. The vinegar balances the sweetness of the honey while the soy sauce provides depth and saltiness. If using, add 0.5 tsp red pepper flakes now for a subtle heat.
Step 3: Thicken the Sauce and Coat the Chicken
In a small bowl, whisk together 2 tbsp cornstarch and 0.25 cup water until smooth. Slowly pour this slurry into the simmering sauce while stirring constantly. The sauce will thicken within 1-2 minutes into a glossy, syrupy consistency that clings to the back of a spoon.
Return the crispy chicken to the skillet and toss to coat evenly in the sauce. Stir in 1 tbsp sesame oil for that nutty aroma that defines this dish. Cook for an additional 1-2 minutes to ensure the chicken absorbs all the flavors and the sauce reaches your desired thickness.
Step 4: Garnish and Serve Immediately
Transfer the sesame chicken to a serving platter and sprinkle with 2 tbsp toasted sesame seeds and sliced 3 whole green onions. The sesame seeds add crunch and visual appeal, while the green onions provide a fresh, mild bite that cuts through the richness.
Serve immediately while the chicken is still crispy and the sauce is at its glossiest. The glaze will thicken further as it cools, so don’t delay. This dish pairs perfectly with steamed rice to soak up every last drop of that irresistible sauce.
Pro Tips For Making Sesame Chicken Recipe Easy
- Cut Thighs Evenly: Slice chicken into 1-inch pieces so they cook through in the same 6-8 minutes—no more dry, overdone bits while waiting for the thick ones to finish.
- Toast the Sesame: Heat sesame oil in the pan for 30 seconds before adding chicken to deepen its nutty flavor—skip this and the dish tastes flat.
- Reduce the Sauce: After coating the chicken, let the soy-honey-vinegar mix bubble for 2-3 minutes until it thickens slightly; otherwise it’ll slide right off the pieces.
- Double Coat: Toss the cooked chicken in half the sauce, then repeat with the rest for a glossy, clingy finish that doesn’t pool at the bottom of the bowl.
Storing and Reheating This Dish
Refrigerator Storage
Let your sesame chicken cool for no more than 2 hours before transferring to an airtight container. I use glass containers with snap-on lids for easy reheating. Store in the fridge at 40°F or below for up to 4 days. The flavors deepen overnight as the glaze soaks into the chicken. ❄️
Freezer Storage
This dish freezes beautifully for up to 3 months without losing quality. I recommend using flat freezer bags to save space. Leave 1 inch of headspace for expansion and squeeze out excess air to prevent freezer burn.
Stovetop Reheating
My preferred method for maintaining texture. Add chicken to a skillet with 2 tbsp water or chicken broth over medium-low heat. Cover and heat for 5-7 minutes, stirring occasionally. The liquid prevents sticking and keeps the chicken tender.
Microwave Reheating
For quick meals, place portions in a microwave-safe dish with a damp paper towel. Heat on 70% power for 2-3 minutes, then stir. Continue in 30-second intervals until reaching 165°F. Add a splash of water if the sauce looks dry.
Reviving the Glaze
If the sauce thickens too much during storage, stir in 1-2 tsp water while reheating. For extra shine, drizzle with ½ tsp sesame oil after warming. This brings back that irresistible sticky texture. 💡
Nutrition Facts
Frequently Asked Questions
Can I use chicken breast instead of thighs?
Yes, but thighs stay juicier. If using breast, cut into smaller pieces and cook for 2-3 minutes less to prevent dryness. The glaze helps compensate for the leaner meat.
What makes the sauce thick and glossy?
The cornstarch slurry is key. Mix 2 tbsp cornstarch with 0.25 cup water and stir into simmering sauce. It transforms from thin to sticky in 1-2 minutes.
How do I prevent the chicken from getting soggy?
Pat pieces very dry before coating with cornstarch, and cook in a single layer. Overcrowding the pan steams instead of crisping.
Can I make this ahead of time?
Store cooked chicken and sauce separately in the fridge for up to 4 days. Reheat gently on the stove with a splash of water to restore the glaze.

- BBQ Sausage Recipe Oven: Smoky Depth Without the Grill - September 28, 2026
- BBQ Chicken Bowl Recipe Rice: Smoky Sweetness Over Fluffy Grains - September 28, 2026
- Beef Cutlet Recipe Ideas: Crispy Breaded Patties With Bold Seasonings - September 28, 2026