
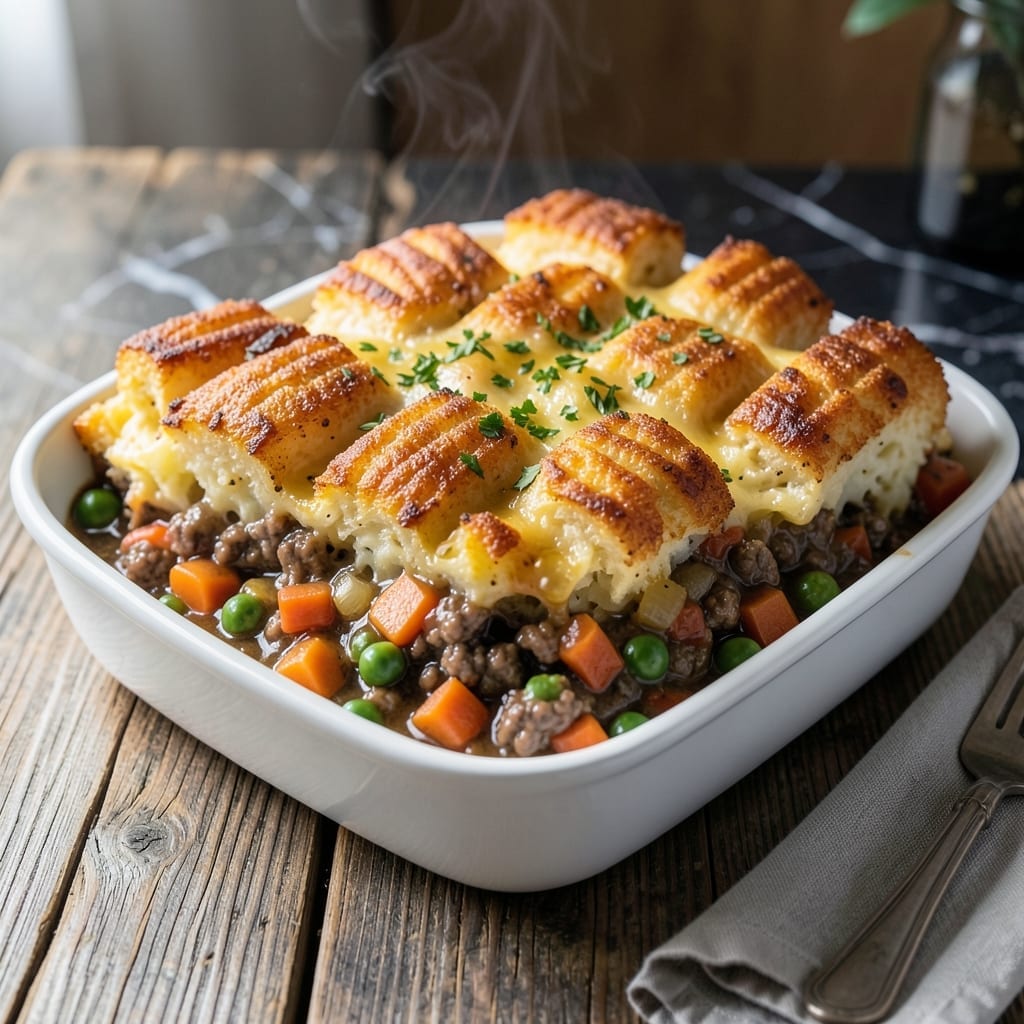
I developed this twist on a classic comfort dish after realizing tater tots create the crispy topping I’d always wanted from traditional mashed potatoes. The golden, crunchy crown contrasts beautifully with the rich, savory filling beneath.
This version keeps the soul of shepherd’s pie intact—ground meat, hearty vegetables, and deep gravy—but swaps the usual topping for frozen tater tots. They bake up perfectly crispy while the filling stays bubbling hot underneath.
By the time it emerges from the oven, you’ll have a dish that’s both nostalgic and exciting. The tater tots stay firm and golden, while the filling remains thick and flavorful.
It’s a foolproof way to deliver that beloved comfort food experience with a fun, unexpected presentation.
Ingredients for Shepherd’s Pie Recipe with Tater Tots
Classic comfort meets crispy innovation with these hearty, familiar ingredients.
| Ingredient | Amount | Notes |
|---|---|---|
| Ground Beef 🥩 | 1 ½ lb | 80/20 blend for best flavor |
| Frozen Tater Tots 🥔 | 1 bag | 32 oz bag, no need to thaw |
| Yellow Onion 🧅 | 1 whole | Medium, finely diced |
| Carrots 🥕 | 2 whole | Medium, peeled and diced |
| Garlic Cloves 🧄 | 3 cloves | Minced for depth of flavor |
| Frozen Peas 🌱 | 1 cup | Thawed and drained |
| Beef Broth 🍲 | 1 ½ cups | Low-sodium preferred |
| Tomato Paste 🍅 | 2 tbsp | For rich umami depth |
| Worcestershire Sauce 🫒 | 1 tbsp | Adds classic savory complexity |
| All-Purpose Flour 🌾 | 2 tbsp | For thickening gravy |
| Dried Thyme 🌿 | 1 tsp | Or use fresh thyme doubled |
| Dried Rosemary 🌿 | 1 tsp | Crushed to release aroma |
| Salt 🧂 | 1 tsp | Adjust to taste at end |
| Black Pepper 🌶️ | ½ tsp | Freshly ground preferred |
| Butter 🧈 | 1 tbsp | Optional for extra richness |
The ground beef is the foundation—80/20 blend gives you the perfect fat-to-meat ratio for rich flavor without being greasy. Costco has great prices on bulk packs, or grab it fresh from your butcher. For the tater tots, Ore-Ida is the gold standard (frozen aisle, 32 oz bag). The beef broth matters too—Better Than Bouillon paste makes a deeper, more concentrated base than canned.
No ground beef? Ground turkey or lamb work great—just drain excess fat. Swap tater tots for hash browns or waffle fries (adjust bake time). Out of Worcestershire? Soy sauce plus a pinch of sugar gets close. Fresh herbs are better if you’ve got them—use double the amount of fresh thyme or rosemary. The peas can be swapped for corn or green beans (whatever’s in the freezer).
Assemble and bake immediately, or prep the filling ahead and refrigerate for 24 hours. Leftovers keep 3-4 days in the fridge, reheat covered with foil. Freeze portions for up to 3 months—the tots may soften slightly but still taste great.
Why You’ll Love This Recipe
- One Pan Wonder: I love that I can brown the beef, sauté the onion, carrots, and garlic, then top with tater tots—all in the same skillet.
- That Crispy Top: The tater tots bake up golden and crunchy, while the beef filling stays juicy with all those savory veggies.
- Crowd Pleaser: My picky nephew and my foodie sister both ask for seconds—this one works for family dinners and casual get-togethers.
- Budget Hero: Ground beef stretches far, and frozen tater tots cost pennies. I feed four for less than a fast-food run.
Step-by-Step Instructions for Shepherd’s Pie With Tater Tots
This method delivers a perfectly crispy topping over a rich, savory filling every time.
Step 1: Brown the Ground Beef and Aromatics
Heat a large skillet over medium-high heat and add the 1.5 lb ground beef. Cook, breaking it up with a wooden spoon, for 5-6 minutes until browned and crumbly. Drain excess fat, leaving about 1 tablespoon in the pan for flavor.
Add the finely diced yellow onion and 2 whole carrots to the skillet. Cook for 4-5 minutes until the vegetables soften and the onion turns translucent. Stir in the minced 3 cloves garlic cloves and cook for 30 seconds until fragrant.
Step 2: Create the Savory Gravy Base
Sprinkle the 2 tbsp all-purpose flour over the beef mixture and stir to coat evenly. Cook for 1-2 minutes to remove the raw flour taste. This creates a roux that will thicken your filling beautifully.
Pour in the 1.5 cups beef broth, 2 tbsp tomato paste, and 1 tbsp Worcestershire sauce. Stir in the 1 tsp dried thyme, 1 tsp dried rosemary, 1 tsp salt, and 0.5 tsp black pepper. Bring to a simmer and cook for 5 minutes until the mixture thickens slightly.
Step 3: Add Vegetables and Prepare for Baking
Stir in the 1 cup frozen peas (thawed and drained) and cook for 2-3 minutes until heated through. Taste and adjust seasoning if needed. The filling should be rich and flavorful, with a thick, gravy-like consistency.
Transfer the beef mixture to a 9×13-inch baking dish and spread it evenly. Press down gently to create a flat surface for the topping. This ensures every bite gets a good ratio of filling to crispy topping.
Step 4: Crown with Tater Tots and Bake
Arrange the 1 bag frozen tater tots in a single layer on top of the beef mixture, slightly overlapping if necessary. Press them down gently into the filling so they stay in place during baking.
Bake at 400°F for 25-30 minutes until the tater tots are golden brown and crispy and the filling is bubbling around the edges. For extra richness, brush the tops with 1 tbsp butter during the last 5 minutes of baking.
Step 5: Rest and Serve
Remove from the oven and let rest for 5-10 minutes before serving. This allows the filling to set slightly, making it easier to serve clean portions with that perfect crispy topping intact.
Scoop generous portions onto plates, ensuring each serving has plenty of the crispy tater tot crown. The contrast between the hot, savory filling and the crunchy topping is what makes this dish so satisfying.
Pro Tips For Making Shepherd’S Pie Recipe With Tater Tots
- Pre-cook the Tots: Spread the frozen tater tots on a baking sheet and bake for 10 minutes at 425°F before assembling the pie. This guarantees they crisp up instead of turning soggy under the beef filling.
- Drain the Beef: After browning the ground beef with onions, carrots, and garlic, drain off the excess fat—even if it looks lean. I learned this the hard way when my pie turned greasy.
- Skip Thawing: Resist the urge to thaw the tater tots first; frozen works better. They’ll hold their shape and create that perfect crunchy top layer.
- Press Down Lightly: When layering the tots over the beef, press them just enough to nestle into the filling—no need to compact. This keeps the topping airy and crisp rather than dense.
Storing and Reheating Leftovers
Refrigerator Storage
Let your dish cool for no more than 2 hours before transferring to airtight containers. I use glass Pyrex with snap-on lids for easy stacking. Store at 40°F or below for up to 4 days. The flavors actually deepen overnight as everything melds together. ❄️
Freezer Storage
This freezes beautifully for up to 3 months without losing quality. I recommend flat freezer bags (gallon size) because they save space. Leave 1 inch of headspace for expansion and squeeze out excess air to prevent freezer burn.
Oven Reheating
Preheat your oven to 375°F and cover the dish with aluminum foil. Heat for 20-25 minutes until the filling reaches 165°F. Remove the foil and broil for 2-3 minutes to crisp the tater tots again.
Microwave Method
For quick meals, microwave individual portions covered with a damp paper towel. Heat on 70% power for 2-3 minutes, stir, then continue in 1-minute intervals until hot. Add a splash of beef broth if it looks dry.
Reviving the Crisp
If your tater tots soften in storage, don’t worry. A quick trip under the broiler for 2-3 minutes will bring back that golden crunch. I always watch closely to avoid burning—30 seconds can make the difference. 🔥
Portion Control
Divide into individual servings before freezing for easy grab-and-go meals. I use 16 oz mason jars for perfect single portions. Thaw overnight in the fridge before reheating for best texture results.
Nutrition Facts
Frequently Asked Questions
Can I use a different type of potato topping?
Yes! Try frozen hash browns, waffle fries, or even sweet potato tots for a twist. Adjust bake time slightly—hash browns may need 5-10 extra minutes to crisp up properly.
Why is my filling too runny?
This usually happens if the roux didn’t cook long enough.
Can I make this ahead of time? Assemble the dish completely, cover tightly, and refrigerate for up to 24 hours. Add 5-10 extra minutes to bake time if cooking straight from the fridge.

- BBQ Sausage Recipe Oven: Smoky Depth Without the Grill - September 28, 2026
- BBQ Chicken Bowl Recipe Rice: Smoky Sweetness Over Fluffy Grains - September 28, 2026
- Beef Cutlet Recipe Ideas: Crispy Breaded Patties With Bold Seasonings - September 28, 2026