
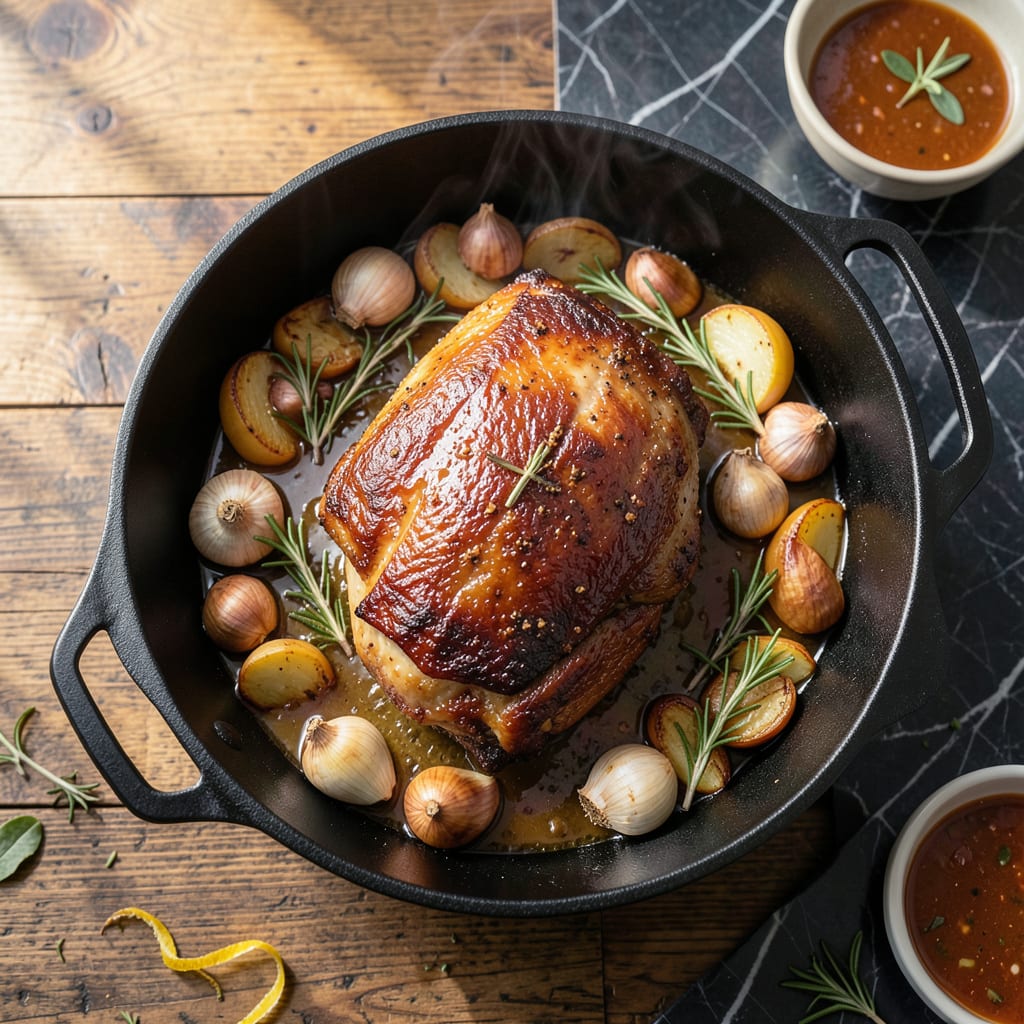
Achieving fall-off-the-bone pork shoulder requires patience and the right technique. This method transforms tough cuts into tender, succulent meat through slow roasting.
With minimal hands-on time, you’ll create a dish that’s rich, flavorful, and impossible to resist. The low temperature ensures perfect tenderness every time.
Ingredients for Slow Roasted Pork Shoulder
Slow roasting transforms tough pork shoulder into tender perfection with these essential ingredients.
| Ingredient | Amount | Notes |
|---|---|---|
| Pork Shoulder 🥩 | 4 lb | Bone-in, skin-on preferred |
| Kosher Salt 🧂 | 2 tbsp | Diamond Crystal preferred |
| Black Pepper 🌶️ | 1 tbsp | Freshly ground coarse |
| Garlic Cloves 🧄 | 8 cloves | Peeled, smashed |
| Yellow Onion 🧅 | 2 whole | Thickly sliced |
| Fresh Rosemary 🌿 | 4 sprigs | Woody stems removed |
| Fresh Thyme 🍃 | 6 sprigs | Stems removed |
| Dijon Mustard 🟡 | 2 tbsp | Whole grain variety |
| Apple Cider Vinegar 🍏 | ¼ cup | Unfiltered preferred |
| Brown Sugar 🏝️ | 2 tbsp | Light or dark |
| Olive Oil 🫒 | 2 tbsp | Extra-virgin for richness |
| Chicken Stock 🥣 | 1 cup | Low-sodium preferred |
| Red Wine 🍷 | ½ cup | Dry variety recommended |
The pork shoulder is the foundation—look for bone-in, skin-on cuts with good marbling (about 4 pounds). Whole Foods and Costco typically carry quality options. Bone-in retains moisture during the long cook, while the skin renders into crisp crackling. For the herbs, fresh rosemary and thyme are non-negotiable for that aromatic depth. Avoid pre-cut herbs; they lose potency quickly.
No red wine? Substitute beef stock with a splash of balsamic vinegar. Out of Dijon? Whole grain mustard at equal measure works. For the stock, homemade is ideal, but low-sodium store-bought (like Swanson) prevents oversalting. The brown sugar can be swapped for maple syrup at a 1:1 ratio, though the caramelization differs slightly.
The roast can rest in its juices for up to 4 hours before serving—flavor only improves. Store leftovers in cooking liquid for 5 days refrigerated or 3 months frozen. Reheat gently to maintain that fall-apart texture (don’t microwave straight from cold).
Why You’ll Love This Recipe
- Set and Forget: I just season, pop it in the oven, and let the pork shoulder do its thing for hours.
- Garlic-Onion Magic: The slow roast turns those garlic cloves and yellow onion into a sweet, savory paste that soaks into every bite.
- Weekend to Weekday: I make a big batch Sunday and use it for tacos, sandwiches, or fried rice all week.
- Budget Hero: Pork shoulder is cheap, and this recipe turns it into something that tastes like it came from a fancy restaurant.
Step-by-Step Instructions for Slow Roasted Pork Shoulder
This method delivers consistently tender results with minimal active cooking time.
Step 1: Create the Aromatic Dry Rub
Pat the 4 lb Pork Shoulder dry with paper towels to ensure the rub adheres properly. In a small bowl, combine the 2 tbsp Kosher Salt, 1 tbsp Black Pepper, 2 tbsp Brown Sugar, and leaves from the 4 sprigs Fresh Rosemary and 6 sprigs Fresh Thyme.
Massage this mixture all over the pork, including in any crevices. I press firmly to create a thick, even crust. This step builds the foundation for deep flavor penetration during the long, slow roast that transforms tough connective tissue into gelatinous richness.
Step 2: Sear and Build the Braising Liquid
Heat the 2 tbsp Olive Oil in a large Dutch oven over medium-high heat. Sear the pork on all sides until deeply browned, about 4-5 minutes per side. This creates the Maillard reaction that adds complex flavor layers to the finished dish.
Remove the pork and add the 2 whole Yellow Onion (thickly sliced), 8 cloves Garlic Cloves, 2 tbsp Dijon Mustard, 0.25 cup Apple Cider Vinegar, 1 cup Chicken Stock, and 0.5 cup Red Wine. Stir to deglaze, scraping up all browned bits from the bottom of the pot.
Step 3: Slow Roast to Perfection
Return the pork to the Dutch oven, spooning some of the liquid over the top. Cover tightly and transfer to a preheated 300°F oven. Roast for 3-4 hours, turning the pork every 90 minutes to ensure even cooking and basting.
You’ll know it’s ready when the meat pulls apart effortlessly with a fork and reaches an internal temperature of 195-200°F. The collagen in the pork shoulder will have fully rendered, creating that signature fall-off-the-bone texture the recipe promises.
Step 4: Rest and Shred for Serving
Carefully transfer the pork to a cutting board and let it rest for 20-30 minutes. This allows the juices to redistribute throughout the meat rather than spilling out when you cut into it. The resting period also makes the pork easier to handle.
Using two forks, shred the pork directly in the Dutch oven with the braising liquid, mixing everything together. The meat should absorb the cooking liquid like a sponge, creating a moist, flavorful result. Serve immediately while hot, with some of the cooking liquid spooned over the top.
Pro Tips For Making Slow Roasted Pork Shoulder
- Dry the Pork: Pat the pork shoulder completely dry with paper towels before seasoning—this guarantees a better crust and helps the salt stick where it matters.
- Score the Fat: Use a sharp knife to cut 1/4-inch deep slits in the fat cap before roasting so the salt, garlic, and onion flavors penetrate deep into the meat.
- Low and Slow: Keep your oven at 275°F or lower and give it at least 6 hours—rushing this with higher heat leaves the meat tough and dry.
- Rest Before Pulling: Let the pork rest covered for 30 minutes after roasting; I learned this the hard way when my first few attempts lost all their juices the second I tried to shred them.
Pro Cooking Tips for Slow Roasted Pork Shoulder
Perfect Temperature Control
Maintain a steady 300°F in your oven throughout the cook. I use an oven thermometer to verify, as many home ovens run 10-15°F off. This consistent heat is crucial for breaking down collagen without drying out the meat.
Searing for Flavor
Don’t rush the sear—4-5 minutes per side on medium-high heat develops deep Maillard reactions. Use a heavy Dutch oven like Le Creuset for even heat distribution. The dark brown crust you see is pure flavor development. 🔥
Basting Technique
Every 90 minutes, turn the pork and baste with the cooking liquid. This keeps the surface moist and promotes even cooking. I use a turkey baster for precision, but a large spoon works too.
Internal Temp Matters
Remove the pork when it hits 195-200°F internally, not by time alone. A ThermoWorks MK4 instant-read thermometer is my go-to for accuracy. At this temp, the collagen melts into gelatin, creating that signature tenderness.
Resting is Key
Let the pork rest 20-30 minutes before shredding. This allows juices to redistribute. Skipping this step means dry meat—I learned this the hard way. Cover loosely with foil during resting. 💡
Shredding Pro Tip
Use two forks to pull the meat apart directly in the Dutch oven. The pork will absorb the cooking liquid as you work. Discard any large fat chunks, but keep some for flavor. This method creates the juiciest final product.
Nutrition Facts
Frequently Asked Questions
What’s the ideal internal temperature for doneness?
Aim for 195-200°F internally. This ensures the collagen has fully broken down, giving you that coveted fall-apart texture. Use a meat thermometer for accuracy.
Can I use a slow cooker instead of an oven?
Yes! Cook on low for 8-10 hours or high for 5-6 hours. Add 1/2 cup extra liquid since slow cookers don’t reduce like ovens do.
How long can I store leftovers?
Store in cooking liquid in the fridge for up to 5 days or freeze for 3 months. Reheat gently to maintain moisture and tenderness.
Why does my pork turn out dry?
Overcooking or insufficient liquid are common culprits. Always check the internal temp and baste regularly during cooking.

- BBQ Sausage Recipe Oven: Smoky Depth Without the Grill - September 28, 2026
- BBQ Chicken Bowl Recipe Rice: Smoky Sweetness Over Fluffy Grains - September 28, 2026
- Beef Cutlet Recipe Ideas: Crispy Breaded Patties With Bold Seasonings - September 28, 2026