
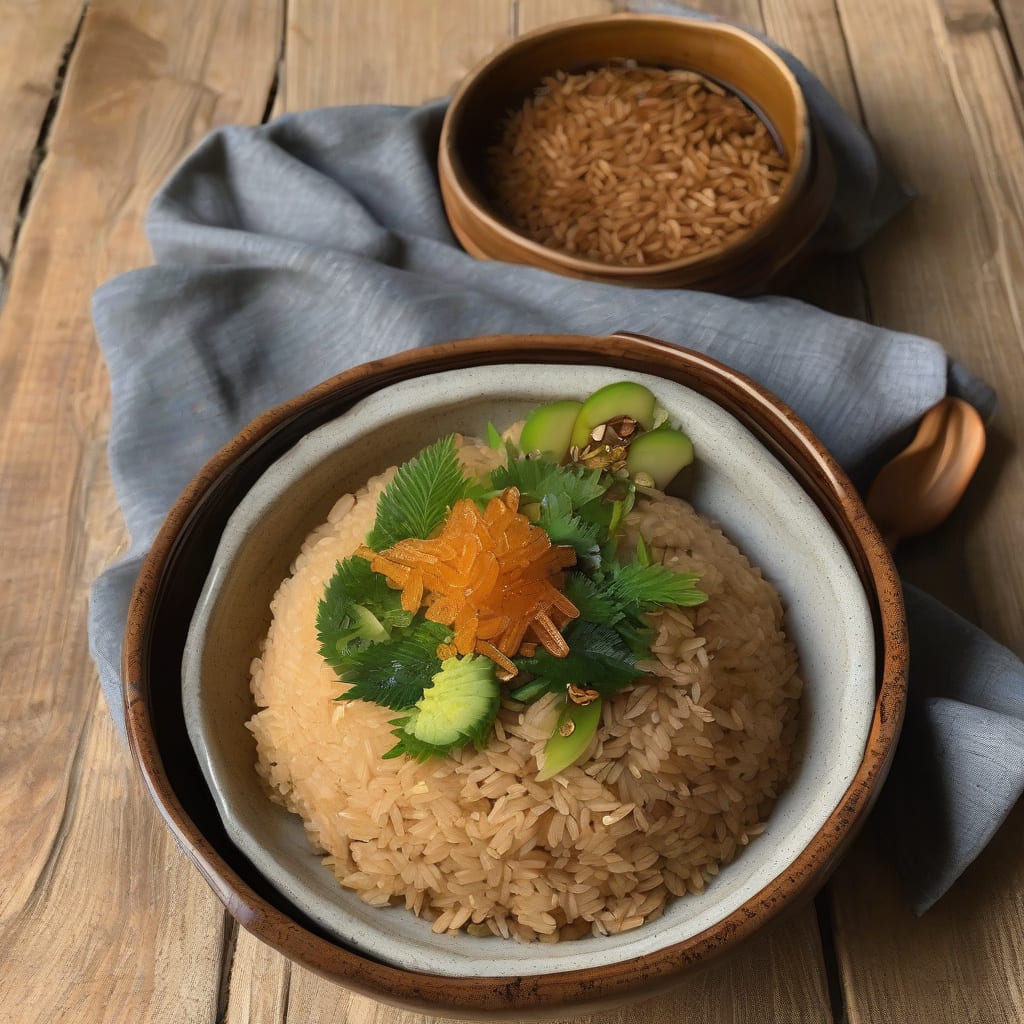
I’ve perfected my sticky brown rice recipe to deliver creamy perfection every time. The secret lies in using coconut milk and precise cooking techniques to achieve that signature stickiness.
This perfect side dish pairs beautifully with grilled proteins or vegetables, and can be ready in about 40 minutes. With simple ingredients and straightforward instructions, you’ll be enjoying this creamy coconut brown rice in no time.
Ingredients for Sticky Brown Rice
Simple ingredients come together to create creamy coconut brown rice perfection every time.
| Ingredient | Amount | Notes |
|---|---|---|
| Brown Rice 🍚 | 1 cup | Short-grain preferred for stickiness |
| Coconut Milk 🥛 | 1 ½ cups | Full-fat for creaminess |
| Water 💧 | 2 cups | Filtered for better taste |
| Coconut Oil 🫒 | 2 tbsp | Or other neutral oil |
| Salt 🧂 | ¼ tsp | Kosher or sea salt |
| Fresh Lime Juice 🍋 | 1 tbsp | Freshly squeezed |
| Grated Fresh Ginger 🌿 | 1 tsp | Peeled and grated |
| Garlic Cloves 🧄 | 2 cloves | Minced |
| Cilantro Leaves 🌿 | ¼ cup | Chopped, for garnish |
| Green Onions 🌿 | 2 whole | Thinly sliced, for garnish |
| Toasted Sesame Seeds 🥜 | 1 tbsp | For added crunch |
| Black Pepper 🌶️ | ¼ tsp | Freshly ground |
The coconut milk matters here. Full-fat gives that luxurious creaminess—don’t skimp. Most stores carry it near international or baking supplies. I like Thai Kitchen or Aroy-D brands for consistency. Fresh ginger is worth grating (microplane works great), but jarred is fine in a pinch.
No fresh lime? Bottled juice works, just check the ingredients. For extra richness, try adding a pat of butter (yes, butter!) at the end. Want more heat? Red pepper flakes add nice kick. The garlic can be adjusted—some like it strong, some like it subtle.
This keeps beautifully—4-5 days in the fridge, reheats like a charm. Freeze portions for 3 months if you need. When reheating, a splash of water helps restore that just-cooked texture. Fluff gently with a fork to separate grains.
❤️
Why You’ll Love This Recipe
- Quick Prep: I can throw this sticky brown rice recipe together in under 30 minutes, and it’s honestly a lifesaver on busy weeknights.
- Coconut Bliss: The combination of coconut milk and coconut oil gives this dish a ridiculously rich and creamy flavor that I just can’t get enough of.
- Meal Prep Master: This recipe makes a big batch, which is perfect for meal prep – I can use it throughout the week in different dishes, from simple bowls to complex curries.
- Leftover Luxury: I love that this sticky brown rice recipe makes great leftovers – it’s just as delicious the next day, and it saves me time and money by reducing food waste.
Step-by-Step Instructions for Sticky Brown Rice
Here’s the method that delivers perfectly creamy coconut sticky brown rice every time.
Step 1: Prepare the Aromatics and Rice
Start by heating the 2 tbsp coconut oil in a large saucepan over medium heat. Once it’s warm and shimmering, add the 2 cloves garlic cloves and 1 tsp grated fresh ginger. Cook for 1 minute until fragrant, stirring constantly to prevent burning. The aroma should be intense and inviting.
Next, add the 1 cup brown rice to the saucepan. Stir well to coat the rice with the oil and mix with the aromatics. You’ll notice the rice starts to toast slightly – that’s exactly what you want. Continue cooking for 2-3 minutes, stirring frequently, until the rice is lightly toasted and aromatic.
Step 2: Cook the Rice with Coconut Milk and Water
Pour in the 1.5 cups coconut milk and 2 cups water, then add the 0.25 tsp salt. Stir everything together, ensuring the rice is fully submerged. Bring the mixture to a gentle boil, then reduce the heat to low and cover the saucepan with a tight-fitting lid.
Simmer for 40-45 minutes until the liquid is fully absorbed and the rice is tender. You’ll know it’s done when the rice is creamy and has a slightly sticky texture. If you notice the liquid absorbing too quickly, you can add a splash more water. Conversely, if there’s too much liquid at the end, remove the lid and cook for a few more minutes to evaporate the excess.
Step 3: Finish with Fresh Flavors
Once the rice is cooked, remove it from the heat and let it rest, covered, for 5 minutes. This resting period allows the flavors to meld together and the rice to become even creamier. After resting, fluff the rice gently with a fork to separate the grains.
Stir in the 1 tbsp fresh lime juice to add a bright, citrusy note that balances the richness of the coconut milk. Taste and adjust the seasoning with additional salt or lime juice if needed. The rice should be perfectly seasoned and aromatic.
Step 4: Garnish and Serve
Transfer the sticky brown rice to a serving platter or individual bowls. Garnish with the 0.25 cup cilantro leaves and 2 whole green onions, thinly sliced. Sprinkle the 1 tbsp toasted sesame seeds over the top for added crunch and nutty flavor. Finally, grind a bit of 0.25 tsp black pepper over the dish to enhance the overall flavor profile.
Serve immediately while the rice is still warm and creamy. This dish pairs beautifully with grilled meats, vegetables, or as part of a larger Asian-inspired meal. The combination of textures and flavors will elevate any meal to a new level.
👨🍳
Pro Tips For Making Sticky Brown Rice
- Rinse That Rice: Rinsing your brown rice before cooking removes excess starch, which actually helps it absorb the coconut milk better later. I learned this the hard way—my early batches were always a bit too crunchy.
- Use Right Ratio: Stick to a 1:1 ratio of coconut milk to water for that perfect stickiness. Using too much water makes it mushy, while too little leaves it undercooked.
- Don’t Over-Stir: Resist the urge to stir the rice too much while it’s cooking. Let it sit for a bit between stirs to allow that lovely crust to form at the bottom.
- Rest Before Serving: Let your sticky brown rice rest for 5 minutes after cooking before fluffing it gently with a fork. This lets the coconut milk fully absorb and the rice to become even stickier.
Creative Variations of This Recipe
Southeast Asian Variations
Transform this basic recipe into a Thai-inspired dish by adding 1-2 tbsp Thai red curry paste with the garlic and ginger. The coconut milk will help mellow the heat while infusing deep flavor. For a Malaysian-style version, mix in 1 tbsp sambal oelek after cooking for a spicy kick. 🌶️
Indian-Style Flavor
Create an Indian-inspired variation by substituting coconut oil with ghee and adding 1 tsp ground cumin with the garlic and ginger. This adds a rich, aromatic flavor that pairs beautifully with curries. You can also mix in some toasted cashews or chopped cilantro for added texture and freshness.
Japanese-Inspired Modifications
For a Japanese twist, replace some of the coconut milk with dashi broth (a traditional Japanese cooking stock) to add umami depth. You can also add furikake seasoning after cooking for a savory, seaweed flavor. Mixing in some pickled ginger can add a nice tangy contrast to the creamy rice.
Spicy Variations
For those who like heat, add 1-2 tsp sriracha or chopped fresh chilies during cooking to infuse the rice with spice. You can also sprinkle some crushed red pepper flakes on top before serving for an extra kick. Adjust the heat level to your preference by adding more or less of these spicy ingredients.
Protein Pairings
This sticky brown rice pairs beautifully with various proteins. Try serving it with grilled chicken marinated in a mixture of soy sauce, honey, and ginger for a balanced meal. Alternatively, pan-seared salmon with a soy-ginger glaze complements the coconut flavors nicely. For a vegetarian option, roasted vegetables like carrots and bell peppers add a nice contrast.
Additional Toppings
Enhance your sticky brown rice with various toppings. Toasted coconut flakes add a nice crunch and extra coconut flavor. Fresh herbs like mint or basil can provide a refreshing contrast to the rich rice. You can also sprinkle some crushed peanuts or sesame seeds for added texture and nutty flavor. Experiment with different combinations to find your favorite. 🌿
Nutrition Facts
240kcal
Frequently Asked Questions
Can I use regular long-grain brown rice instead of short-grain?
While short-grain brown rice is preferred for its natural stickiness, you can use long-grain with some adjustments. Add 1/4 cup more coconut milk to achieve similar creaminess. The result will be slightly less sticky but still delicious.
How do I prevent the rice from becoming mushy?
To maintain perfect texture, use the correct 2:1 liquid-to-rice ratio and avoid overcooking. Letting it rest for 5 minutes after cooking helps the rice firm up. If you notice excess liquid, remove the lid for the last 5 minutes of cooking to evaporate it.
Can I make this recipe in a rice cooker?
Yes, you can adapt this recipe for a rice cooker. Use the same ingredient ratios and cook on the “white rice” setting. After cooking, let it rest for 5 minutes before fluffing. Some rice cookers have a “porridge” setting that works well too. The result will be slightly different but still creamy.
How long does leftover sticky brown rice keep?
Properly stored in an airtight container, leftover sticky brown rice keeps for 4-5 days in the refrigerator. When reheating, add a splash of water and microwave covered until steaming hot. You can also freeze portions for up to 3 months.

- BBQ Sausage Recipe Oven: Smoky Depth Without the Grill - September 28, 2026
- BBQ Chicken Bowl Recipe Rice: Smoky Sweetness Over Fluffy Grains - September 28, 2026
- Beef Cutlet Recipe Ideas: Crispy Breaded Patties With Bold Seasonings - September 28, 2026