
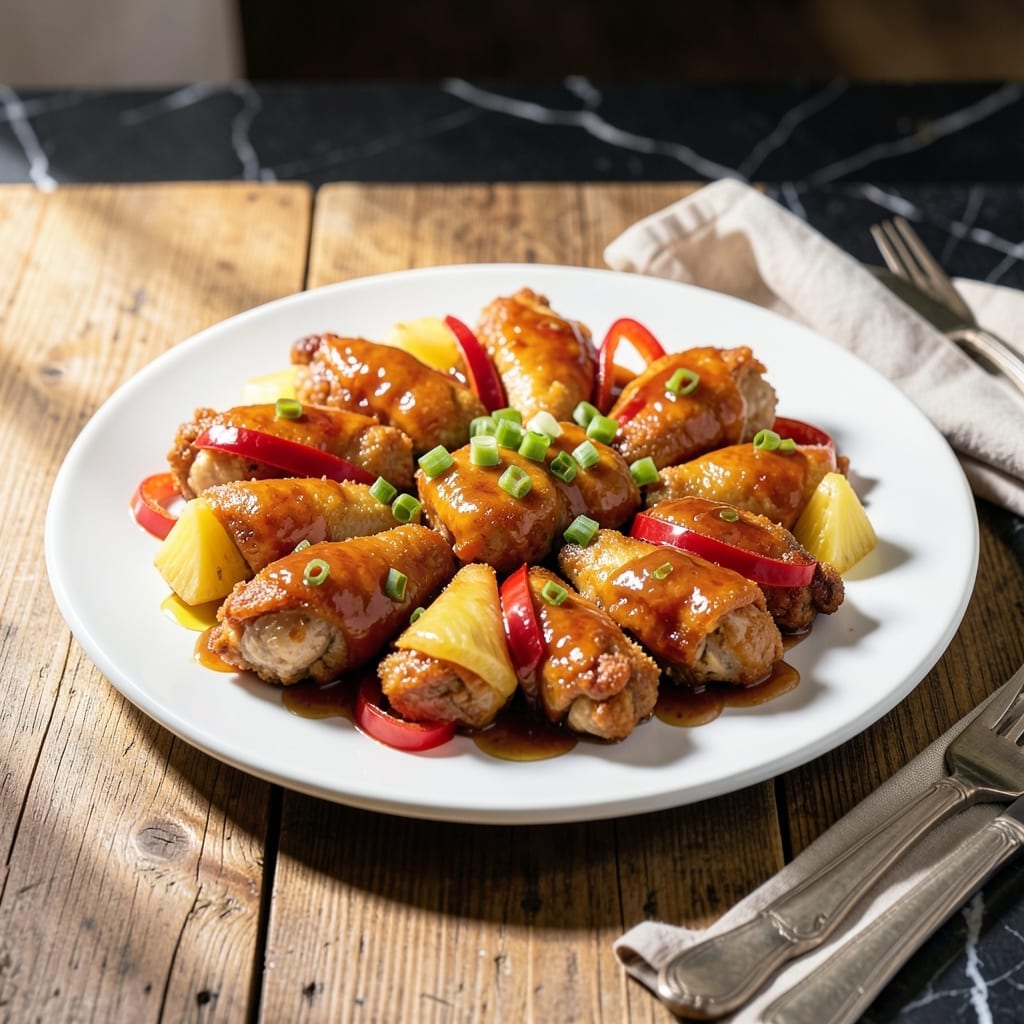
This sweet and sour chicken delivers the crispy texture and tangy glaze you crave from takeout, made right in your kitchen. The secret is a two-step frying method that guarantees shatteringly crispy bites every time.
I developed this recipe to capture the perfect balance of sweet pineapple and sharp vinegar that defines the classic dish. The sauce clings beautifully to each piece, creating that signature sticky coating.
The chicken stays juicy inside while developing a golden, crunchy exterior. Serve over steamed rice for a complete meal that’s sure to become a family favorite.
Ready in under an hour with simple ingredients from your pantry. Here’s how to make it perfectly.
Ingredients for Sweet and Sour Chicken
Pantry staples plus fresh veggies create that takeout magic at home.
| Ingredient | Amount | Notes |
|---|---|---|
| Boneless Chicken Thighs 🍗 | 1 ½ lb | Cut into 1-inch pieces |
| Cornstarch 🌾 | ½ cup | For crispy coating |
| All-Purpose Flour 🌾 | ½ cup | For dredging chicken |
| Large Eggs 🥚 | 2 whole | Beaten for batter |
| Pineapple Chunks 🍍 | 1 cup | Fresh or canned, drained |
| Red Bell Pepper 🌶️ | 1 whole | Cut into 1-inch pieces |
| White Vinegar 💧 | ½ cup | For tangy sauce base |
| Ketchup 🍅 | ½ cup | For sweetness and color |
| Brown Sugar 🍚 | ½ cup | Packed, for sauce |
| Soy Sauce 🫒 | 2 tbsp | Low-sodium preferred |
| Garlic Cloves 🧄 | 3 cloves | Minced for sauce |
| Fresh Ginger 🌿 | 1 tbsp | Grated for sauce |
| Vegetable Oil 🫒 | 2 cups | For frying, peanut oil works too |
| Green Onions 🧅 | ¼ cup | Sliced, for garnish |
| Salt 🧂 | 1 tsp | Kosher or sea salt |
The chicken is the star here. Boneless thighs stay juicier than breasts after frying—Costco or Sam’s Club are great for bulk buys. For the crispiest coating, use cornstarch (the kind in the baking aisle, not cornmeal). I’ve tried both and cornstarch wins every time. If you’re gluten-free, swap the all-purpose flour for rice flour—works just as well.
No pineapple chunks? Fresh pineapple cut into bite-sized pieces works great (just core it first). Out of ketchup? Tomato paste plus a touch of sugar gets you close. Want extra tang? Add a splash of rice vinegar. The brown sugar can be light or dark—dark gives a deeper molasses flavor. For a shortcut, grab pre-minced garlic and ginger from the store (I won’t tell).
Fry the chicken in batches so it cooks evenly—don’t crowd the pan. Leftovers keep in the fridge for 3-4 days, but the coating softens. Reheat in the oven at 375°F for 10-15 minutes to crisp it back up. Freezing? Not ideal, but doable for 1 month.
Why You’ll Love This Recipe
- One Pan Meal: I toss everything in a skillet—no extra bowls, no mess, just crispy chicken and juicy pineapple ready in one go.
- Sweet-Tangy Bite: That first crunch of cornstarch-coated chicken followed by the pineapple’s burst of sweetness? I make it just to chase that flavor.
- Feeds Everyone: Honestly, it’s my go-to for picky eaters and adults alike—chicken thighs stay tender, and the sauce is universally loved.
- Budget Stretcher: Boneless thighs are cheap, pineapple chunks work fresh or canned, and leftovers taste even better the next day.
Step-by-Step Instructions for Sweet and Sour Chicken
Here’s how I make perfectly crispy chicken with that tangy sauce you love.
Step 1: Prep and Coat the Chicken for Maximum Crispiness
Cut the 1.5 lb Boneless Chicken Thighs into 1-inch pieces and pat them dry with paper towels. I can’t stress this enough—dry chicken means crispy chicken. Season the pieces with the 1 tsp Salt.
In a bowl, whisk the 2 whole Large Eggs until smooth. In another bowl, combine the 0.5 cup Cornstarch and 0.5 cup All-Purpose Flour. Dip each piece of chicken into the egg, letting any excess drip off, then toss it in the cornstarch mixture. Press gently to adhere. This double coating creates that shatteringly crisp exterior.
Step 2: Fry the Chicken to Golden Perfection
Heat the 2 cups Vegetable Oil in a deep skillet or Dutch oven over medium-high heat until it reaches 350°F. Use a thermometer for accuracy—this is key. Working in batches to avoid crowding, carefully add the chicken pieces. Fry for 4-5 minutes until golden brown and crispy.
Turn the pieces halfway through cooking so they brown evenly. Transfer the cooked chicken to a paper towel-lined plate to drain. Real talk: if your oil isn’t hot enough, the chicken will absorb oil and turn greasy instead of crispy. Don’t rush this step.
Step 3: Make the Tangy Sweet and Sour Sauce
In a clean saucepan, combine the 0.5 cup White Vinegar, 0.5 cup Ketchup, 0.5 cup Brown Sugar, 2 tbsp Soy Sauce, minced 3 cloves Garlic Cloves, and grated 1 tbsp Fresh Ginger. I know it seems like a lot of vinegar, but trust me—it balances beautifully.
Bring to a simmer over medium heat, stirring until the brown sugar dissolves. Let it cook for 3-4 minutes until slightly thickened. The sauce should coat the back of a spoon but still be pourable. This is the moment that matters: don’t let it reduce too much or it’ll be cloying instead of vibrant.
Step 4: Combine Chicken and Sauce with Fresh Additions
Add the crispy chicken to the saucepan with the sauce. Toss gently to coat every piece evenly. Then stir in the 1 cup Pineapple Chunks and diced 1 whole Red Bell Pepper. Cook for just 1-2 minutes until everything is heated through and the peppers slightly soften.
The pineapple adds natural sweetness and a juicy contrast to the crispy chicken. Don’t overcook at this stage—you want the chicken to stay crispy, not soggy. The bell pepper should retain a slight bite for texture variation.
Step 5: Garnish and Serve Immediately
Transfer the chicken and sauce to a serving platter. Sprinkle with the 0.25 cup Green Onions for a fresh, oniony crunch. The bright green color pops against the rich sauce and makes the dish look as good as it tastes.
Serve immediately while the chicken is still crispy. The sauce will thicken slightly as it cools, creating that perfect glossy coating on each piece. This dish is best eaten fresh—the contrast of textures is what makes it special.
Pro Tips For Making Sweet And Sour Chicken
- Double fry the chicken: Fry the coated chicken once at 350°F until golden, rest it 2 minutes, then fry again at 400°F for 30 seconds—this guarantees a shatteringly crisp crust that holds up to the sauce.
- Cut thighs evenly: Slice boneless thighs into 1-inch pieces so they cook through in the same 4-5 minutes, no chewy centers or burnt edges.
- Use cold pineapple: If using canned pineapple chunks, drain and chill them first—the cold temp helps the sauce thicken faster and prevents the fruit from turning mushy.
- Skip the flour: Replace half the all-purpose flour with cornstarch in the dredge for a lighter, crispier coating that doesn’t turn gummy when tossed in the sweet and sour sauce.
Creative Variations of These Flavors
Spicy Thai Twist
Add 1-2 tsp sriracha to the sauce for heat, then stir in 1 tbsp fish sauce and 1 stalk lemongrass (bruised) while simmering. Remove lemongrass before combining with chicken. The fish sauce adds umami depth that pairs beautifully with the sweetness. 🌶️
Honey Garlic Version
Replace brown sugar with ½ cup honey and add 2 extra garlic cloves. The honey creates a glossier sauce with a more complex sweetness. I love this variation for its richer, more aromatic profile.
Vegetable Medley
Add 1 cup broccoli florets and ½ cup snow peas along with the bell pepper. Blanch the veggies for 2 minutes in boiling water first to keep them crisp-tender. This makes the dish more colorful and nutritious.
Baked Crispy Option
For a lighter take, toss coated chicken with 1 tbsp oil and bake at 400°F for 20-25 minutes, flipping halfway. The texture won’t be identical to frying but still delicious. Use a wire rack on the baking sheet for best air circulation.
Pineapple Upside-Down
Arrange pineapple slices on the serving platter first, then spoon chicken and sauce over them. The presentation looks stunning and the pineapple soaks up extra sauce. I learned this trick from a Hawaiian restaurant in Honolulu.
Gluten-Free Adaptation
Swap all-purpose flour for rice flour and use tamari instead of soy sauce. The rice flour creates an even crispier coating. This version tastes just as good as the original, with no compromise on texture.
Nutrition Facts
Frequently Asked Questions
Can I use chicken breasts instead of thighs?
Yes, but thighs stay juicier. If using breasts, cut into 1-inch pieces and reduce frying time by 1-2 minutes to prevent dryness. Brining for 30 minutes first helps too.
How do I make the sauce thicker?
Simmer it longer after adding chicken. For quicker results, mix 1 tbsp cornstarch with 1 tbsp water, then stir into the sauce. It thickens in under 1 minute.
Can I make this ahead of time?
Fry and sauce the chicken, then store separately in the fridge for up to 2 days. Reheat in a 350°F oven for 10-12 minutes to restore crispiness. Avoid freezing.
What can I substitute for pineapple?
Try peaches, mango, or bell peppers for sweetness. For tang, add 1/4 cup orange juice and 1 tbsp lime zest. Each gives a unique twist while keeping the balance.

- Beef Cutlet Recipe Ideas: Crispy Breaded Patties With Bold Seasonings - September 28, 2026
- Bluefin Tuna Recipe Ideas: Sushi-Grade Seared and Sesame-Crusted - September 28, 2026
- Blue Zone Recipe Ideas: Longevity-Boosting Meals for Vibrant Living - September 28, 2026