
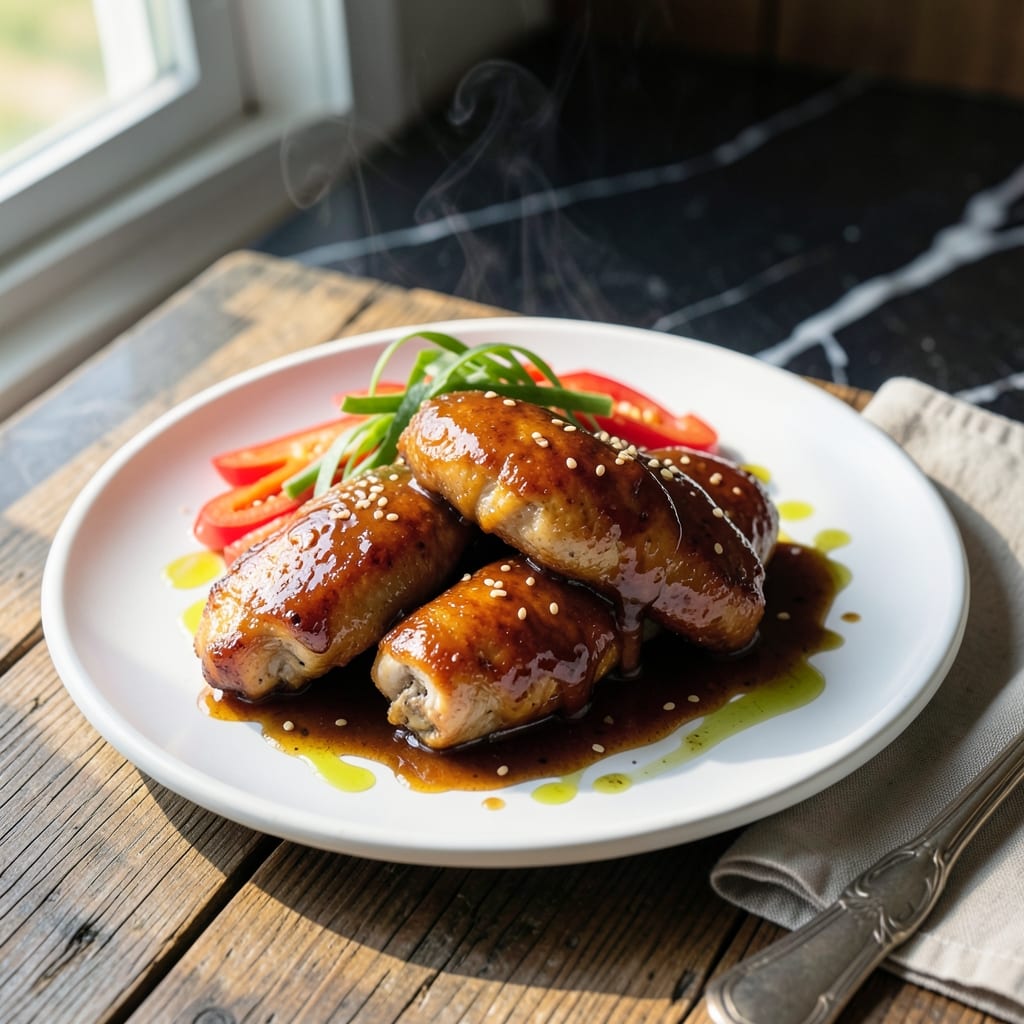
Teriyaki Chicken Recipe Easy: Sweet and Savory Weeknight Meal

Teriyaki Chicken Recipe Easy: Sweet and Savory Weeknight Meal

This teriyaki chicken delivers restaurant-quality flavor with minimal effort, perfect for busy weeknight dinners. I developed this method after years of testing to ensure consistent results every time.

The key is a simple homemade sauce that comes together in minutes while the chicken cooks. No bottled shortcuts here—just fresh ingredients creating that ideal balance of sweet and savory. The sauce thickens beautifully as it glazes the chicken.

You’ll end up with tender, juicy chicken pieces coated in a glossy, sticky teriyaki glaze that’s far superior to takeout. The best part? It’s ready in under 30 minutes with one pan to clean.

Serve over rice with steamed vegetables for a complete meal. Here’s how to make it.

👨‍🍳
Difficulty
Medium
🍗
Diet
Poultry
⏱️
Total Time
30 min
🔥
Calories
Med Cal

Ingredients for Teriyaki Chicken Recipe Easy

Weeknight dinner hero: pantry staples meet quick prep for restaurant-style teriyaki chicken at home.

Ingredient Amount Notes
Boneless Skinless Chicken Thighs 🍗 1 ½ lb Cut into bite-sized pieces
Soy Sauce 🫒 ½ cup Low-sodium preferred
Brown Sugar 🍚 ⅓ cup Packed, light or dark
Honey 🍯 ¼ cup For balanced sweetness
Rice Vinegar 💧 2 tbsp Unseasoned variety
Fresh Ginger 🌿 1 tbsp Minced or grated fine
Garlic Cloves 🧄 3 cloves Minced for sauce
Sesame Oil 🫒 1 tsp Toasted for depth
Cornstarch 🌾 1 tbsp For sauce thickening
Water 💧 ¼ cup Cold, for slurry
Vegetable Oil 🫒 2 tbsp For cooking chicken
Green Onions 🧅 3 whole Thinly sliced for garnish
Sesame Seeds 🌰 1 tsp Toasted, optional garnish

The chicken thighs are non-negotiable here—boneless, skinless for even cooking and maximum flavor absorption. Most supermarkets carry them pre-cut, but I grab mine from Costco for bulk savings. For soy sauce, Kikkoman low-sodium is my go-to; it lets you control the salt without sacrificing depth. The ginger and garlic should be fresh (those jars just don’t compare), and the brown sugar needs to be packed to get the right consistency in the glaze.

No honey? Maple syrup at a 1:1 ratio works in a pinch. Out of rice vinegar? Apple cider vinegar is a decent substitute, though the flavor profile shifts slightly. If you’re avoiding gluten, tamari replaces soy sauce perfectly. The cornstarch slurry is key for that glossy finish—don’t skip it. And if you want extra shine, add a splash of pineapple juice to the sauce (trust me on this one).

The sauce keeps 5-7 days in the fridge, though it’ll thicken as it cools. Reheat gently with a splash of water to loosen. Cooked chicken stays good for 3-4 days—store it separate from the sauce to prevent sogginess. Freeze the sauce alone for up to 3 months (the ginger may separate slightly, but it’s fine).

❤️

Why You’ll Love This Recipe

  • One Pan Wonder: I toss everything in a skillet and let the soy sauce and honey work their magic while I set the table.
  • Sweet-Savory Balance: The brown sugar and rice vinegar create that sticky, tangy glaze that makes the chicken irresistible.
  • Feeds a Crowd: I double the batch and pack leftovers for lunch—honestly, it tastes even better the next day.
  • Budget Friendly: Boneless thighs stay juicy and cost half what breasts do, so I make this weekly without guilt.

Step-by-Step Instructions for Sweet and Savory Teriyaki Chicken

This streamlined process delivers restaurant-quality results with minimal effort on busy evenings.

Step 1: Prepare the Chicken and Make the Sauce Base

Cut the 1.5 lb boneless skinless chicken thighs into bite-sized pieces and pat them dry with paper towels. This ensures even cooking and better browning. Meanwhile, combine the 0.5 cup soy sauce, 0.33 cup brown sugar, 0.25 cup honey, 2 tbsp rice vinegar, 1 tbsp fresh ginger, and 3 cloves garlic cloves in a bowl.

Stir until the brown sugar fully dissolves. I always use packed brown sugar for consistent sweetness. The raw sauce will look thin, but it will thicken beautifully as it reduces.

Step 2: Cook the Chicken Until Golden

Heat the 2 tbsp vegetable oil in a large skillet over medium-high heat. When the oil shimmers, add the chicken pieces in a single layer, working in batches if necessary. Cook undisturbed for 4-5 minutes until the bottoms develop a deep golden crust.

Flip the pieces and cook for another 3-4 minutes until cooked through. The chicken should reach 165°F internally and release easily from the pan. Transfer to a plate and set aside while you finish the sauce in the same skillet.

Step 3: Create the Teriyaki Glaze

Pour the sauce mixture into the hot skillet and bring to a boil. Reduce heat to medium and let it simmer for 3-4 minutes until it reduces by about one-third. In a small cup, whisk together the 1 tbsp cornstarch and 0.25 cup water until smooth.

Stir the cornstarch slurry into the simmering sauce and cook for another 1-2 minutes until it thickens to a glossy glaze that coats the back of a spoon. The color should deepen to a rich amber, and the sauce will cling to your spoon when lifted.

Step 4: Combine and Finish with Aromatics

Return the cooked chicken to the skillet and toss to coat evenly in the thickened sauce. Cook for an additional 1-2 minutes to allow the flavors to meld. The sauce should bubble gently and cling to each piece of chicken, creating that signature sticky glaze.

Remove from heat and stir in the 1 tsp sesame oil. This adds depth to the flavor profile. The oil will glisten on the surface, signaling it’s fully incorporated. The chicken should now be glossy and fragrant.

Step 5: Garnish and Serve Immediately

Transfer the teriyaki chicken to a serving platter. Sprinkle with the 3 whole green onions, thinly sliced, and the 1 tsp sesame seeds. The green onions should wilt slightly from the residual heat, releasing their fresh aroma.

The sesame seeds will toast lightly in the steam, adding a nutty crunch. Serve while the sauce is still glistening and warm. Each piece should be thoroughly coated, with the sauce pooling slightly at the bottom of the dish.

👨‍🍳

Pro Tips For Making Teriyaki Chicken Recipe Easy

  • Sear First, Sauce Later: Get a good crust on the chicken thighs in a hot pan before adding the teriyaki sauce—I learned this the hard way after ending up with soggy, steamed meat.
  • Pat Thighs Dry: Blot the chicken with a paper towel before cooking, or the sauce won’t stick properly and you’ll be left with a sad, pale finish.
  • Watch the Sugar: Brown sugar burns fast, so keep the heat at medium once the sauce goes in—after scorching a batch, I now hover over the pan like a hawk.
  • Use Cornstarch Slurry: Mix 1 tablespoon cornstarch with cold water and stir it into the sauce at the end for that glossy, restaurant-style glaze that actually clings to the chicken.

Creative Variations of This Dish

Spicy Sriracha Twist

Add 1 tbsp sriracha to the sauce mixture for a spicy kick that balances the sweetness perfectly. I love how this simple addition transforms the dish without overpowering the classic teriyaki flavor. The heat builds gradually with each bite. 🌶️

Pineapple Sweetness

Stir in ½ cup crushed pineapple with its juice when making the sauce. This Hawaiian-inspired variation adds natural sweetness and a pleasant texture contrast. The pineapple caramelizes slightly as the sauce reduces.

Honey Garlic Variation

Double the garlic to 6 cloves and replace brown sugar with ½ cup honey for a richer, more complex flavor. This version has become my go-to when I want something slightly different but equally delicious.

Sesame Crusted

Before cooking, coat the chicken pieces in 2 tbsp sesame seeds mixed with 1 tbsp cornstarch. This creates a nutty, crunchy exterior that contrasts beautifully with the tender meat inside. The seeds toast as the chicken cooks.

Vegetable Medley

Add 1 cup bell pepper strips and 1 cup broccoli florets when cooking the chicken. They soak up the teriyaki sauce wonderfully while adding color and nutrition. I often use this version for a complete one-pan meal.

Slow Cooker Method

Combine all sauce ingredients in your slow cooker, add chicken pieces, and cook on low for 4-5 hours. This hands-off approach yields incredibly tender chicken. Thicken the sauce at the end with a cornstarch slurry. 💡

Nutrition Facts

Servings 4
Amount Per Serving
Calories 480kcal
% Daily Value
Total Fat 18g23%
Saturated Fat 4g20%
Cholesterol 120mg40%
Sodium 980mg43%
Total Carbohydrate 45g16%
Dietary Fiber 1g4%
Sugars 38g
Protein 30g60%
Percent Daily Values are based on a 2,000 calorie diet. Your daily values may be higher or lower depending on your calorie needs.

Frequently Asked Questions

1

Can I use chicken breast instead of thighs?

Yes, but thighs stay juicier. If using breasts, reduce cooking time to 3-4 minutes per side to prevent dryness. The leaner meat cooks faster but lacks the richness of thighs.

2

How do I make the sauce thicker?

Simmer the sauce longer after adding the cornstarch slurry. For extra thickness, mix 1 tsp cornstarch with 1 tbsp water and stir in. Cook for 1-2 minutes more until glossy.

3

Can I make this ahead of time?

Cook chicken fully, then store sauce separately in the fridge for up to 3 days. Reheat sauce gently, add chicken, and toss to coat. This prevents soggy texture.

4

What if my sauce is too salty?

Balance it with 1 tsp honey or 1 tbsp brown sugar. A splash of rice vinegar can also help. Taste as you adjust—small additions make a big difference.

★★★★★4.7(2 reviews)
Allison Carter

Teriyaki Chicken Recipe Easy: Sweet and Savory Weeknight Meal

Teriyaki Chicken Recipe Easy: Sweet and Savory Weeknight Meal

This teriyaki chicken delivers restaurant-quality flavor with minimal effort, perfect for busy weeknight dinners. I developed this method after years of testing to ensure consistent results every time.

The key is a simple homemade sauce that comes together in minutes while the chicken cooks. No bottled shortcuts here—just fresh ingredients creating that ideal balance of sweet and savory. The sauce thickens beautifully as it glazes the chicken.

You’ll end up with tender, juicy chicken pieces coated in a glossy, sticky teriyaki glaze that’s far superior to takeout. The best part? It’s ready in under 30 minutes with one pan to clean.

Serve over rice with steamed vegetables for a complete meal. Here’s how to make it.

👨‍🍳
Difficulty
Medium
🍗
Diet
Poultry
⏱️
Total Time
30 min
🔥
Calories
Med Cal

Ingredients for Teriyaki Chicken Recipe Easy

Weeknight dinner hero: pantry staples meet quick prep for restaurant-style teriyaki chicken at home.

Ingredient Amount Notes
Boneless Skinless Chicken Thighs 🍗 1 ½ lb Cut into bite-sized pieces
Soy Sauce 🫒 ½ cup Low-sodium preferred
Brown Sugar 🍚 ⅓ cup Packed, light or dark
Honey 🍯 ¼ cup For balanced sweetness
Rice Vinegar 💧 2 tbsp Unseasoned variety
Fresh Ginger 🌿 1 tbsp Minced or grated fine
Garlic Cloves 🧄 3 cloves Minced for sauce
Sesame Oil 🫒 1 tsp Toasted for depth
Cornstarch 🌾 1 tbsp For sauce thickening
Water 💧 ¼ cup Cold, for slurry
Vegetable Oil 🫒 2 tbsp For cooking chicken
Green Onions 🧅 3 whole Thinly sliced for garnish
Sesame Seeds 🌰 1 tsp Toasted, optional garnish

The chicken thighs are non-negotiable here—boneless, skinless for even cooking and maximum flavor absorption. Most supermarkets carry them pre-cut, but I grab mine from Costco for bulk savings. For soy sauce, Kikkoman low-sodium is my go-to; it lets you control the salt without sacrificing depth. The ginger and garlic should be fresh (those jars just don’t compare), and the brown sugar needs to be packed to get the right consistency in the glaze.

No honey? Maple syrup at a 1:1 ratio works in a pinch. Out of rice vinegar? Apple cider vinegar is a decent substitute, though the flavor profile shifts slightly. If you’re avoiding gluten, tamari replaces soy sauce perfectly. The cornstarch slurry is key for that glossy finish—don’t skip it. And if you want extra shine, add a splash of pineapple juice to the sauce (trust me on this one).

The sauce keeps 5-7 days in the fridge, though it’ll thicken as it cools. Reheat gently with a splash of water to loosen. Cooked chicken stays good for 3-4 days—store it separate from the sauce to prevent sogginess. Freeze the sauce alone for up to 3 months (the ginger may separate slightly, but it’s fine).

❤️

Why You’ll Love This Recipe

  • One Pan Wonder: I toss everything in a skillet and let the soy sauce and honey work their magic while I set the table.
  • Sweet-Savory Balance: The brown sugar and rice vinegar create that sticky, tangy glaze that makes the chicken irresistible.
  • Feeds a Crowd: I double the batch and pack leftovers for lunch—honestly, it tastes even better the next day.
  • Budget Friendly: Boneless thighs stay juicy and cost half what breasts do, so I make this weekly without guilt.

Step-by-Step Instructions for Sweet and Savory Teriyaki Chicken

This streamlined process delivers restaurant-quality results with minimal effort on busy evenings.

Step 1: Prepare the Chicken and Make the Sauce Base

Cut the 1.5 lb boneless skinless chicken thighs into bite-sized pieces and pat them dry with paper towels. This ensures even cooking and better browning. Meanwhile, combine the 0.5 cup soy sauce, 0.33 cup brown sugar, 0.25 cup honey, 2 tbsp rice vinegar, 1 tbsp fresh ginger, and 3 cloves garlic cloves in a bowl.

Stir until the brown sugar fully dissolves. I always use packed brown sugar for consistent sweetness. The raw sauce will look thin, but it will thicken beautifully as it reduces.

Step 2: Cook the Chicken Until Golden

Heat the 2 tbsp vegetable oil in a large skillet over medium-high heat. When the oil shimmers, add the chicken pieces in a single layer, working in batches if necessary. Cook undisturbed for 4-5 minutes until the bottoms develop a deep golden crust.

Flip the pieces and cook for another 3-4 minutes until cooked through. The chicken should reach 165°F internally and release easily from the pan. Transfer to a plate and set aside while you finish the sauce in the same skillet.

Step 3: Create the Teriyaki Glaze

Pour the sauce mixture into the hot skillet and bring to a boil. Reduce heat to medium and let it simmer for 3-4 minutes until it reduces by about one-third. In a small cup, whisk together the 1 tbsp cornstarch and 0.25 cup water until smooth.

Stir the cornstarch slurry into the simmering sauce and cook for another 1-2 minutes until it thickens to a glossy glaze that coats the back of a spoon. The color should deepen to a rich amber, and the sauce will cling to your spoon when lifted.

Step 4: Combine and Finish with Aromatics

Return the cooked chicken to the skillet and toss to coat evenly in the thickened sauce. Cook for an additional 1-2 minutes to allow the flavors to meld. The sauce should bubble gently and cling to each piece of chicken, creating that signature sticky glaze.

Remove from heat and stir in the 1 tsp sesame oil. This adds depth to the flavor profile. The oil will glisten on the surface, signaling it’s fully incorporated. The chicken should now be glossy and fragrant.

Step 5: Garnish and Serve Immediately

Transfer the teriyaki chicken to a serving platter. Sprinkle with the 3 whole green onions, thinly sliced, and the 1 tsp sesame seeds. The green onions should wilt slightly from the residual heat, releasing their fresh aroma.

The sesame seeds will toast lightly in the steam, adding a nutty crunch. Serve while the sauce is still glistening and warm. Each piece should be thoroughly coated, with the sauce pooling slightly at the bottom of the dish.

👨‍🍳

Pro Tips For Making Teriyaki Chicken Recipe Easy

  • Sear First, Sauce Later: Get a good crust on the chicken thighs in a hot pan before adding the teriyaki sauce—I learned this the hard way after ending up with soggy, steamed meat.
  • Pat Thighs Dry: Blot the chicken with a paper towel before cooking, or the sauce won’t stick properly and you’ll be left with a sad, pale finish.
  • Watch the Sugar: Brown sugar burns fast, so keep the heat at medium once the sauce goes in—after scorching a batch, I now hover over the pan like a hawk.
  • Use Cornstarch Slurry: Mix 1 tablespoon cornstarch with cold water and stir it into the sauce at the end for that glossy, restaurant-style glaze that actually clings to the chicken.

Creative Variations of This Dish

Spicy Sriracha Twist

Add 1 tbsp sriracha to the sauce mixture for a spicy kick that balances the sweetness perfectly. I love how this simple addition transforms the dish without overpowering the classic teriyaki flavor. The heat builds gradually with each bite. 🌶️

Pineapple Sweetness

Stir in ½ cup crushed pineapple with its juice when making the sauce. This Hawaiian-inspired variation adds natural sweetness and a pleasant texture contrast. The pineapple caramelizes slightly as the sauce reduces.

Honey Garlic Variation

Double the garlic to 6 cloves and replace brown sugar with ½ cup honey for a richer, more complex flavor. This version has become my go-to when I want something slightly different but equally delicious.

Sesame Crusted

Before cooking, coat the chicken pieces in 2 tbsp sesame seeds mixed with 1 tbsp cornstarch. This creates a nutty, crunchy exterior that contrasts beautifully with the tender meat inside. The seeds toast as the chicken cooks.

Vegetable Medley

Add 1 cup bell pepper strips and 1 cup broccoli florets when cooking the chicken. They soak up the teriyaki sauce wonderfully while adding color and nutrition. I often use this version for a complete one-pan meal.

Slow Cooker Method

Combine all sauce ingredients in your slow cooker, add chicken pieces, and cook on low for 4-5 hours. This hands-off approach yields incredibly tender chicken. Thicken the sauce at the end with a cornstarch slurry. 💡

Nutrition Facts

Servings 4
Amount Per Serving
Calories 480kcal
% Daily Value
Total Fat 18g23%
Saturated Fat 4g20%
Cholesterol 120mg40%
Sodium 980mg43%
Total Carbohydrate 45g16%
Dietary Fiber 1g4%
Sugars 38g
Protein 30g60%
Percent Daily Values are based on a 2,000 calorie diet. Your daily values may be higher or lower depending on your calorie needs.

Frequently Asked Questions

1

Can I use chicken breast instead of thighs?

Yes, but thighs stay juicier. If using breasts, reduce cooking time to 3-4 minutes per side to prevent dryness. The leaner meat cooks faster but lacks the richness of thighs.

2

How do I make the sauce thicker?

Simmer the sauce longer after adding the cornstarch slurry. For extra thickness, mix 1 tsp cornstarch with 1 tbsp water and stir in. Cook for 1-2 minutes more until glossy.

3

Can I make this ahead of time?

Cook chicken fully, then store sauce separately in the fridge for up to 3 days. Reheat sauce gently, add chicken, and toss to coat. This prevents soggy texture.

4

What if my sauce is too salty?

Balance it with 1 tsp honey or 1 tbsp brown sugar. A splash of rice vinegar can also help. Taste as you adjust—small additions make a big difference.

★★★★★4.7(2 reviews)
Allison Carter