
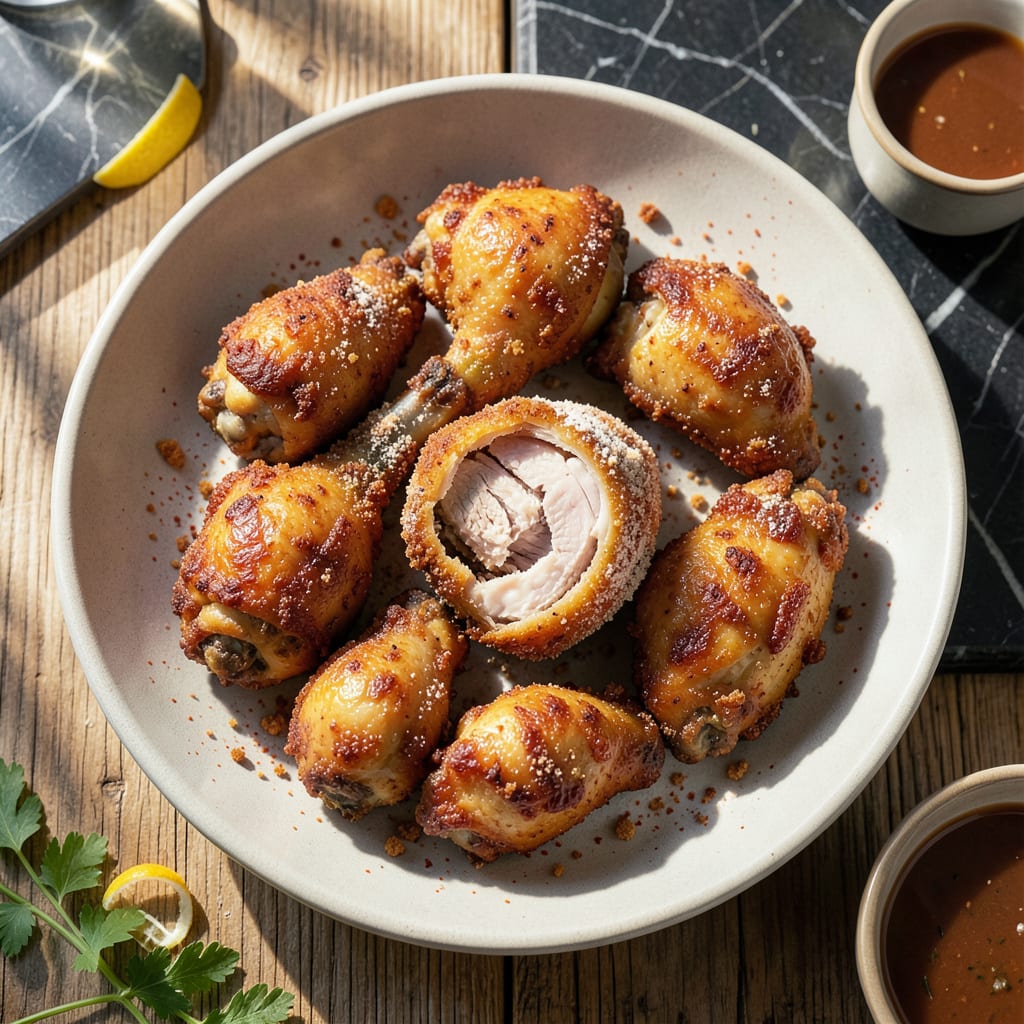
This recipe delivers the best crispy, golden fried chicken with a double-crisp coating that stays shatteringly crunchy. The secret lies in a well-seasoned flour blend and a two-step frying process.
Every bite offers juicy, tender meat inside with a perfectly seasoned crust outside. This method ensures consistent results, making it a reliable choice for any meal.
Ingredients for The Best Fried Chicken
Quality chicken and a well-seasoned blend create this double-crisp classic with shattering crunch.
| Ingredient | Amount | Notes |
|---|---|---|
| Chicken Thighs 🍗 | 3 lb | Bone-in, skin-on for crispiness |
| Chicken Drumsticks 🍗 | 1 lb | Bone-in, skin-on for crispiness |
| Buttermilk 🥛 | 2 cups | Full-fat for tenderness |
| All-Purpose Flour 🌾 | 3 cups | Divided for dredging and coating |
| Cornstarch 🌾 | ½ cup | For extra crispiness |
| Kosher Salt 🧂 | 1 tbsp | Diamond Crystal preferred |
| Black Pepper 🌶️ | 1 tbsp | Freshly ground for best flavor |
| Paprika 🌶️ | 1 tbsp | Sweet or smoked variety |
| Garlic Powder 🧄 | 1 tbsp | For depth in seasoning |
| Onion Powder 🧅 | 1 tbsp | Balances overall flavor profile |
| Cayenne Pepper 🔥 | ½ tsp | Adjust for heat preference |
| Vegetable Oil 🫒 | 4 cups | For deep frying, high smoke point |
| Large Eggs 🥚 | 2 whole | For binding the coating |
The chicken matters most here. Bone-in, skin-on thighs and drumsticks yield the juiciest, most flavorful results—boneless dries out too quickly. Source from local butchers or Whole Foods for superior quality and ethical sourcing. For the buttermilk, full-fat dairy delivers the tenderizing power you need for meat that practically falls off the bone.
No buttermilk? Whole milk with 1 tbsp lemon juice or vinegar per cup works in a pinch. Want extra crunch? Crushed cornflakes at one-third the flour amount adds texture. The cayenne can be reduced or omitted for kids, but the paprika is non-negotiable—it provides the signature color. Penzeys spices are exceptional if you want to elevate the blend further.
The raw chicken keeps 1-2 days in the fridge, but fry it fresh for best texture. Leftovers stay crispy when reheated in a 375°F oven for 10-15 minutes. The cooked chicken freezes well for up to 3 months—perfect for meal prep.
Why You’ll Love This Recipe
- One Bowl Wonder: I mix the buttermilk marinade and coating in the same bowl—no extra dishes, just crispy chicken.
- Buttermilk Magic: The tangy buttermilk soaks into the thighs and drumsticks overnight, making every bite juicy with that perfect crunch.
- Feeds a Hungry Table: I make a double batch for Sunday dinner, and honestly, it’s the only time the kids stay quiet at the table.
- Leftovers? No Problem: Cold from the fridge the next day? Still ridiculous. I pack pieces for lunch, and they vanish before noon.
Step-by-Step Instructions for The Best Fried Chicken
Master the technique for achieving a shatteringly crisp exterior and succulent interior with this method.
Step 1: Brine and Marinate for Maximum Tenderness
In a large bowl, whisk together the 2 cups Buttermilk with the 1 tbsp Kosher Salt, 1 tbsp Black Pepper, 1 tbsp Paprika, 1 tbsp Garlic Powder, 1 tbsp Onion Powder, and 0.5 tsp Cayenne Pepper until fully combined. This creates a flavorful buttermilk brine that tenderizes and seasons the chicken deeply.
Add the 3 lb Chicken Thighs and 1 lb Chicken Drumsticks to the buttermilk mixture, ensuring all pieces are fully submerged. Cover and refrigerate for at least 4 hours, or ideally overnight. The longer marinating time allows the buttermilk to break down proteins, resulting in exceptionally tender meat that stays juicy through frying.
Step 2: Prepare the Double-Crisp Coating
In a large, shallow dish, combine 2 cups All-Purpose Flour with the remaining 1 cup All-Purpose Flour and 0.5 cup Cornstarch. The cornstarch is the secret to an ultra-crisp coating that stays crunchy even after frying. Whisk until no lumps remain and the mixture looks uniform.
In a separate bowl, beat the 2 whole Large Eggs until frothy. This creates a binding layer that helps the flour mixture adhere to the chicken. The two-step dredging process—egg wash followed by flour mixture—builds a thicker, more durable crust that won’t fall off during frying.
Step 3: Dredge for Optimal Crispiness
Remove the chicken from the buttermilk marinade, allowing excess to drip off. Dip each piece into the beaten eggs, coating completely, then let any excess drip off for 10 seconds. This thin egg layer is crucial—too much will create a gummy coating rather than a crisp one.
Immediately dredge the egg-coated chicken in the flour-cornstarch mixture, pressing firmly to ensure an even, thick coating. Shake off excess and place on a wire rack. Let the dredged chicken rest for 10-15 minutes at room temperature. This resting period allows the coating to set, preventing it from sliding off during frying.
Step 4: Deep-Fry to Golden Perfection
In a heavy-bottomed pot or deep fryer, heat the 4 cups Vegetable Oil to 350°F. Use a deep-fry or candy thermometer for accuracy—oil temperature is critical. If it’s too low, the chicken will absorb oil and become greasy; too high, and the outside will burn before the inside cooks.
Carefully lower 3-4 pieces of chicken into the hot oil, being careful not to overcrowd the pot. Fry for 12-15 minutes for thighs and 10-12 minutes for drumsticks, turning occasionally, until the coating is deep golden brown and the internal temperature reaches 165°F. The oil temperature will drop when you add the chicken—maintain it between 325-340°F for even cooking.
Step 5: Drain and Rest for Final Crispness
Transfer the fried chicken to a wire rack set over a baking sheet or paper towels. The wire rack prevents steam from collecting underneath, which would make the coating soggy. Let the chicken drain and rest for 5-10 minutes before serving.
This resting period allows the juices to redistribute and the coating to set fully. The result should be audibly crisp when bitten into, with meat that pulls away from the bone easily. Serve immediately while hot and at peak crispness. The contrast between the crunchy exterior and tender, flavorful meat is what makes this the definitive fried chicken.
Pro Tips For Making The Best Fried Chicken
- Double Dredge: Dip the chicken in buttermilk, then flour, then buttermilk again, then flour once more—I learned this the hard way, but the extra layer guarantees a thicker, crispier crust.
- Rest the Chicken: After dredging, let the pieces sit on a wire rack for 10 minutes so the coating sets properly; skip this and you’ll lose half the breading in the oil.
- Heat the Oil Right: Use a thermometer and keep it at 350°F—any lower and the chicken absorbs grease, any higher and the outside burns before the inside cooks.
- Use Cornstarch: Swap ¼ cup of the flour for cornstarch in your dredge; it’s the thing that actually changes the outcome, giving that extra crunch without heaviness.
Dietary Considerations for This the best fried chicken
Gluten-Free Option
Swap the all-purpose flour for a 1:1 gluten-free flour blend like King Arthur’s. Add 1 tsp xanthan gum to help the coating adhere better. The texture will be slightly different but still delicious and crispy. 💪
Dairy-Free Adaptation
Replace buttermilk with unsweetened almond milk plus 1 tbsp vinegar per cup. Use flax eggs (1 tbsp ground flaxseed + 3 tbsp water per egg) for binding. The flavor remains rich, and the crispiness stays intact.
Lower-Calorie Version
Use an air fryer at 375°F for 20-25 minutes, flipping halfway. Spray with avocado oil for extra crispiness. This cuts calories significantly while keeping the crunch and flavor.
Keto-Friendly Twist
Replace flour with crushed pork rinds and almond flour (equal parts). Add 1 tsp baking powder for lift. Fry in avocado oil at 350°F until golden. The result is crispy, flavorful, and low-carb.
Nut Allergy Note
For nut-free versions, avoid almond flour and use oat flour or sunflower seed flour. Ensure all ingredients are processed in nut-free facilities. Safety first without sacrificing taste.
Less Sodium Option
Reduce kosher salt by half and use low-sodium buttermilk. Boost flavor with 1 tsp lemon zest and 1 tbsp fresh herbs like thyme. You’ll still get a flavorful, crispy result. ✨
Nutrition Facts
Frequently Asked Questions
What’s the secret to extra-crispy coating?
The cornstarch in the flour blend creates an ultra-crisp texture. Also, the two-step dredging process and resting time before frying help the coating adhere and crisp perfectly.
Can I use boneless chicken?
Bone-in, skin-on pieces are recommended for juiciness and flavor. Boneless tends to dry out quickly during frying, but if you must, reduce frying time to 8-10 minutes.
How do I keep it crispy after frying?
Drain on a wire rack, not paper towels, to prevent steam buildup. Keep warm in a 200°F oven until serving to maintain crispiness.
Can I bake this instead of frying?
Use an oven at 400°F for 30-35 minutes, flipping halfway. Spray with oil for extra crunch, though texture will differ from deep-frying.

- BBQ Sausage Recipe Oven: Smoky Depth Without the Grill - September 28, 2026
- BBQ Chicken Bowl Recipe Rice: Smoky Sweetness Over Fluffy Grains - September 28, 2026
- Beef Cutlet Recipe Ideas: Crispy Breaded Patties With Bold Seasonings - September 28, 2026