
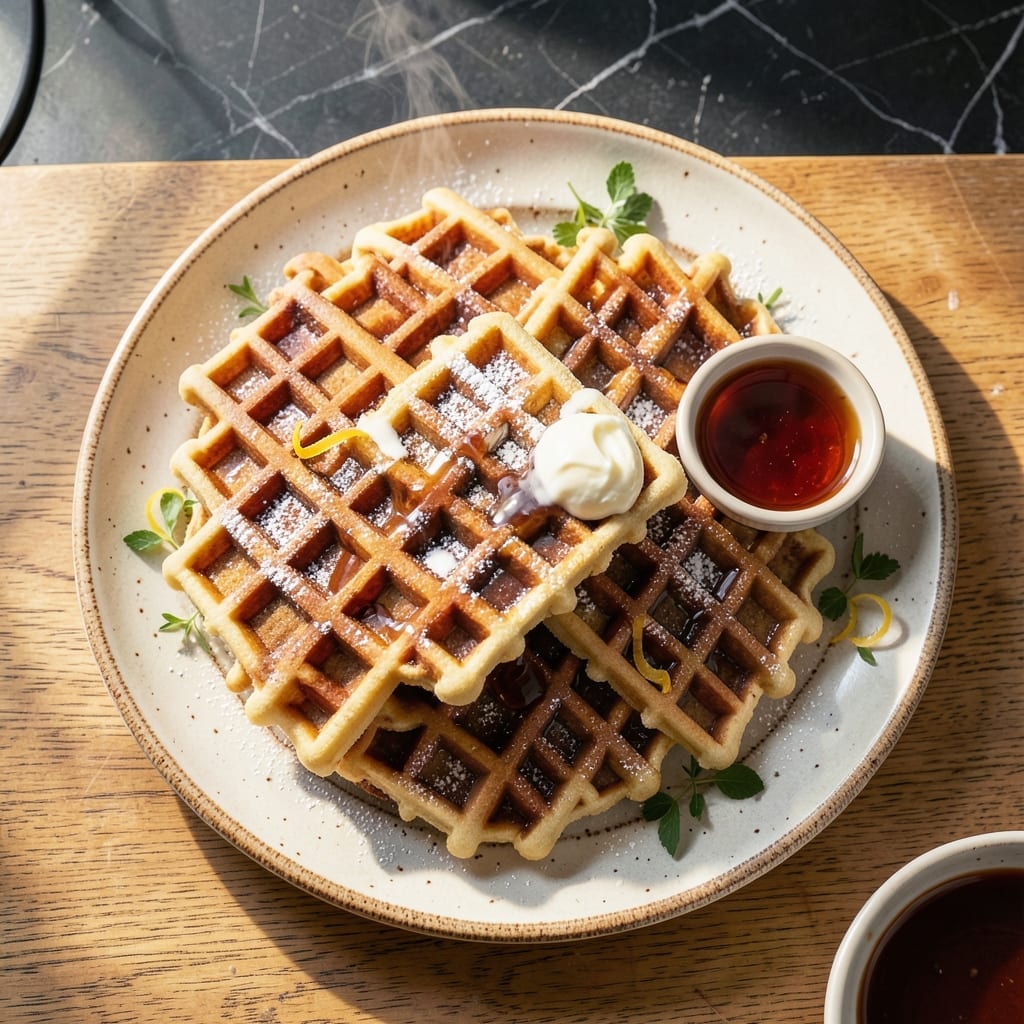
Achieving the perfect thin crispy waffle requires precision in both batter and cooking technique. This recipe delivers golden edges and airy texture through a carefully balanced formula.
The batter combines simple ingredients with a touch of cornstarch, which helps create that signature crispness. Cooking at the right temperature ensures even browning without burning the delicate edges.
You’ll end up with waffles that are shatteringly crisp on the outside while maintaining light, airy pockets inside. The contrast between textures makes each bite satisfying.
Serve warm with fresh berries and syrup, or enjoy plain to fully appreciate the perfect crunch. This method consistently produces professional-quality results.
Ingredients for Thin Crispy Waffle
Precision ingredients create that signature golden crispness and airy texture everyone loves.
| Ingredient | Amount | Notes |
|---|---|---|
| All-Purpose Flour 🌾 | 2 cups | Sifted for even texture |
| Cornstarch 🌽 | ¼ cup | Key for crispiness |
| Granulated Sugar 🍚 | 2 tbsp | Balances batter sweetness |
| Baking Powder 🧂 | 2 tsp | Ensures light texture |
| Salt 🧂 | ½ tsp | Enhances all flavors |
| Large Eggs 🥚 | 2 whole | Room temperature preferred |
| Whole Milk 🥛 | 1 ¾ cups | Full-fat for richness |
| Unsalted Butter 🧈 | ½ cup | Melted and cooled |
| Vanilla Extract 🌿 | 1 tsp | Pure for best flavor |
| Vegetable Oil 🫒 | 2 tbsp | For greasing waffle iron |
The batter’s foundation is critical. King Arthur Flour is the gold standard for all-purpose, and Clabber Girl baking powder ensures consistent rise. Cornstarch is non-negotiable for that shatteringly crisp exterior—look for it in the baking aisle at any major supermarket. The butter must be unsalted; salted can throw off the balance since we’re controlling the seasoning precisely.
No whole milk? 2% works in a pinch (but full-fat is ideal). Eggs at room temperature incorporate better—set them out 30 minutes before. Vanilla extract should be pure, not imitation. For a richer flavor, brown sugar can replace granulated, though the texture will be slightly different. If you’re out of cornstarch, instant mashed potato flakes (1:1) can sub, but the crispness won’t be as pronounced.
Batter keeps in the fridge for 12 hours—whisk before using. Cooked waffles stay crisp if kept on a wire rack in a 200°F oven for up to 30 minutes. Freeze extras between parchment paper; reheat in a toaster for that fresh-made crunch.
Why You’ll Love This Recipe
- The cornstarch is the secret: it gives each waffle that paper-thin, crackling edge with a light, airy center.
- Mix and Pour: I can have the batter ready in 5 minutes—just whisk the flour, cornstarch, and sugar with wet ingredients, no resting required.
- Crispy Perfection: The cornstarch is the secret: it gives each waffle that paper-thin, crackling edge with a light, airy center.
- Breakfast to Dessert: Honestly, I serve these with syrup at dawn, then repurpose leftovers as ice cream sandwiches at night.
Step-by-Step Instructions for Thin Crispy Waffles
Master the technique for achieving perfectly thin, crispy waffles with golden edges and airy interiors.
Step 1: Combine Dry Ingredients for Structure
In a large mixing bowl, whisk together the 2 cups All-Purpose Flour, 0.25 cup Cornstarch, 2 tbsp Granulated Sugar, 2 tsp Baking Powder, and 0.5 tsp Salt until fully incorporated. I always sift these ingredients first to eliminate lumps and ensure even distribution throughout the batter.
The cornstarch is the secret to crispiness—it creates a delicate structure that fries up perfectly in the waffle iron. Make sure there are no visible streaks of flour remaining, as this could lead to uneven texture in your finished waffles.
Step 2: Incorporate Wet Ingredients Gently
In a separate bowl, beat the 2 whole Large Eggs lightly, then whisk in the 1.75 cups Whole Milk, 0.5 cup Unsalted Butter (melted and cooled), and 1 tsp Vanilla Extract. The butter should be warm but not hot to avoid cooking the eggs.
Pour the wet mixture into the dry ingredients and stir just until combined. It’s crucial not to overmix—the batter should have small lumps. Overmixing develops gluten, which would make your waffles tough rather than tender and crisp.
Step 3: Preheat and Grease the Waffle Iron
Plug in your waffle iron and preheat it to its highest setting. This is essential for achieving that coveted crispy exterior. While it heats, use a pastry brush to apply 2 tbsp Vegetable Oil to both the top and bottom plates, ensuring complete coverage.
The iron is ready when a drop of water sizzles and evaporates immediately upon contact. This high heat creates the steam that makes the waffles light while the oil ensures they release easily with a crisp, golden crust.
Step 4: Cook to Golden Perfection
Pour about ½ cup of batter onto the center of the preheated waffle iron (adjust based on your iron’s size). Close the lid and cook for 3-4 minutes or until the waffle is deep golden brown and crisp.
Resist the urge to open the iron early—this can tear the waffle and prevent proper crisping. You’ll know it’s ready when the steam stops escaping and the waffle releases easily. For extra crispiness, transfer to a wire rack instead of stacking, which would trap steam and make them soggy.
Pro Tips For Making Thin Crispy Waffle
- Heat That Iron: I learned this the hard way—preheat your waffle iron for at least 10 minutes on the highest setting. Thin waffles need that immediate sizzle to crisp up properly.
- Rest the Batter: After mixing, let the batter sit for 15 minutes. This gives the cornstarch time to absorb liquid, which makes the waffles extra crispy.
- Skip Overmixing: Stir just until the dry ingredients disappear—small lumps are fine. Overworking the batter develops gluten, which turns thin waffles tough instead of tender.
- Use Cold Liquid: Sounds weird, but it works: replace some water with ice-cold club soda. The bubbles create tiny air pockets for crunch, and the cold helps the batter hit the hot iron with maximum sizzle.
Common Mistakes When Making This Recipe
Overmixing the Batter
Stir just until the flour is incorporated—small lumps are fine. Overmixing develops gluten, which creates tough, chewy waffles instead of tender, crisp ones. I use a wooden spoon and stop as soon as the batter comes together.
Skipping the Rest
Let the batter rest for 10 minutes after mixing. This allows the flour to hydrate fully and the baking powder to activate. You’ll notice the batter thickens slightly, which helps create that perfect crisp exterior.
Insufficient Preheating
Your waffle iron must be fully preheated—this is non-negotiable for crispiness. Test by flicking water droplets on the surface; they should sizzle and evaporate instantly. A cold iron produces pale, soggy waffles. 🔥
Using Cold Ingredients
Ensure eggs and milk are at room temperature. Cold ingredients can cause the butter to clump, leading to uneven texture. I set mine out 30 minutes before mixing for consistent results.
Overcrowding the Iron
Pour just enough batter to cover the grids without overflowing. Too much batter creates thick waffles that don’t crisp properly. For my Belgian-style iron, ½ cup per waffle is perfect.
Stacking While Warm
Never stack waffles directly on top of each other. Trapped steam makes them soggy. Instead, place them on a wire rack in a 200°F oven to stay crisp while finishing the batch.
Nutrition Facts
Frequently Asked Questions
Why does cornstarch make waffles crispier?
Cornstarch absorbs moisture and creates a delicate structure that fries up extra crisp in the iron. It also prevents gluten overdevelopment, keeping the texture light rather than chewy.
Can I make the batter the night before?
Yes! Mix the batter, cover, and refrigerate for up to 12 hours. Stir before using, as it will thicken slightly. The resting time actually improves the texture.
How do I keep waffles crisp while making a batch?
Place finished waffles on a wire rack in a 200°F oven. This allows airflow so steam escapes, preventing sogginess. Never stack them directly on a plate.
What if my waffles aren’t crispy enough?
Ensure your iron is fully preheated and you’re using enough fat in the batter. Also, cook until deep golden brown—lighter waffles won’t be as crisp.

- Bread Recipe KitchenAid Mixer: Foolproof Loaf With Perfect Rise - September 28, 2026
- BBQ Oysters Recipe Grill: Smoky Garlic Butter Bliss - September 28, 2026
- Crock Pot Mac and Cheese Recipe Paula Deen: Ultra Creamy Southern-Style Comfort - September 28, 2026