
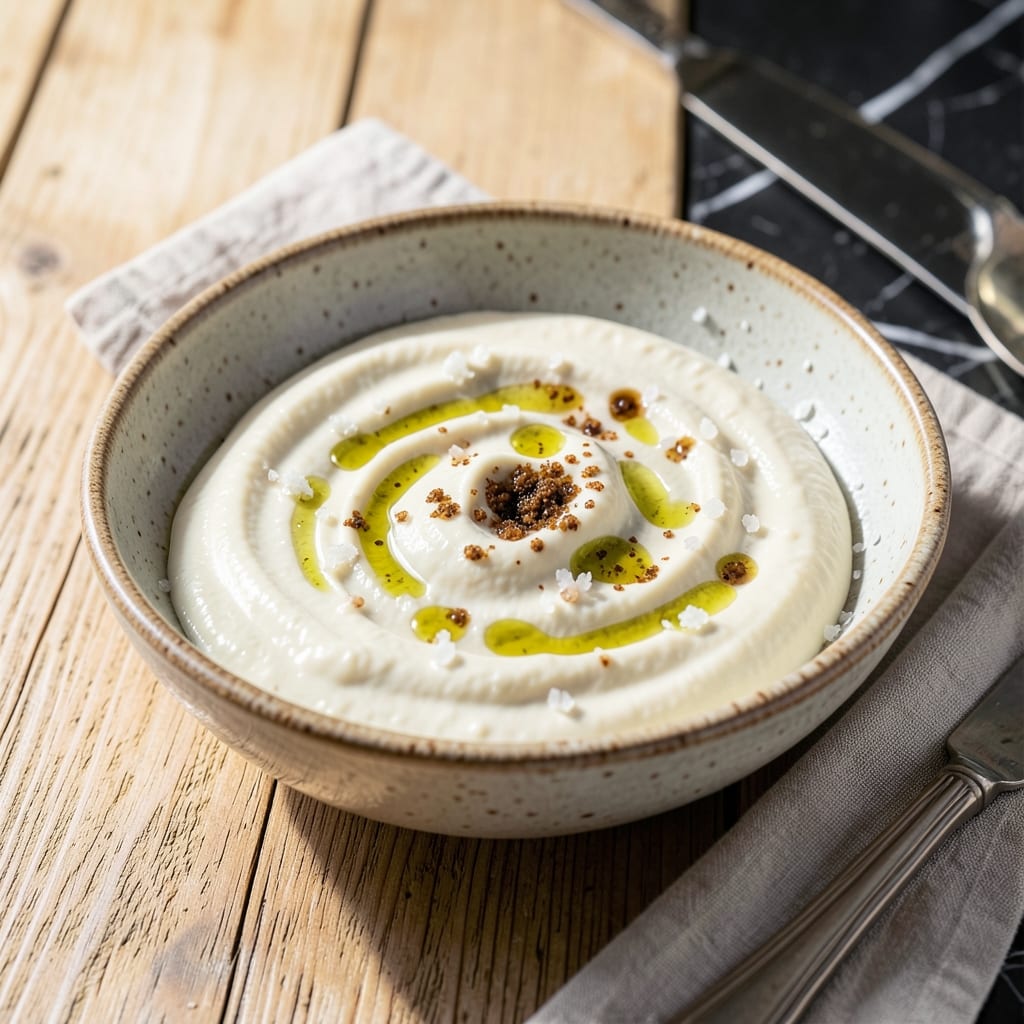
Traditional aioli doesn’t need eggs to achieve its signature creamy texture and bold garlic flavor. This classic emulsion relies on patience and technique to transform simple ingredients into a rich, velvety sauce.
Using only garlic, oil, and a touch of acid, this method stays true to its Mediterranean roots. The slow incorporation of oil creates a stable, smooth emulsion that clings perfectly to bread, vegetables, or seafood.
What sets this version apart is its authenticity—no shortcuts, just the time-honored process that’s been perfected for generations. The result is a sauce with bold garlic flavor and a luxurious consistency.
Perfect for dipping, spreading, or drizzling, this aioli proves that traditional methods often yield the best results.
Ingredients for Traditional Aioli Recipe No Eggs
Eight ingredients transform into a velvety, garlic-forward emulsion without a single yolk.
| Ingredient | Amount | Notes |
|---|---|---|
| Garlic Cloves 🧄 | 6 cloves | Freshly peeled, minced to paste |
| Neutral-Flavored Oil 🫒 | 1 ½ cups | Light olive or avocado oil |
| Extra-Virgin Olive Oil 🫒 | ¼ cup | For finishing and flavor |
| Lemon Juice 🍋 | 2 tbsp | Freshly squeezed preferred |
| Dijon Mustard 🟡 | 1 tsp | Optional emulsifier aid |
| Sea Salt 🧂 | ½ tsp | Fine grain for even distribution |
| White Wine Vinegar 💧 | 1 tsp | Or substitute apple cider vinegar |
| Water 💧 | 2 tbsp | Room temperature for emulsion |
The garlic is non-negotiable here. Use fresh, plump cloves—old or sprouted ones taste bitter. Spanish or French aioli traditions call for a mortar and pestle to crush the garlic into a paste, which helps stabilize the emulsion. For oil, light olive or avocado oil works best for the base; save the bold extra-virgin for finishing. Whole Foods and Trader Joe’s carry good neutral oils if your pantry is lacking.
No mortar and pestle? A food processor or immersion blender works too, though the texture won’t be quite as smooth. Skip the Dijon if you’re purist about tradition, but it helps prevent breaking. Apple cider vinegar can replace white wine vinegar at a 1:1 ratio. If your emulsion separates, a splash of warm water often brings it back—don’t rush the oil (that’s the golden rule).
Store in an airtight jar in the fridge for up to 1 week. The flavor mellows and deepens over 24 hours, so make it a day ahead if possible. If it thickens too much after chilling, thin with a little warm water. Always use clean, dry utensils to avoid contamination.
Why You’ll Love This Recipe
- I’ll be real: it keeps in the fridge for days, so I make a big batch and use it all week.
- No-Fuss Whisking: Honestly, I just dump everything in a bowl and whisk—no eggs, no fuss, just garlic, oil, and a squeeze of lemon.
- Garlic Lovers’ Dream: That punch of fresh garlic with the sharp Dijon mustard? Ridiculously good on almost anything.
- Last-Minute Saver: Between us, it’s my go-to when I need a quick sauce for sandwiches, roasted veggies, or even fries.
Step-by-Step Instructions for Traditional Aioli
Master this classic emulsion technique for a rich, creamy aioli without eggs.
Step 1: Prepare the Garlic Base
Peel and mince the 6 cloves garlic cloves to a fine paste using a chef’s knife. The finer the texture, the more evenly it will incorporate into the emulsion. I use the flat side of the knife to crush and smear the garlic repeatedly until it forms a smooth paste.
Transfer the garlic paste to a mortar and pestle or a small mixing bowl. Add the 0.5 tsp sea salt and crush together for 30 seconds to create a uniform paste. This step is crucial as it breaks down the garlic fibers and ensures a smooth final texture.
Step 2: Incorporate Acidic Elements
Add the 2 tbsp lemon juice, 1 tsp white wine vinegar, and 1 tsp Dijon mustard to the garlic paste. The acids help stabilize the emulsion while the mustard acts as an emulsifier, ensuring the oil and water-based ingredients bind properly.
Whisk these ingredients together until fully combined. The mixture should look slightly creamy and have a strong garlic aroma. Let it sit for 2 minutes to allow the flavors to meld before introducing the oils.
Step 3: Begin the Emulsion with Neutral Oil
Start adding the 1.5 cups neutral-flavored oil drop by drop while whisking constantly. This slow incorporation is critical for building a stable emulsion. After about ¼ cup of oil is added, the mixture will begin to thicken and take on a mayonnaise-like consistency.
Continue adding the oil in a thin stream, still whisking vigorously. If the mixture becomes too thick, add 1 tsp water and whisk to loosen before proceeding. The emulsion should maintain a smooth, glossy appearance throughout this process.
Step 4: Finish with Extra-Virgin Olive Oil
Once all the neutral oil is incorporated, begin adding the 0.25 cup extra-virgin olive oil in the same slow, steady stream. This oil adds depth of flavor to the aioli. The emulsion should now be thick and creamy, with a pale ivory color.
After adding the olive oil, whisk in the remaining 1 tbsp water to achieve the perfect consistency. The finished aioli should cling to a spoon but still be pourable. Taste and adjust seasoning if needed, though the initial salt should be sufficient.
Step 5: Rest and Serve
Transfer the aioli to a clean jar or bowl and let it rest at room temperature for 10 minutes. This allows the flavors to fully develop and the emulsion to set completely.
Serve immediately or store in the refrigerator for up to 3 days. The aioli will thicken slightly when chilled. Before serving, give it a quick whisk to restore its creamy texture. Use it as a dip, spread, or sauce for your favorite dishes.
Pro Tips For Making Traditional Aioli Recipe No Eggs
- Start with Room-Temp Garlic: Pull your garlic cloves out 30 minutes before making the aioli—cold garlic doesn’t release its oils as well, and I learned this the hard way after wondering why my first batch tasted harsh.
- Drizzle Slowly at First: Add the oil drop by drop for the first minute, especially with no eggs to help emulsify. After burning through a cup of oil on a broken aioli, I finally realized patience here is non-negotiable.
- Skip the Cheap Oil: That bargain neutral oil can taste bitter or off. I was skeptical until I tried a mid-range sunflower oil—sounds small, but it actually changes the outcome.
- Use a Mortar First: Crush the garlic with a pinch of salt in a mortar before mixing with other ingredients. This isn’t the prettiest method, but it breaks down the garlic fibers better than any shortcut I’ve tried.
Make-Ahead Tips for This traditional aioli recipe no eggs
Overnight Flavor Boost
I always make this aioli at least 24 hours ahead. The garlic mellows and the flavors deepen overnight, transforming sharp raw notes into a complex, rounded taste. A small glass jar with a tight lid works perfectly for storage.
Emulsion Stability
If your aioli thickens too much in the fridge, don’t worry. Just whisk in 1-2 tbsp of warm water to restore the creamy texture. The emulsion is stable for up to 1 week refrigerated. 💡
Prep the Garlic Early
You can mince and paste the garlic up to 12 hours ahead and store it covered in the fridge. This saves time on cooking day. Just bring it to room temperature before starting the emulsion.
Oil Temperature Tip
Use room temperature oils for the best results. Cold oil can cause the emulsion to break. I keep my light olive oil and extra-virgin olive oil on the counter for 1 hour before starting.
Batch Making
This recipe doubles easily for parties. Use a food processor for larger batches, adding oil in a very slow stream. Store in multiple small jars for easy sharing. The flavor holds beautifully for 5-7 days. 🔥
Last-Minute Adjustments
If your aioli separates after storage, don’t discard it. Place the jar in warm water for 5 minutes, then whisk vigorously. It almost always comes back together perfectly.
Nutrition Facts
Frequently Asked Questions
Can I use a blender instead of whisking by hand?
Yes, but pulse carefully to avoid breaking the emulsion. A food processor works best for larger batches, adding oil in a thin stream. Hand-whisking gives you more control for beginners.
Why did my aioli turn out bitter?
This usually means the garlic was old or sprouted. Always use fresh, plump cloves for the best flavor. Adding oil too quickly can also cause separation and bitterness.
How can I make it thicker?
Continue whisking while adding more oil in a very slow stream. If it’s too thick, thin with 1 tsp warm water at a time. The perfect consistency should cling to a spoon.

- Beefaroni Recipe With Tomato Soup: One-Pot Nostalgic Comfort - September 28, 2026
- Bread Recipe KitchenAid Mixer: Foolproof Loaf With Perfect Rise - September 28, 2026
- BBQ Oysters Recipe Grill: Smoky Garlic Butter Bliss - September 28, 2026