
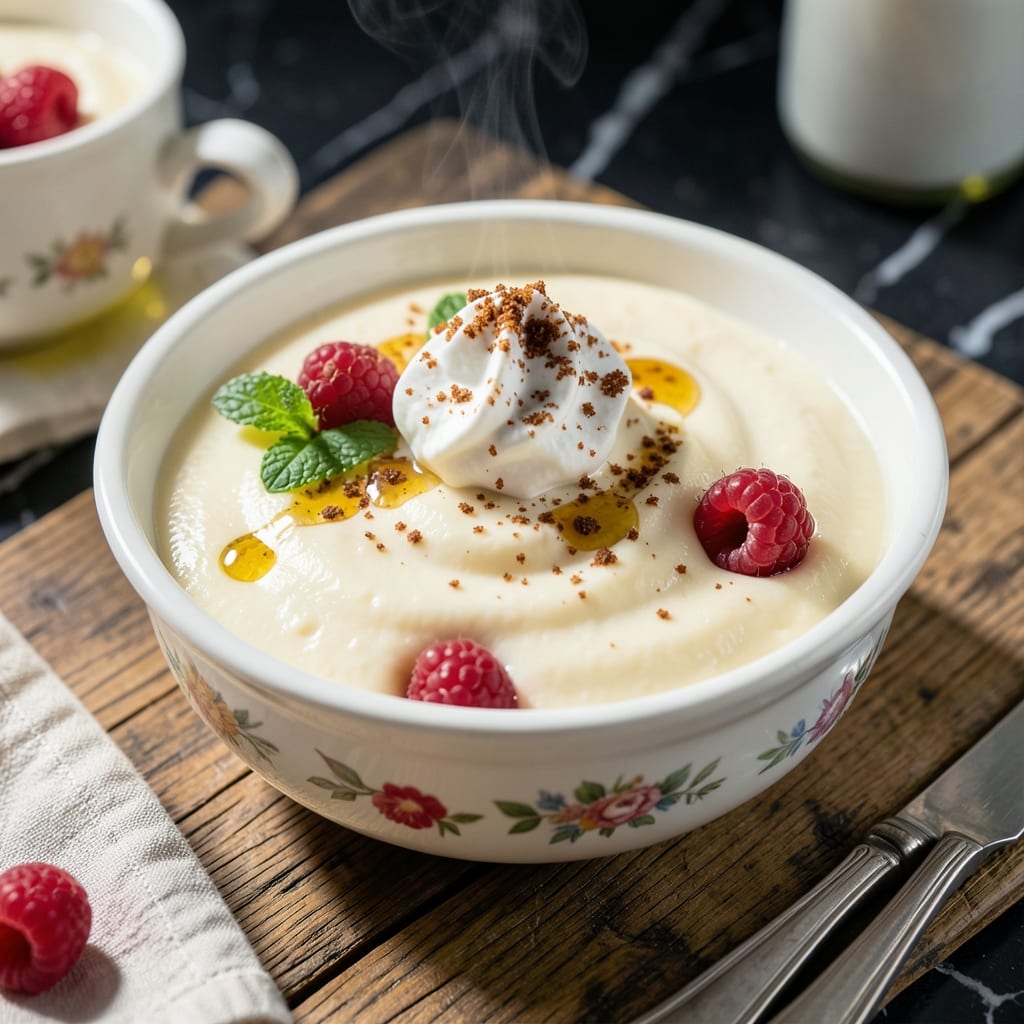
This no-egg vanilla pudding delivers silky smooth texture without traditional custard methods. I developed this recipe after realizing many home cooks lack the patience for tempering eggs or the confidence to avoid curdling.
The secret lies in cornstarch, which thickens the milk into a velvety consistency while maintaining pure vanilla flavor. Simple ingredients and careful temperature control ensure professional results every time.
What emerges is a creamy, lump-free pudding that sets perfectly when chilled. The vanilla shines through without competition, creating a dessert that’s both comforting and impressive.
Serve warm or chilled, topped with fresh berries or a sprinkle of cinnamon. This method proves eggless pudding can rival any classic version.
Ingredients for Vanilla Pudding Recipe No Eggs
Creamy, velvety perfection starts with these eight simple ingredients for the smoothest pudding.
| Ingredient | Amount | Notes |
|---|---|---|
| Whole Milk 🥛 | 4 cups | Full-fat for creaminess |
| Granulated Sugar 🍚 | ¾ cup | Fine white sugar preferred |
| Cornstarch 🌾 | ⅓ cup | Thickening agent essential |
| Pure Vanilla Extract 🌿 | 2 tsp | High-quality for best flavor |
| Unsalted Butter 🧈 | 2 tbsp | For richness and shine |
| Salt 🧂 | ¼ tsp | Balances sweetness |
| Heavy Cream 🥛 | ¼ cup | Optional for extra creaminess |
| Vanilla Bean 🌿 | 1 whole | Seeds scraped, optional |
The milk is non-negotiable here—whole milk delivers the silky texture that defines this dessert. Organic or local dairy from Whole Foods or your farmers market often has superior richness. Cornstarch is the magic thickener, so use fresh, unexpired for maximum effectiveness. The vanilla extract should be pure, not imitation—Nielsen-Massey or Rodelle are top-tier brands worth the splurge.
No whole milk? Half-and-half works at a 1:1 ratio, but avoid skim—it won’t thicken properly. Swap granulated sugar for coconut sugar at the same amount (texture may vary slightly). For a dairy-free version, full-fat coconut milk plus a splash of oat milk mimics the creaminess. The butter can be omitted, but it adds a luxurious mouthfeel that’s hard to replicate.
The pudding sets best after 4 hours chilled, but honestly tastes great warm too. Stores in the fridge for up to 5 days—press plastic wrap directly on the surface to prevent a skin. For longer storage, freeze for up to 3 months (thaw overnight in the fridge).
Why You’ll Love This Recipe
- One Pot Wonder: I love that this comes together in a single saucepan—no bowls, no whisking eggs, just simple stirring until it thickens.
- Velvety Vanilla: The combo of whole milk, butter, and pure vanilla extract gives it that rich, creamy texture I crave.
- Kid Approved: Honestly, my picky nephew gobbles this up warm or cold, and I’ve even packed it in lunchboxes.
- Budget Friendly: Cornstarch and pantry staples keep it cheap, and it’s way better than store-bought pudding cups.
Step-by-Step Instructions for Vanilla Pudding
Master this classic custard with precise technique and professional results.
Step 1: Combine Dry Ingredients and Prepare Milk
In a medium saucepan, whisk together the 0.75 cup Granulated Sugar, 0.33 cup Cornstarch, and 0.25 tsp Salt until no lumps remain. This ensures even distribution of the thickening agent and prevents clumping when the liquid is added.
In a separate heavy-bottomed saucepan, heat the 4 cups Whole Milk over medium heat until small bubbles form at the edges and steam begins to rise. Do not allow it to boil. If using, split the 1 whole Vanilla Bean lengthwise, scrape out the seeds, and add both seeds and pod to the warming milk to infuse flavor.
Step 2: Create the Slurry and Thicken
Gradually whisk about 1 cup of the hot milk into the dry ingredients to create a smooth slurry. This tempering step prevents the cornstarch from seizing up when exposed to heat. Pour the slurry back into the saucepan with the remaining milk.
Return the mixture to medium heat and cook, whisking constantly, until it thickens significantly. This should take 8-10 minutes. The pudding is ready when it coats the back of a spoon and leaves a clean line when you run your finger through it. The texture should be thick but still pourable.
Step 3: Incorporate Fat and Flavor
Remove the saucepan from heat. Discard the vanilla bean pod if used. Stir in the 2 tbsp Unsalted Butter and 2 tsp Pure Vanilla Extract until the butter is completely melted and the mixture is glossy. The butter adds richness and a silky finish to the pudding.
For an extra-luxurious texture, slowly whisk in the 0.25 cup Heavy Cream. This step enhances the creaminess and depth of flavor. The pudding will thicken slightly more as it cools, so aim for a consistency that’s just slightly thinner than your final desired texture.
Step 4: Strain and Chill for Perfect Smoothness
Immediately pour the pudding through a fine-mesh sieve into a clean bowl to remove any potential lumps or bits of cooked cornstarch. This step guarantees the silky-smooth texture that defines a professional-quality pudding.
Press plastic wrap directly onto the surface of the pudding to prevent a skin from forming. Chill in the refrigerator for at least 4 hours, or until completely set. The pudding will continue to thicken as it cools, reaching its ideal consistency once fully chilled.
Pro Tips For Making Vanilla Pudding Recipe No Eggs
- Whisk Before Heating: Mix your cornstarch with a little cold milk first to make a slurry—this prevents lumps when you add it to the hot mixture.
- Low and Slow Heat: Cook the pudding over medium-low heat and stir constantly; I learned this the hard way after scorching two batches.
- Use Full-Fat Milk: Whole milk gives the creamiest texture—skimp on the fat and your pudding will taste thin and watery.
- Add Butter Last: Stir in the butter at the very end, after removing from heat, for a silky finish without breaking the mixture.
Essential Equipment for Great vanilla pudding recipe no eggs
Saucepan Selection
Use a heavy-bottomed saucepan like All-Clad Stainless Steel to prevent scorching. Thin pans create hot spots that can burn milk. A 2-3 quart capacity gives enough room for whisking without spills. I’ve ruined batches in cheap pans—worth the investment.
Whisk Matters
A balloon whisk with a long handle (I love OXO’s Good Grips) reaches deep into corners. Silicone-coated whisks work but won’t dissolve lumps as effectively. Avoid wooden spoons—they don’t incorporate air well for that silky texture. 💛
Fine-Mesh Sieve
Straining is non-negotiable for lump-free results. A fine-mesh sieve like Cuisinox catches every stray cornstarch bit. Press the pudding through with a spatula—don’t skip this even if it looks smooth. The difference is night and day.
Plastic Wrap Trick
Use heavy-duty plastic wrap (not the thin kind) to prevent a skin. Press it directly onto the surface before chilling. This creates an airtight seal that keeps the top as smooth as the rest. I cut a square slightly larger than my bowl for full coverage.
Measuring Tools
Accurate measurements are key with cornstarch. Use dry measuring cups for sugar and cornstarch, and liquid measures for milk. A kitchen scale (I use Escali Primo) ensures perfect ratios every time. Even 1 tbsp off can affect thickness. 🔥
Optional Additions
For vanilla bean versions, a sharp paring knife splits pods cleanly. A microplane helps scrape seeds efficiently. These aren’t essential but elevate the flavor significantly. I keep both in my drawer for pudding days.
Nutrition Facts
Frequently Asked Questions
Can I use a different thickener?
Arrowroot or tapioca starch can replace cornstarch in a 1:1 ratio. Both create a slightly different texture—arrowroot gives a clearer gel, while tapioca adds a chewy quality. Avoid flour as it can make the pudding grainy.
Why did my pudding turn lumpy?
Lumps usually mean the cornstarch wasn’t fully dissolved before heating. Whisk vigorously while adding milk to the dry mix. If lumps form, strain through a fine-mesh sieve immediately.
How long does it keep?
Properly stored in an airtight container, it stays fresh for 5 days in the fridge. Press plastic wrap on the surface to prevent a skin. For longer storage, freeze for up to 3 months.

- Pina Colada Dip Recipe Red Lobster: Tropical Creaminess With Toasted Coconut - October 12, 2026
- Pickled Sweet Cherry Peppers Recipe Canning: Tangy Heat for Pantry Staples - October 12, 2026
- Peppercorn Sauce Recipe Vegan: Rich Umami Depth Without Cream - October 12, 2026