
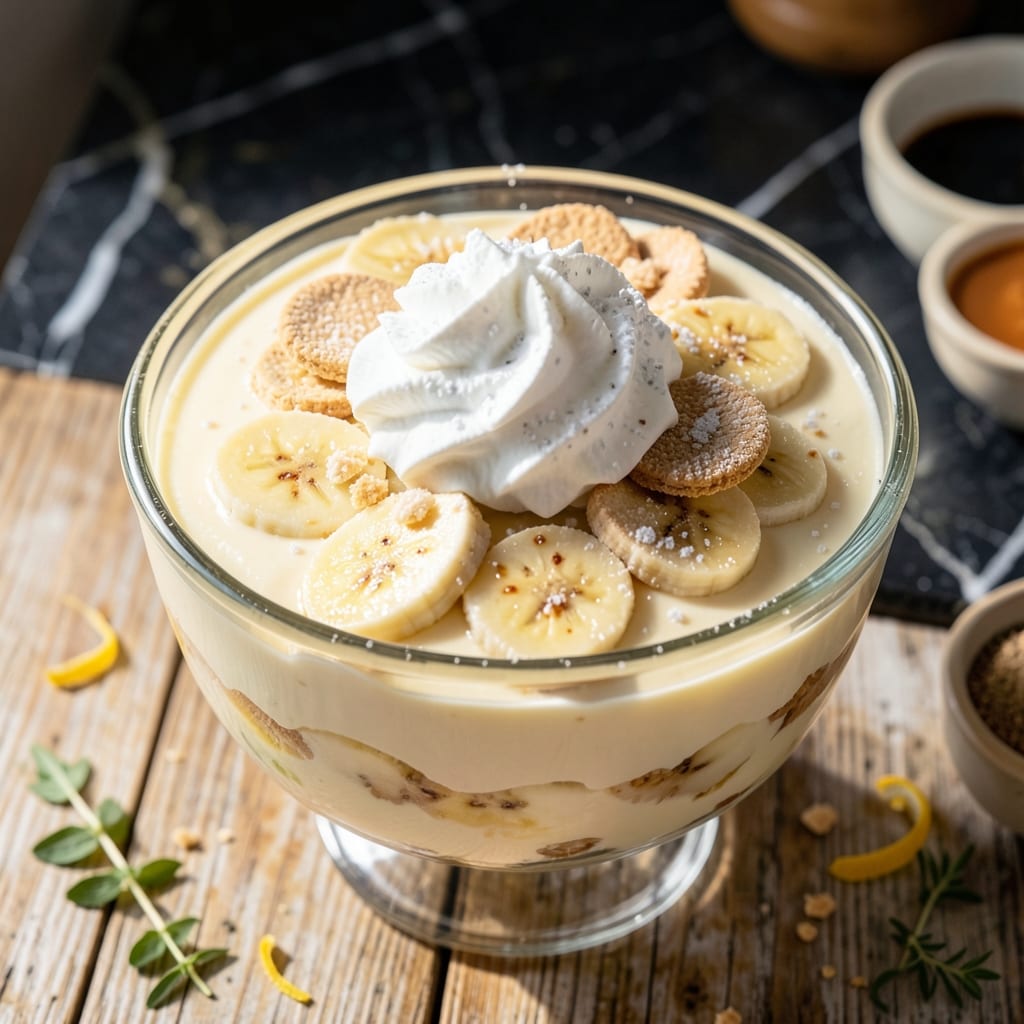
There’s something timeless about homemade banana pudding—layers of creamy custard, fresh bananas, and vanilla wafers that soften just enough. This from-scratch version skips the boxed shortcuts for a dessert that tastes like genuine care.
The custard is the star, cooked slowly until thick and velvety, then layered with ripe bananas and crisp wafers. Each bite delivers a perfect balance of textures and flavors, from the smooth pudding to the gentle crunch of the cookies.
Assembling it takes minutes, but letting it chill for 4 hours is key. The wafers absorb the custard’s richness, transforming into tender, flavorful layers that make this dish irresistible.
Serve it in a large bowl or individual cups for a classic finish. Every spoonful proves why this dessert remains a beloved favorite.
Ingredients for Banana Pudding Recipe from Scratch
Creamy custard, ripe bananas, and vanilla wafers come together for this beloved dessert.
| Ingredient | Amount | Notes |
|---|---|---|
| Granulated Sugar 🍚 | 1 ½ cups | Divided for custard and meringue |
| All-Purpose Flour 🌾 | ¼ cup | For thickening custard |
| Salt 🧂 | ¼ tsp | Balances sweetness |
| Whole Milk 🥛 | 3 cups | Full-fat for creaminess |
| Large Eggs 🥚 | 4 whole | Separated, yolks for custard |
| Vanilla Extract 🌿 | 2 tsp | Pure vanilla for best flavor |
| Unsalted Butter 🧈 | 2 tbsp | For richness in custard |
| Ripe Bananas 🍌 | 6 whole | Sliced just before layering |
| Vanilla Wafers 🍪 | 12 oz | About 48 wafers |
| Vanilla Wafer Crumbs 🍪 | ½ cup | For topping |
The custard needs full-fat milk for that velvety texture—whole milk only. I grab mine from Whole Foods or any major grocery store. The vanilla matters too; pure extract beats imitation every time. For the wafers, Nilla Wafers are the classic choice, but store brands work fine. Just check they’re crisp—stale ones won’t soften right.
No whole milk? Half-and-half mixed with water (equal parts) gets you close. Out of vanilla extract? Vanilla bean paste adds extra speckles and depth. Want to skip the meringue? Whipped cream works as a topping. The bananas should be ripe but not mushy—yellow with a few brown spots is perfect (frozen works in a pinch).
Assemble and chill for at least 4 hours—overnight is even better. Keeps in the fridge for 3 days (if it lasts that long). The wafers will soften more each day, but the flavor just gets richer.
Why You’ll Love This Recipe
- No Fancy Tools: I just need a whisk, a pot, and those simple ingredients like whole milk and eggs.
- That Vanilla Layer: The pudding base made with whole milk and sugar tastes like the custard I remember from childhood.
- Potluck Hero: I bring this to picnics, and it’s always the first dish to disappear.
- Two-Day Treat: Honestly, it tastes even better the next day when the vanilla wafers soak up the pudding.
Step-by-Step Instructions for Banana Pudding From Scratch
Here’s the method. Straightforward, tested, works every time.
Step 1: Make the Vanilla Custard Base
In a medium saucepan, whisk together 1.25 cups Granulated Sugar, 0.25 cup All-Purpose Flour, and 0.25 tsp Salt. Gradually whisk in the 3 cups Whole Milk until smooth—this prevents lumps from forming and ensures a silky texture.
Place the saucepan over medium heat and cook, stirring constantly with a wooden spoon, for 8-10 minutes until the mixture thickens and coats the back of the spoon. Don’t rush this; the custard needs time to reach the right consistency.
Once thickened, remove from heat and stir in the 2 tbsp Unsalted Butter and 2 tsp Vanilla Extract until the butter melts completely. The mixture should look glossy and rich. Set aside to cool slightly while you prepare the other components.
Step 2: Prepare the Egg Yolks for the Custard
Separate the 4 whole Large Eggs, placing the yolks in a small bowl and setting the whites aside for later use. Whisk the yolks lightly until they’re uniform in color—this step ensures they incorporate smoothly into the warm custard.
Slowly temper the yolks by drizzling about ½ cup of the warm custard mixture into them while whisking constantly. This prevents the eggs from scrambling when added to the hot mixture. Pour the tempered yolks back into the saucepan with the remaining custard.
Return the saucepan to medium-low heat and cook for an additional 2-3 minutes, stirring constantly, until the custard thickens further and reaches a pudding-like consistency. You’ll know it’s ready when it holds its shape briefly when you drag a spoon through it.
Step 3: Layer the Pudding Components
Slice the 6 whole Ripe Bananas just before assembling the pudding to prevent browning. Arrange a layer of 12 oz Vanilla Wafers at the bottom of a 9×13-inch baking dish or trifle bowl. I like to break a few wafers to fill in gaps for an even layer.
Pour half of the warm custard over the vanilla wafers, spreading it evenly. Top with a layer of banana slices, arranging them so each bite gets a piece. Repeat with another layer of vanilla wafers, the remaining custard, and the remaining bananas.
Step 4: Add the Topping and Chill
Sprinkle the 0.5 cup Vanilla Wafer Crumbs evenly over the top of the pudding. This adds a delightful crunch and extra vanilla wafer flavor. Press down gently to help the crumbs adhere to the custard.
Cover the dish with plastic wrap, pressing it directly onto the surface of the pudding to prevent a skin from forming. Refrigerate for at least 4 hours or overnight. This chilling time allows the flavors to meld and the vanilla wafers to soften into that classic pudding texture.
Serve chilled, scooping down through all the layers to get a bit of each component in every serving. The pudding should be creamy, the bananas fresh, and the vanilla wafers perfectly tender.
Pro Tips For Making Banana Pudding Recipe From Scratch
- Temper the Eggs: Slowly whisk about 1/2 cup of the hot milk mixture into the beaten eggs before combining everything—I learned this the hard way after scrambling eggs in my first three batches.
- Use Ripe Bananas: The spottier the bananas, the sweeter and more flavorful your pudding will be; I skip the green ones now after tasting the difference.
- Cook Until Thick: Keep stirring over medium heat until the pudding coats the back of a spoon; it’ll thicken more as it cools, so don’t rush this step.
- Chill Completely: Give it at least 4 hours in the fridge—yes, even if you’re impatient like me—so the layers set and the flavors meld together.
Make-Ahead Tips for banana pudding recipe from scratch
Prep Ahead Strategy
You can make the custard up to 2 days in advance and store it in an airtight container in the fridge. This gives you a head start and actually improves the flavor as it chills. Just give it a good stir before layering. 💡
Banana Timing
Slice the bananas right before assembling to prevent browning. If you must prep them early, toss with 1 tbsp lemon juice to preserve color. However, I find fresh-sliced bananas maintain the best texture and appearance.
Wafer Prep
Keep the vanilla wafers in their original package until ready to use. If they lose their crispness, they won’t soften properly in the pudding. For the crumb topping, crush the wafers just before sprinkling to maintain texture.
Chilling Time
The pudding needs at least 4 hours to set, but overnight chilling is ideal. This allows the wafers to fully absorb the custard while keeping the bananas fresh. I always make mine the night before serving. ❄️
Individual Servings
For easy grab-and-go desserts, assemble in 8-ounce mason jars. Layer wafers, custard, and bananas, then top with crumbs. These keep refrigerated for 3 days and are perfect for potlucks or lunchbox treats.
Reviving Leftovers
If the pudding sits too long and the wafers get mushy, stir everything together and serve as a creamy banana mousse. It’s a delicious way to salvage any leftovers without waste.
Nutrition Facts
Frequently Asked Questions
Can I make this without eggs?
Yes! Use 3 tbsp cornstarch mixed with 3 tbsp cold water as an egg substitute. Cook the custard as directed, stirring constantly until thickened. The texture will be slightly different but still delicious.
Why did my custard turn lumpy?
Lumps form when the flour or eggs aren’t fully incorporated. Whisk vigorously at each step, especially when tempering the yolks. If lumps appear, strain the custard through a fine-mesh sieve while warm.
Can I use a different cookie?
Shortbread, graham crackers, or even ginger snaps work well. Adjust sweetness if using less sugary cookies, and ensure they’re fresh for best texture.
How do I prevent a skin from forming?
Press plastic wrap directly onto the pudding’s surface before chilling. This blocks air contact. For individual servings, cover each cup tightly with cling film.

- Banana Pudding Recipe From Scratch: Layers of Vanilla Wafer Bliss - October 7, 2026
- Peanut Butter Balls No Bake Recipe With Rice Krispies: Crunchy Bites in Minutes - October 7, 2026
- Peanut Brittle Recipe With Dry Roasted Peanuts: Crunchy Caramelized Sweetness - October 7, 2026