
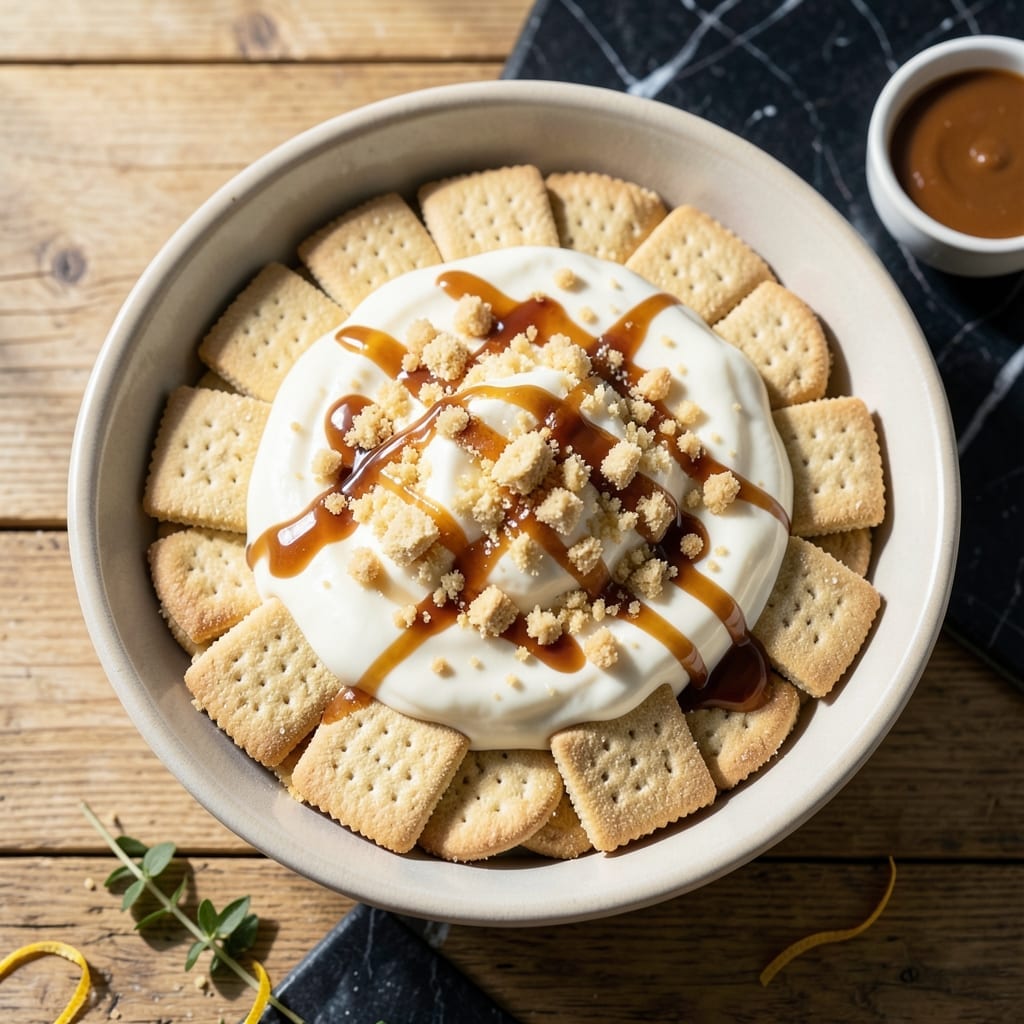
This twist on classic banana pudding delivers all the nostalgia without a single banana in sight. The secret lies in vanilla wafers, which provide the familiar texture and sweetness that make this dessert so beloved.
The layers of wafers, creamy custard, and whipped topping create a perfectly balanced dessert that’s just as satisfying as the original. It’s a foolproof way to enjoy the flavors you love, even when bananas aren’t an option.
What you get is a dish that looks and feels traditional, with the same comforting layers and rich vanilla flavor. The wafers soften slightly, soaking up the custard just enough to blend seamlessly.
Serve it chilled for a refreshing treat that’s sure to impress. Here’s how to make it.
Ingredients for Banana Pudding Recipe Without Bananas
Familiar flavors with a clever twist. Vanilla wafers bring the nostalgia you love.
| Ingredient | Amount | Notes |
|---|---|---|
| Vanilla Wafers 🍪 | 11 oz | About 40-45 wafers |
| Whole Milk 🥛 | 2 cups | Cold, for custard base |
| Granulated Sugar 🍚 | ¾ cup | Divided for custard and topping |
| All-Purpose Flour 🌾 | ¼ cup | For thickening custard |
| Large Egg Yolks 🥚 | 4 whole | Room temperature preferred |
| Vanilla Extract 🌿 | 2 tsp | Pure for best flavor |
| Salt 🧂 | ¼ tsp | Balances sweetness in custard |
| Heavy Whipping Cream 🥛 | 2 cups | Cold, for whipped topping |
| Powdered Sugar 🍚 | ¼ cup | Sweetens whipped cream |
| Unsalted Butter 🧈 | 2 tbsp | For richness in custard |
The vanilla wafers are everything here—Nilla Wafers are the classic choice, but store-brand works too. Look for the 11-oz box to get the right layering. Most grocery stores carry them in the cookie aisle. I grab mine from Walmart or Target since they’re always stocked. If you’re making this ahead, grab an extra box—people tend to snack on them while you cook.
No whole milk? 2% works in a pinch, but the custard won’t be as rich. For a dairy-free version, coconut milk (full-fat) is your best bet. Don’t have egg yolks? Save the whites for meringues and use extra yolks from another recipe. The vanilla extract should be pure, not imitation—McCormick or Nielsen-Massey are solid picks for good flavor at a fair price.
Assemble this the night before—it needs at least 4 hours to chill and set properly. Leftovers keep in the fridge for 3-4 days, though the wafers will soften the longer it sits. Cover with plastic wrap pressed directly on the surface to prevent a skin from forming on the custard.
Why You’ll Love This Recipe
- One-Bowl Magic: I love that I can mix the milk, sugar, flour, and egg yolks in a single pot—no fancy equipment, just a whisk and 10 minutes of stirring.
- Vanilla Wafer Love: The layers of crispy wafers soaking up that rich custard made with whole milk and egg yolks? Pure comfort in every bite.
- Make-Ahead Dream: Honestly, this tastes even better the next day after the wafers soften perfectly, making it ideal for potlucks or lazy Sundays.
- Budget-Friendly Treat: Between us, it costs pennies per serving with just pantry staples, and it still feels like a special dessert.
Step-by-Step Instructions for Vanilla Wafer Surprise Delight
This method delivers creamy layers with crisp vanilla wafers—simple, foolproof, and delicious.
Step 1: Cook the Custard Base
In a medium saucepan, whisk together the 2 cups Whole Milk, 0.75 cup Granulated Sugar, 0.25 cup All-Purpose Flour, and 0.25 tsp Salt until smooth. Place over medium heat and cook, stirring constantly, until the mixture thickens and begins to bubble.
once bubbling, continue cooking for 1-2 minutes until it reaches a pudding-like consistency. Remove from heat and stir in the 2 tbsp Unsalted Butter and 2 tsp Vanilla Extract until the butter melts completely. This creates a rich, velvety base for your dessert.
Here’s the thing—don’t rush this step. The custard should coat the back of a spoon thickly. If it’s too thin, it won’t hold up when layered with the vanilla wafers.
Step 2: Temper and Thicken with Egg Yolks
In a separate bowl, lightly beat the 4 whole Large Egg Yolks. Slowly pour about 1 cup of the hot custard mixture into the yolks while whisking constantly. This tempering step prevents the eggs from scrambling when they meet the hot liquid.
Pour the tempered egg mixture back into the saucepan with the remaining custard. Return to medium-low heat and cook for another 2-3 minutes, stirring constantly, until the custard thickens enough to leave a visible trail when you drag a spoon through it.
Real talk: if the custard isn’t thick enough at this stage, your layers won’t set properly. Keep cooking until you see that perfect ribbon-like texture.
Step 3: Layer with Vanilla Wafers
Arrange a layer of 11 oz Vanilla Wafers (about 20-22 wafers) at the bottom of a 9×13-inch dish or individual serving glasses. Pour half of the warm custard over the wafers, spreading it evenly to fully coat them. The heat from the custard will soften the wafers just enough to meld with the layers.
Add another layer of vanilla wafers, then top with the remaining custard. Press down gently to ensure the wafers are fully submerged. This step creates that iconic texture contrast—soft custard with slightly crisp wafer edges.
I know it seems weird, but trust me—letting the layers sit for 10 minutes before adding the topping allows the wafers to absorb some of the custard without turning soggy.
Step 4: Whip the Cream Topping
In a chilled bowl, whip the 2 cups Heavy Whipping Cream and 0.25 cup Powdered Sugar until stiff peaks form. This should take 3-4 minutes with an electric mixer on high speed. Be careful not to over-whip, or the cream will turn grainy.
Spread or pipe the whipped cream over the custard layer, creating an even, smooth finish. For a little flair, you can crumble a few extra vanilla wafers on top as a garnish.
This is the moment that matters: chilling the dessert for at least 4 hours (or overnight) allows all the flavors to meld and the layers to set perfectly.
Pro Tips For Making Banana Pudding Recipe Without Bananas
- Temper the Eggs: Slowly whisk about a cup of the hot milk mixture into the egg yolks before combining everything—otherwise you’ll end up with scrambled eggs in your pudding.
- Toast the Wafers: Lightly toast the vanilla wafers in a dry pan for 2-3 minutes to bring out their flavor before layering. I learned this the hard way after my first batch tasted flat.
- Avoid Lumpy Flour: Whisk the flour and sugar together before adding to the milk to prevent clumps. Sounds obvious, but I skipped this once and spent 10 minutes fishing out little flour bits.
- Chill Completely: Give it at least 4 hours in the fridge—overnight is even better. The wafers soften perfectly and the pudding sets just right.
Pro Cooking Tips for Great banana pudding recipe without bananas
Custard Consistency
Cook the custard over medium heat until it thickly coats the back of a spoon—about 5-7 minutes. If it’s too thin, the layers won’t hold. I always test by running a finger through the custard on the spoon; if the line stays, it’s ready. 🌡️
Egg Tempering
Slowly drizzle 1 cup of hot custard into the beaten egg yolks while whisking constantly. This prevents scrambled eggs. Pour the mixture back into the saucepan and cook for 2-3 minutes until it reaches a pudding-like thickness.
Layering Technique
Use a 9×13-inch dish for even layers. Start with 20-22 vanilla wafers on the bottom, then add half the custard. Repeat with another wafer layer and the remaining custard. Press gently to ensure full coverage.
Whipped Cream Perfection
Chill your bowl and beaters for 10 minutes before whipping. Beat the heavy cream and powdered sugar on high for 3-4 minutes until stiff peaks form. Over-whipping turns it grainy, so stop as soon as peaks hold.
Chilling Time
Let the dessert chill for at least 4 hours, but overnight is ideal. This sets the layers and lets the wafers soften perfectly. Cover with plastic wrap pressed directly on the surface to avoid a skin forming. ❄️
Serving Tip
Garnish with extra crumbled vanilla wafers just before serving. This adds texture and a fresh, crisp contrast to the creamy layers. Serve chilled for the best experience.
Nutrition Facts
Frequently Asked Questions
What can I use instead of bananas?
Vanilla wafers are the perfect substitute, providing the same texture and sweetness. You can also try sliced strawberries or crushed pineapple for a fruity twist. The wafers give the most authentic result.
Why does the custard need to thicken so much?
Thick custard holds the layers together and prevents a soggy dessert. If it’s too thin, the wafers will turn mushy. Cook until it coats the back of a spoon and leaves a clear trail.
Can I make this ahead of time?
Yes! Assemble it the night before for best results. The flavors meld and the wafers soften perfectly after 4+ hours in the fridge. Just cover it tightly.
How do I keep the whipped cream from deflating?
Whip the cream just before assembling, and ensure your bowl and beaters are chilled. Avoid over-whipping, which can cause it to separate.

- Pina Colada Dip Recipe Red Lobster: Tropical Creaminess With Toasted Coconut - October 12, 2026
- Pickled Sweet Cherry Peppers Recipe Canning: Tangy Heat for Pantry Staples - October 12, 2026
- Peppercorn Sauce Recipe Vegan: Rich Umami Depth Without Cream - October 12, 2026