
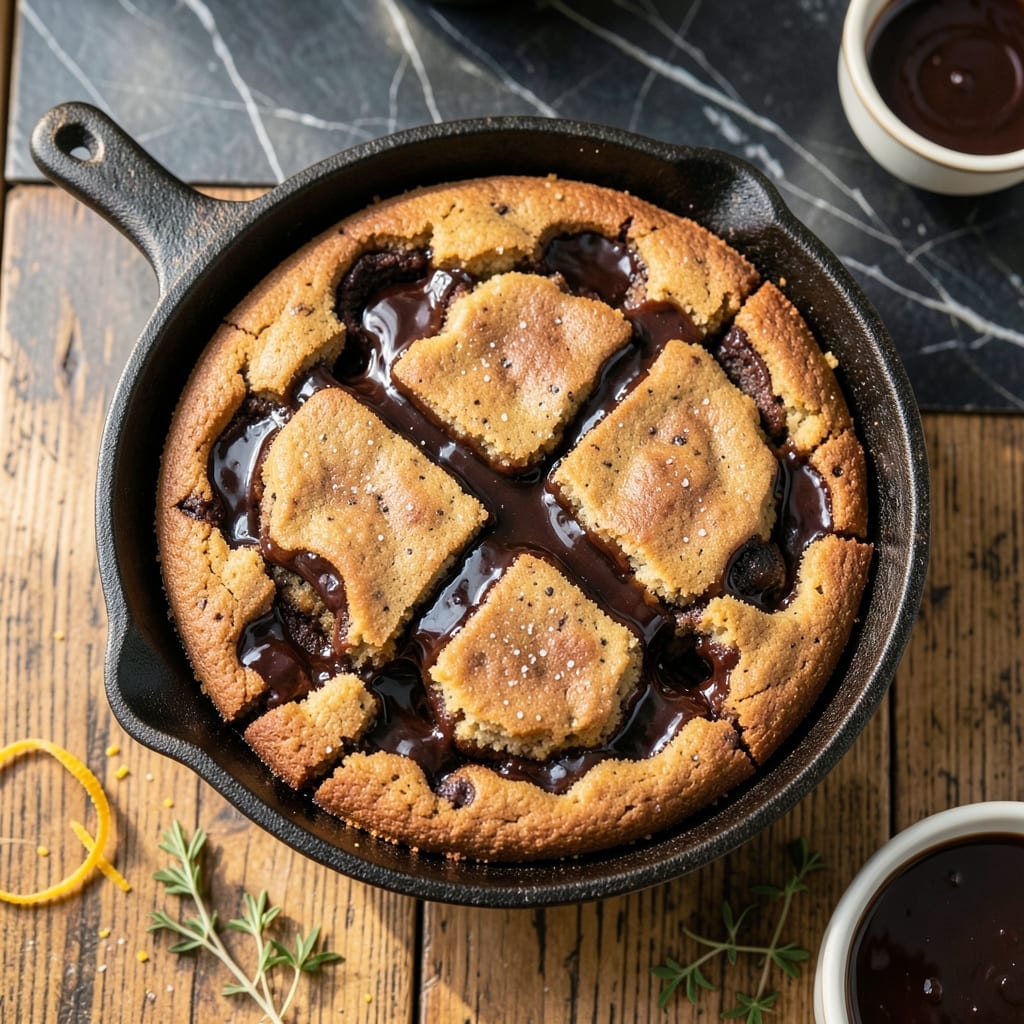
This chocolate cobbler delivers warm, gooey decadence straight from your skillet to the table. I perfected this method after years of testing, and it never fails to impress with its rich, fudgy texture and cake-like topping.
The beauty lies in its simplicity—just a few pantry staples and one bowl. As it bakes, the batter rises to form a soft, cakey layer while a molten chocolate sauce pools beneath, creating that signature cobbler magic.
Serve it warm with a scoop of vanilla ice cream for the ultimate comfort dessert. The contrast of hot and cold, gooey and creamy, makes every bite unforgettable.
It’s a crowd-pleaser that comes together in minutes and bakes while you enjoy dinner. This is dessert done right.
Ingredients for Chocolate Cobbler Recipe Pioneer Woman
Pantry staples turn into warm, gooey magic with just one bowl.
| Ingredient | Amount | Notes |
|---|---|---|
| All-Purpose Flour 🌾 | 1 cup | Sifted for lighter texture |
| Granulated Sugar 🍚 | 1 cup | Divided for batter and topping |
| Unsweetened Cocoa Powder 🍫 | ½ cup | Dutch-process for richer flavor |
| Baking Powder 🧂 | 2 tsp | For cakey rise |
| Salt 🧂 | ¼ tsp | Balances sweetness |
| Whole Milk 🥛 | ¾ cup | Room temperature preferred |
| Unsalted Butter 🧈 | ½ cup | Melted, plus extra for greasing |
| Vanilla Extract 🌿 | 1 tsp | Pure for best flavor |
| Light Brown Sugar 🍚 | ¾ cup | Packed, for sauce |
| Hot Water 💧 | 1 ½ cups | Creates molten sauce |
| Semisweet Chocolate Chips 🍫 | ½ cup | Optional for extra richness |
The cocoa powder is doing heavy lifting here. Hershey’s Special Dark gives that deep, rich flavor I love, but any unsweetened works. The butter matters too—Land O’Lakes or store brand is fine, just don’t skimp on quality. I always grab my baking powder from the back of the cupboard (freshness check: it should bubble when you drop it in hot water). For the milk, any percentage works, but whole milk makes it extra decadent.
No cocoa powder? Melted chocolate bars at a 1:1 ratio work in a pinch. Out of brown sugar? White sugar plus a splash of molasses gets you close. The chocolate chips are optional but highly recommended—Ghirardelli or Nestle are my go-tos. For a gluten-free version, swap the all-purpose flour for King Arthur’s 1:1 mix. Just don’t overmix the batter.
The sauce thickens as it cools, so serve it straight from the oven (careful—it’s lava-hot). Leftovers? 3 days in the fridge, but honestly it’s best fresh. Reheat in the microwave for 20-30 seconds to revive that gooey texture. Freezes for up to 1 month if you must, but I doubt it’ll last that long.
Why You’ll Love This Recipe
- One Bowl Wonder: I mix the flour, sugar, cocoa, baking powder, and salt right in the dish—no extra bowls to wash.
- Warm Chocolate Hug: The cocoa powder gives it that deep, rich chocolate flavor that’s even better with a scoop of vanilla ice cream.
- Feeds a Crowd: Between us, this is my go-to for potlucks because it serves 8-10 without breaking a sweat.
- Budget Friendly: Honestly, pantry staples like flour and cocoa make this a treat I can afford to make whenever the craving hits.
Step-by-Step Instructions for Chocolate Cobbler
This method delivers that magical molten center with a cakey top every time.
Step 1: Prepare the Batter Base
In a medium bowl, whisk together the 1 cup All-Purpose Flour, 1 cup Granulated Sugar, 0.5 cup Unsweetened Cocoa Powder, 2 tsp Baking Powder, and 0.25 tsp Salt. I like to sift the dry ingredients first to prevent any lumps from forming in the batter.
Create a well in the center and pour in the 0.75 cup Whole Milk, 0.5 cup Unsalted Butter (melted and cooled slightly), and 1 tsp Vanilla Extract. Stir just until the dry ingredients are moistened—overmixing will make the cobbler dense instead of light and cakey.
Step 2: Layer the Cobbler in Your Skillet
Pour the batter into a greased oven-safe skillet or baking dish, spreading it evenly. The batter will be thick, almost like a cake batter, so use a spatula to smooth it out into an even layer. This ensures it cooks uniformly without any dry spots.
Now, sprinkle the 0.75 cup Light Brown Sugar evenly over the top of the batter. Don’t press it in—just let it sit on the surface. Then, sprinkle the 0.5 cup Semisweet Chocolate Chips over the brown sugar for an extra burst of chocolate in every bite.
Step 3: Add the Hot Water for Molten Magic
Carefully pour the 1.5 cups Hot Water over the entire surface. I know it looks like too much liquid, but trust me—it’s what creates that signature gooey sauce beneath the cake layer. The hot water will sink through the batter and sugar, so don’t stir or disturb it.
You’ll see the brown sugar start to dissolve and bubble slightly as the hot water hits it. This is exactly what you want. The mixture will look soupy at this stage, but it all comes together during baking.
Step 4: Bake to Perfection
Preheat your oven to 350°F and bake the cobbler for 35-40 minutes. You’ll know it’s done when the top is set and springy to the touch, and a toothpick inserted into the cake portion comes out clean. The center should still have a slight jiggle—that’s the molten chocolate sauce beneath.
Avoid opening the oven door during the first 25 minutes to prevent the cobbler from collapsing. The top will rise and develop a slightly crisp edge while the sauce beneath stays rich and fudgy.
Step 5: Rest and Serve Warm
Let the cobbler rest for 10 minutes after removing it from the oven. This gives the sauce time to thicken slightly and the cake layer to set. If you cut into it too soon, the sauce will run everywhere and the cake won’t hold its shape.
Serve warm in bowls with a scoop of vanilla ice cream or a dollop of whipped cream. The contrast of the warm cobbler and cool ice cream is irresistible. Each spoonful should deliver a bit of cake, a pool of chocolate sauce, and melty chocolate chips.
Pro Tips For Making Chocolate Cobbler Recipe Pioneer Woman
- Preheat the Oven: I learned this the hard way—always preheat to 350°F before mixing your batter, or the cobbler won’t rise evenly.
- Sift the Cocoa: Sounds tedious, but sifting the cocoa powder with the flour and baking powder prevents clumps and gives a smoother texture.
- Skip Packed Brown Sugar: Resist the urge to swap granulated sugar for brown—it changes the texture and can make the cobbler too dense.
- Check at 30 Minutes: Start testing doneness at 30 minutes; overbaking dries it out, and the edges should be set but the center still slightly gooey.
Health Benefits of This Dish
Rich in Antioxidants
This dessert packs a surprising antioxidant punch thanks to the unsweetened cocoa powder. A single serving provides about 20% of your daily iron needs, supporting energy and oxygen transport. The flavonoids in cocoa also promote heart health by improving blood flow. 💪
Mood-Boosting Benefits
Chocolate is famous for triggering endorphin release, creating that feel-good sensation. The semisweet chocolate chips add extra phenylethylamine, a compound associated with mood elevation. I always feel a little happier after a warm bowl of this cobbler.
Energy from Natural Sugars
The combination of brown sugar and granulated sugar provides quick carbohydrates for a natural energy boost. While it’s a treat, the sugars here are balanced by the protein and fat from milk and butter, preventing a sharp energy crash.
Calcium Source
Thanks to the whole milk in the batter, each serving contributes to your daily calcium intake. This supports bone health and muscle function. It’s a small but meaningful nutritional benefit in a dessert that’s primarily about indulgence.
Comfort Food Advantages
Beyond nutrition, this dish offers psychological comfort. The warmth and texture create a sensory experience that reduces stress. Sometimes, the emotional benefits of a homemade dessert are just as valuable as the nutritional ones. ✨
Portion Control Friendly
At about 400-450 calories per serving, this cobbler allows for reasonable portion sizes. The rich flavor means a small bowl satisfies cravings, helping you enjoy dessert without overindulging. I find one serving is always enough to hit the spot.
Nutrition Facts
Frequently Asked Questions
Can I use a different pan instead of a skillet?
An 8×8-inch baking dish or 9×9-inch pan works perfectly. Just ensure it’s oven-safe and greased well to prevent sticking.
Why does the recipe call for hot water?
The hot water creates the signature molten sauce by dissolving the brown sugar and cocoa. It sinks through the batter during baking, forming that rich, gooey layer beneath the cake.
Can I make this gluten-free?
Yes! Swap the all-purpose flour for a 1:1 gluten-free baking blend. The texture will be slightly denser, but still delicious.
How do I know when it’s done baking?
The top should be set and springy with a slight jiggle in the center after 35-40 minutes at 350°F. A toothpick in the cake portion should come out clean.

- BBQ Sausage Recipe Oven: Smoky Depth Without the Grill - September 28, 2026
- BBQ Chicken Bowl Recipe Rice: Smoky Sweetness Over Fluffy Grains - September 28, 2026
- Beef Cutlet Recipe Ideas: Crispy Breaded Patties With Bold Seasonings - September 28, 2026