
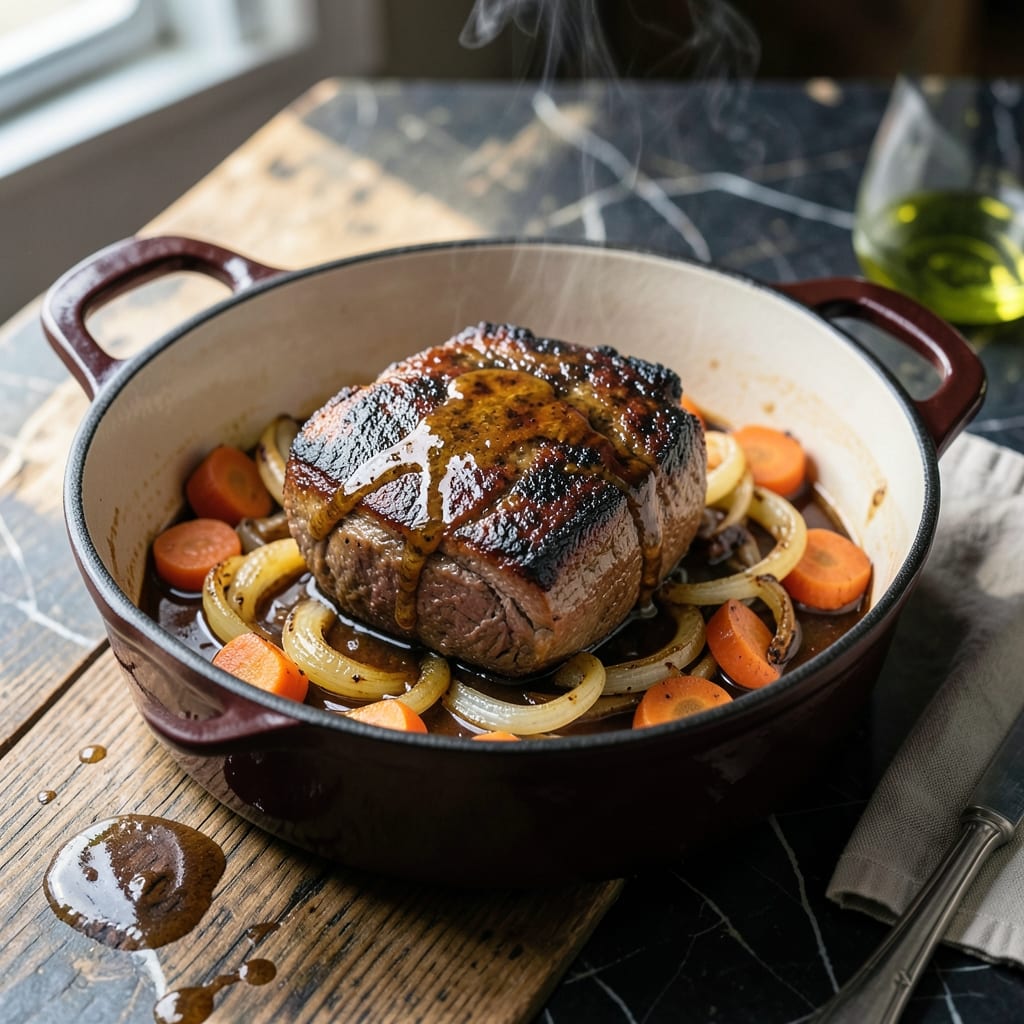
I burned more chuck roasts than I care to admit before cracking the code to melt-in-your-mouth tenderness. This Dutch oven method transforms tough cuts into something extraordinary.
Low and slow is the secret here—325°F for hours lets the connective tissue break down while building deep, rich flavor. The Dutch oven traps moisture, ensuring the meat stays juicy throughout the long cook.
What emerges is fork-tender beef with a caramelized crust, bathed in a velvety sauce that soaks into every bite. The aroma alone will have your whole house gathering in the kitchen.
Between you and me, this is the kind of dish that makes people think you’ve been cooking all day. Little do they know it practically cooks itself.
Ingredients for Chuck Roast Recipe Oven
Nothing exotic here—just good beef and pantry staples for that slow-cooked magic.
| Ingredient | Amount | Notes |
|---|---|---|
| Chuck Roast 🥩 | 3 lb | Well-marbled, boneless preferred |
| Kosher Salt 🧂 | 1 ½ tsp | Divided for seasoning and sauce |
| Black Pepper 🌶️ | 1 tsp | Freshly ground preferred |
| Olive Oil 🫒 | 2 tbsp | For searing roast |
| Yellow Onion 🧅 | 1 whole | Large, diced into chunks |
| Carrots 🥕 | 3 whole | Peeled, cut into 2-inch pieces |
| Garlic Cloves 🧄 | 6 cloves | Minced for deep flavor |
| Beef Broth 🥣 | 2 cups | Low-sodium preferred |
| Red Wine 🍷 | 1 cup | Dry variety like Cabernet |
| Tomato Paste 🍅 | 2 tbsp | For richness in sauce |
| Fresh Thyme Sprigs 🌿 | 4 whole | Stems removed before serving |
| Fresh Rosemary Sprig 🌿 | 1 whole | Large sprig, about 6 inches |
| Bay Leaf 🍃 | 1 whole | Dried, removed after cooking |
The chuck roast is non-negotiable here—look for good marbling (those white fat streaks) at your butcher or Costco. More marbling equals more flavor and tenderness. I like to buy a whole roast and cube it myself (saves money), but pre-cut stew meat works too if you’re short on time. Just avoid lean cuts like sirloin—they’ll turn out tough no matter how long you cook them.
No red wine? Beef broth with a tablespoon of balsamic vinegar gets you most of the way there. Fresh thyme and rosemary are ideal, but dried at one-third the amount works in a pinch (add them with the liquid, not at the start). The tomato paste can be swapped for crushed tomatoes—just reduce the broth slightly. And if you’re out of carrots, parsnips or potatoes hold up great.
This tastes even better the next day—4-5 days in the fridge, or freeze for 3 months (slice before freezing for easy portions). I always make extra sauce to drizzle over mashed potatoes. Leftovers reheat beautifully on the stove or in the microwave (cover with a damp paper towel).
Why You’ll Love This Recipe
- Set and Forget: I season the roast, let the oven do the work, and come back to fall-apart tender beef hours later.
- Rich and Hearty: The chuck roast soaks up the olive oil and onion flavors, making every bite ridiculously good.
- Feeds the Crew: One roast and I’ve got dinner for the family, plus leftovers for sandwiches the next day.
- Budget Winner: Honestly, chuck roast gives me that slow-cooked luxury taste without the fancy price tag.
Step-by-Step Instructions for Chuck Roast in the Oven
Here’s my no-fail method for fall-apart tender beef every single time.
Step 1: Season and Sear the Chuck Roast
Pat the 3 lb chuck roast completely dry with paper towels—this ensures a good sear. Season all sides aggressively with 1.5 tsp kosher salt and 1 tsp black pepper. I like to press the seasoning in so it adheres well to the meat.
Heat 2 tbsp olive oil in a Dutch oven over medium-high heat until shimmering. Add the roast and sear for 4-5 minutes per side until deeply browned. You’ll know it’s ready to flip when it releases easily from the pan. Transfer the roast to a plate and set aside.
Step 2: Sauté the Aromatics
In the same Dutch oven, add the diced 1 whole yellow onion and 3 whole carrots. Cook for 5 minutes, stirring occasionally, until the onion starts to soften and brown slightly. This builds the flavor base for your sauce.
Add the 6 cloves garlic cloves and cook for 30 seconds until fragrant. Stir in the 2 tbsp tomato paste and cook for 1 minute to deepen its flavor. The tomato paste should turn a richer, brick-red color when it’s ready.
Step 3: Deglaze and Build the Braising Liquid
Pour in the 1 cup red wine and scrape up all the browned bits from the bottom of the pot with a wooden spoon. Let it simmer for 2-3 minutes until reduced by half. This step captures all that concentrated beefy flavor.
Add the 2 cups beef broth, 4 whole fresh thyme sprigs, 1 whole fresh rosemary sprig, and 1 whole bay leaf. Stir to combine. The liquid should smell aromatic and rich at this point.
Step 4: Braise to Tenderness
Return the chuck roast to the Dutch oven along with any accumulated juices. The liquid should come about halfway up the roast. Cover with a tight-fitting lid and transfer to a preheated 325°F oven.
Braise for 3 to 3.5 hours until the meat is fork-tender and easily pulls apart. I check it at the 3-hour mark—if it doesn’t shred easily with a fork, give it more time. The house will smell incredible by now.
Step 5: Rest and Serve
Carefully remove the roast from the Dutch oven and transfer to a cutting board. Discard the fresh thyme sprigs, fresh rosemary sprig, and bay leaf from the liquid. Let the roast rest for 15 minutes before serving.
Shred or slice the chuck roast against the grain. Spoon some of the braising liquid over the top for extra moisture and flavor. The meat should be so tender it nearly melts in your mouth, with rich, deeply flavored juices soaking into every bite.
Pro Tips For Making Chuck Roast Recipe Oven
- Dry the Roast: Pat the chuck roast thoroughly dry with paper towels before seasoning—this guarantees a deep, flavorful crust instead of steamed meat.
- Sear It Hard: Use high heat and about 2 tablespoons of olive oil to get a dark sear on all sides; I learned this the hard way after too many pale, bland roasts.
- Don’t Rush the Onions: Let the sliced yellow onions caramelize slowly in the same pan after searing—this builds a rich base for braising.
- Rest Before Slicing: Give the roast a solid 15 minutes under foil after cooking, or all the juices will end up on the cutting board instead of in the meat.
Make-Ahead Tips for Leftovers
Overnight Prep
I always prep the veggies and measure spices the night before—dice the onion, peel and chop the carrots, and mince the garlic. Store them in separate containers in the fridge. This saves 20 minutes on cooking day. 💡
Morning Sear
Start the searing process in the morning if you plan to serve dinner at 6 PM. The 3-3.5 hour braise fits perfectly into a work-from-home schedule. Just pop it in the oven before your first meeting.
Cooler Resting
If you need to hold the roast for a few hours, transfer it with the braising liquid to a cooler after cooking. It will stay above 140°F for up to 2 hours. I learned this trick from my grandmother’s Sunday dinners.
Freeze for Later
Cook the entire roast, then cool and slice before freezing in airtight containers with some braising liquid. It reheats beautifully in the oven at 350°F for 20-25 minutes. ❄️
Reheat Like a Pro
For leftovers, place slices in a skillet with a splash of beef broth and warm over low heat for 5-7 minutes. This prevents drying out and keeps the meat tender.
Double Batch
This recipe scales easily—just double all ingredients and use a larger Dutch oven. I often make 6 lbs at once for Sunday dinner and weekday leftovers. The flavors deepen even more the next day.
Nutrition Facts
Frequently Asked Questions
What temperature should the oven be set to?
Set your oven to 325°F for the perfect low-and-slow braise. This temperature allows the connective tissue to break down gradually without drying out the meat.
How do I know when it’s done?
The roast is ready when it shreds easily with a fork, usually after 3-3.5 hours. If it resists, give it more time—rushing leads to tough meat.
Can I use a slow cooker instead?
Yes, but the Dutch oven method yields better flavor. If using a slow cooker, sear the meat first, then cook on low for 8 hours or high for 5-6 hours.
Why is my roast tough?
Toughness usually means it didn’t cook long enough. Chuck roast needs time to break down—ensure the internal temperature reaches at least 195°F for tenderness.

- Peach Syrup Recipe for Ice Cream: Sweet and Silky Drizzle for Scoops - October 6, 2026
- Pav Bhaji Recipe Food Lab: Mumbai Street Food Magic at Home - October 6, 2026
- Peach Jelly Recipe Without Pectin: Naturally Set Sweet Spread - October 6, 2026