
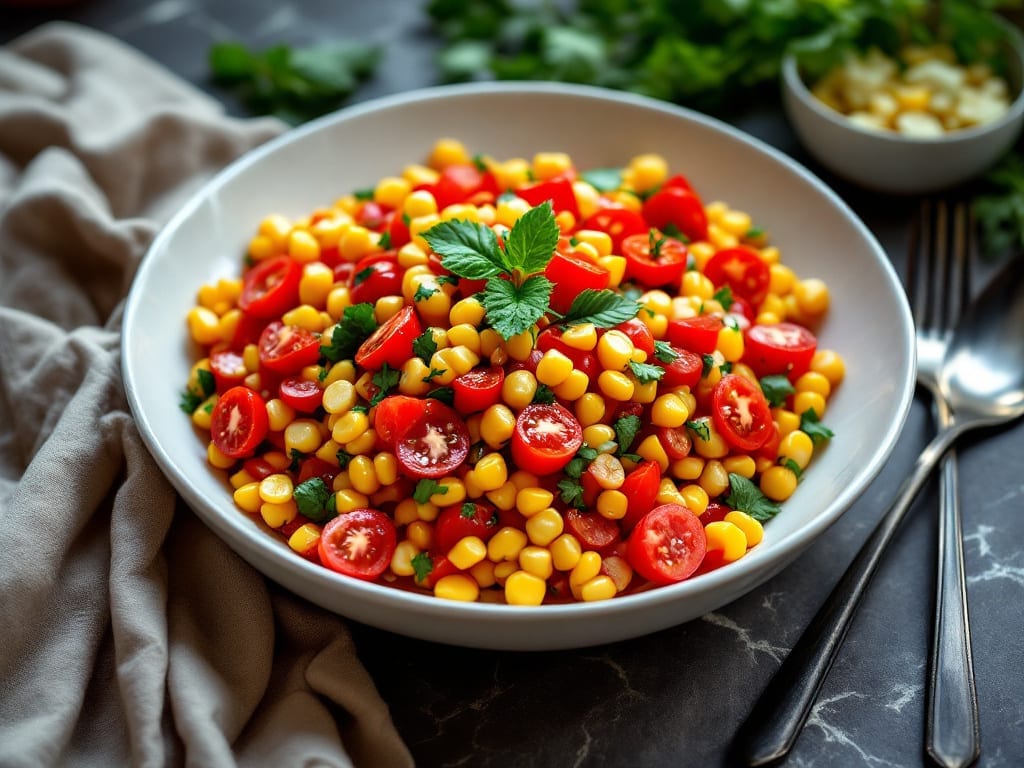
Preserving the bright, summery flavors of corn and tomatoes in homemade salsa through canning transforms a seasonal bounty into year-round goodness. ✨ This recipe delivers a foolproof method for safely sealing vibrant salsa in jars—perfect for gifting, pantry staples, or enjoying when fresh produce isn’t available.
The key lies in proper acidification, sterilization, and processing times that guarantee both safety and flavor preservation.
What makes this corn and tomato salsa recipe stand out is its balance of sweetness, acidity, and texture—crisp corn kernels and juicy tomatoes hold their freshness even after canning.
The process requires just 30 minutes of active prep followed by water bath canning, making it ideal for beginners while still yielding restaurant-quality results. Proper headspace and lid sealing are critical to prevent spoilage while maintaining that vibrant, garden-fresh taste.
By following these precise steps, you’ll end up with jars of salsa that stay fresh for up to a year, ready to elevate tacos, nachos, or grilled meats anytime. The acidified tomato base ensures safety while the careful canning process locks in color, flavor, and texture.
This method preserves not just ingredients, but the essence of summer in every jar.
The beauty of canning lies in its versatility—use this salsa as a condiment, a side dish, or even a base for soups. Whether you’re stocking your pantry or preparing for holiday gifts, this recipe delivers professional-quality results with simple techniques.
Let’s get started on preserving your summer harvest safely and deliciously.
Ingredients for corn and tomato salsa canning
Preserve summer’s bright flavors in jars with these essential ingredients for vibrant, safe canned salsa.
| Ingredient | Amount | Notes |
|---|---|---|
| Fresh Roma Tomatoes 🍅 | 4 lbs | Ripe, firm, cored and chopped |
| Sweet Corn Kernels 🌽 | 3 cups | Freshly cut or frozen, thawed |
| White Vinegar 🍶 | 1 cup | White distilled preferred |
| Lemon Juice 🍋 | ½ cup | Freshly squeezed, acidifies salsa |
| Onion 🧅 | 1 whole | Yellow or white, finely diced |
| Garlic Cloves 🧄 | 6 cloves | Fresh, minced for depth |
| Jalapeño Pepper 🌶️ | 2 whole | Seeds removed for mild heat |
| Salt 🧂 | 2 tbsp | Non-iodized preferred |
| Cilantro Leaves 🌿 | ½ cup | Chopped, optional garnish |
| Pint-Sized Mason Jars 🥫 | 6 jars | With lids and bands |
For the best results, prioritize ripe but firm tomatoes—they yield more juice and maintain texture after processing. Local farmers markets often have the freshest produce, but grocery store tomatoes work fine if they’re vine-ripened. The corn should be sweet and tender—freshly cut kernels are ideal, but frozen works in a pinch (thaw and drain well). For acidification, white vinegar and lemon juice are critical to safety; never skip this step. The jalapeños should be mild if you prefer less heat, but the seeds add intensity—remove them if you want a gentle kick. Penzeys or local spice shops carry high-quality vinegar if you want to splurge, but basic white vinegar is perfectly adequate.
No fresh cilantro? Fresh parsley or basil works as a garnish, though cilantro’s bright flavor is signature. Running out of jalapeños? Serrano peppers at half the quantity deliver similar heat. The onions and garlic can be swapped for green onions or shallots, but they’ll alter the flavor profile slightly. If you’re short on time, pre-chopped frozen corn saves prep work—just thaw and drain thoroughly. The vinegar-to-lemon juice ratio is non-negotiable for safety; if you’re concerned, increase the lemon juice slightly. For storage, glass mason jars with new lids are essential—never reuse old lids, as they won’t seal properly.
Salsa keeps safely for 12-18 months in a cool, dark pantry once processed. Always check seals before storing—if the lid pops when pressed, it didn’t seal and should be refrigerated immediately. Label jars with the date to track freshness. For gifting, wrap jars in twine and add a ribbon for a rustic touch. The flavor actually improves over time, so don’t rush to open them. If you’re canning for the first time, process at least 6 jars to ensure you’ve mastered the technique before scaling up.
Why You’ll Love This Recipe
- No-Chop Nightmare: I swear by this recipe because the onion gets minced in the food processor—no tears, no fuss. Just dump, pulse, and move on while the vinegar and lemon juice do their magic to brighten everything up.
- Summer in a Jar: That sweet corn and Roma tomato combo? It’s like summer vacation in your pantry. The vinegar keeps it fresh, the lemon juice adds a zesty kick, and the onions give it just enough depth to make it ridiculously good with chips or tacos.
- Pantry Superhero: Between us, this salsa lasts months—I’ve got jars from last summer’s garden still going strong. It’s my go-to for quick meals, potlucks, or when I forget to meal prep (which happens… often).
- Budget-Friendly Staple: Fresh tomatoes and corn are cheap in season, and the vinegar and lemon juice stretch your dollar. Honestly, I make a big batch, can it, and use it in everything—burgers, grilled fish, even scrambled eggs. It’s my secret weapon for stretching groceries without sacrificing flavor.
Step-by-step instructions for corn and tomato salsa preservation
Here’s how to transform fresh ingredients into shelf-stable salsa with perfect texture and flavor.
🍳 Step 1: Prepare and Cook the Base Ingredients
In a large stockpot, combine the 4 lbs fresh Roma tomatoes (cored and chopped), 3 cups sweet corn kernels, 1 whole onion (finely diced), 6 cloves garlic (minced), and 2 whole jalapeño peppers (seeds removed and chopped). Bring to a boil over medium-high heat, then reduce to a simmer for 15 minutes until the tomatoes break down and the mixture softens.
Here’s the thing—you want the tomatoes to lose their raw texture but retain their vibrant color. Stir occasionally, and taste after 10 minutes to check for doneness. The mixture should be easily mashable between your fingers. If it’s still too chunky, let it cook another 5 minutes. The corn will soften slightly but stay distinct in texture, which is perfect for the final salsa.
🍳 Step 2: Season and Acidify the Mixture
Add the 1 cup white vinegar, 0.5 cup lemon juice, and 2 tbsp salt to the simmering mixture. Stir well to combine. The acidification is critical—it lowers the pH to create a safe, shelf-stable product while brightening the flavors. Let the mixture simmer uncovered for another 10 minutes to allow the acid to fully incorporate and the flavors to meld.
You’ll notice the liquid reduce slightly and the colors deepen to a rich, vibrant red. This is your signal that the acid has done its job. Remove from heat and let the mixture cool to room temperature—this prevents steam buildup during canning, which can cause jars to crack. I like to spread it out on a baking sheet for faster cooling, about 30 minutes. If it cools too slowly, the salsa may ferment prematurely.
🥘 Step 3: Fill and Process the Mason Jars
Once the salsa has cooled completely, ladle it into the 6 pint-sized mason jars, filling each to within ½ inch of the rim. Use a spoon to remove air bubbles and ensure the mixture settles evenly. Wipe the jar rims with a clean, damp cloth to remove any residue that could prevent proper sealing.
Place the lids on the jars and screw on the bands until fingertip-tight—you shouldn’t need to force them, but they should be snug. This creates an airtight seal that’s essential for safe preservation. Place the filled jars in a canning pot or large pot with enough water to cover them by 1-2 inches. Bring the water to a gentle boil over medium heat—you’re looking for a rolling boil that’s not so vigorous it causes the jars to rock.
⏰ Step 4: Process for Safe Preservation
Once the water reaches a rolling boil, process the jars for 35 minutes for pint-sized jars. Set a timer and avoid opening the lid during processing—this maintains the proper temperature and pressure needed for safe canning. The jars should remain submerged and the water should continue to boil steadily throughout.
After 35 minutes, carefully remove the jars using tongs and place them on a clean towel. Let them cool undisturbed for 12-24 hours. You’ll hear a satisfying “ping” as the lids seal. To test, press the center of each lid—if it doesn’t pop, the jar is sealed. If any jars don’t seal, refrigerate and use within 1 week or reprocess with a new lid.
🔪 Step 5: Store and Enjoy
Once fully cooled and sealed, label the jars with the date and store in a cool, dark place. This salsa will keep for up to 1 year unopened. The flavors will mellow slightly over time, but the bright acidity and sweet corn will still shine. When ready to use, open a jar and give it a taste—you’ll be rewarded with a vibrant, balanced salsa that’s perfect for dips, tacos, or topping grilled meats.
Here’s a pro tip: Stir in the 0.5 cup chopped cilantro leaves just before serving to keep the herb’s freshness. The cilantro adds a bright finish that complements the sweet corn and tangy tomatoes beautifully. Enjoy your homemade, shelf-stable salsa—it’s a taste of summer anytime you want it.
Pro Tips For Making Corn And Tomato Salsa Canning
- BOIL WATER FIRST: Boil your canning jars and lids in a separate pot for 10 minutes before filling—sterilizing them this way prevents moldy salsa later. I learned this the hard way after opening a jar two months later to find fuzzy growth.
- PEEL TOMATOES QUICKLY: Run whole Roma tomatoes under hot tap water for 30 seconds, then plunge into ice water to loosen skins—peeling becomes effortless. Cold skins slide off like magic, and you skip the messy knife work.
- MEASURE VINEGAR PRECISELY: Use a kitchen scale for vinegar (1.25 oz per pint jar) instead of eyeballing—too little risks spoilage, while too much makes the salsa taste harsh. My first batch failed because I guessed, so now I weigh it every time.
- SAVE CORN FROM STALK: Cut fresh corn kernels directly into the pot with the tomatoes instead of using canned—it keeps the texture tender and sweet. If using frozen, thaw and drain completely or your salsa will turn mushy. (Yes, I’ve ruined jars this way.)
Troubleshooting this dish
Moldy or Cloudy Salsa
If your salsa develops mold or appears cloudy after opening, it’s a sign of spoilage. Mold can appear as fuzzy spots or discoloration, while cloudiness often indicates fermentation gone wrong.
Discard any jars with these signs immediately—never taste-test for safety. Always store opened jars in the refrigerator and use within 1 week to prevent this issue. 🌱
Soft or Mushy Texture
Overprocessing or improper acidification can lead to a mushy texture in your canned salsa. If the corn and tomatoes lose their distinct bite, it means the acid levels were insufficient or the processing time was too long.
To fix this, ensure you use the full 1 cup vinegar and 0.5 cup lemon juice—this is non-negotiable for safety and texture. If you accidentally under-acidify, reprocess the salsa with additional acid and monitor closely.
Lids That Won’t Seal
If your jars fail to seal during processing, it’s usually due to improper headspace, dirty jar rims, or insufficient processing time. First, check that each jar has exactly ½ inch of headspace—this is critical. Wipe the rims thoroughly with a damp cloth to remove any residue.
If lids still don’t seal, reprocess the jars for the full 35 minutes with new lids. Never force a lid—it should seal naturally during cooling. Store unsealed jars in the fridge and use within 1 week. 🥫
Excessive Foam or Bubbles
Foam or bubbles in your salsa during processing can indicate too much air trapped in the jars. To prevent this, ladle the salsa in slowly and use a non-metallic utensil to tap the jars gently, releasing trapped air.
If foam forms during processing, simply skim it off before sealing. Excessive foam can also result from overcooking the mixture—stick to the 15-20 minute simmer time to avoid breaking down the corn and tomatoes too much.
Rust or Corrosion on Jars
Rust on your mason jars is a sign of improper storage or old lids. Always use new lids for canning, as old ones can corrode and fail to seal properly. Store jars in a cool, dry place away from moisture.
If you notice rust after processing, it’s likely from the lid or band—never use jars with rusted components. Invest in a pack of new lids and bands from a trusted brand like Ball or Kerr to ensure safe canning every time.
Off or Fermented Smell
A sour or fermented odor means your salsa has undergone unwanted fermentation, often due to insufficient acidification or improper storage. If you detect this smell, discard the salsa immediately—it’s unsafe to eat. To prevent this, always measure your acid ingredients precisely and ensure the salsa cools completely before canning.
Store sealed jars in a dark, cool pantry (below 70°F) to maintain freshness. A properly acidified salsa should smell bright and tangy, not sour or funky. 💡
Nutrition facts
Frequently asked questions about canning corn and tomato salsa
Why is acidification so important in this recipe?
The vinegar and lemon juice create an acidic environment that prevents harmful bacteria growth, making your salsa safe for long-term storage. Tomatoes alone aren’t acidic enough for safe canning—this combo ensures both safety and that bright, tangy flavor we all love.
Can I use frozen corn instead of fresh?
Thaw and drain frozen corn thoroughly before using—it works perfectly and saves time. Just measure after draining to maintain the 3 cups required for proper texture. The canning process will handle any slight texture differences between fresh and frozen.
How do I know when my jars are properly sealed?
After cooling 12-24 hours, press the center of each lid—it should stay down when pressed and not pop back up. If any lid pops, that jar didn’t seal properly and should be refrigerated for immediate use. Proper sealing is what gives your salsa that long shelf life!
What can I do with extra salsa?
Gift it in pretty jars with ribbons, or freeze portions for later. This salsa also makes amazing grilled chicken marinades, taco fillings, or even a base for soups. The possibilities are endless—just store extras in the fridge for 1 week or freeze for 3 months.
Can I adjust the spice level after canning?
No—once sealed, the salsa’s heat level is fixed. For milder salsa, remove jalapeño seeds before canning. To add more spice later, simply stir in chopped fresh peppers or hot sauce when serving. The canning process preserves the existing flavors perfectly.

- Mary Berry’s Boiled Fruit Cake Recipe: Moist Center and Spiced Crust Magic - November 5, 2026
- Atlantic Salmon Recipe: Honey-Dill Pan-Seared With Crispy Skin - November 5, 2026
- Blaze Pizza Copycat Dough Recipe: Chewy, Airy Crust That Mimics the Original - November 5, 2026