
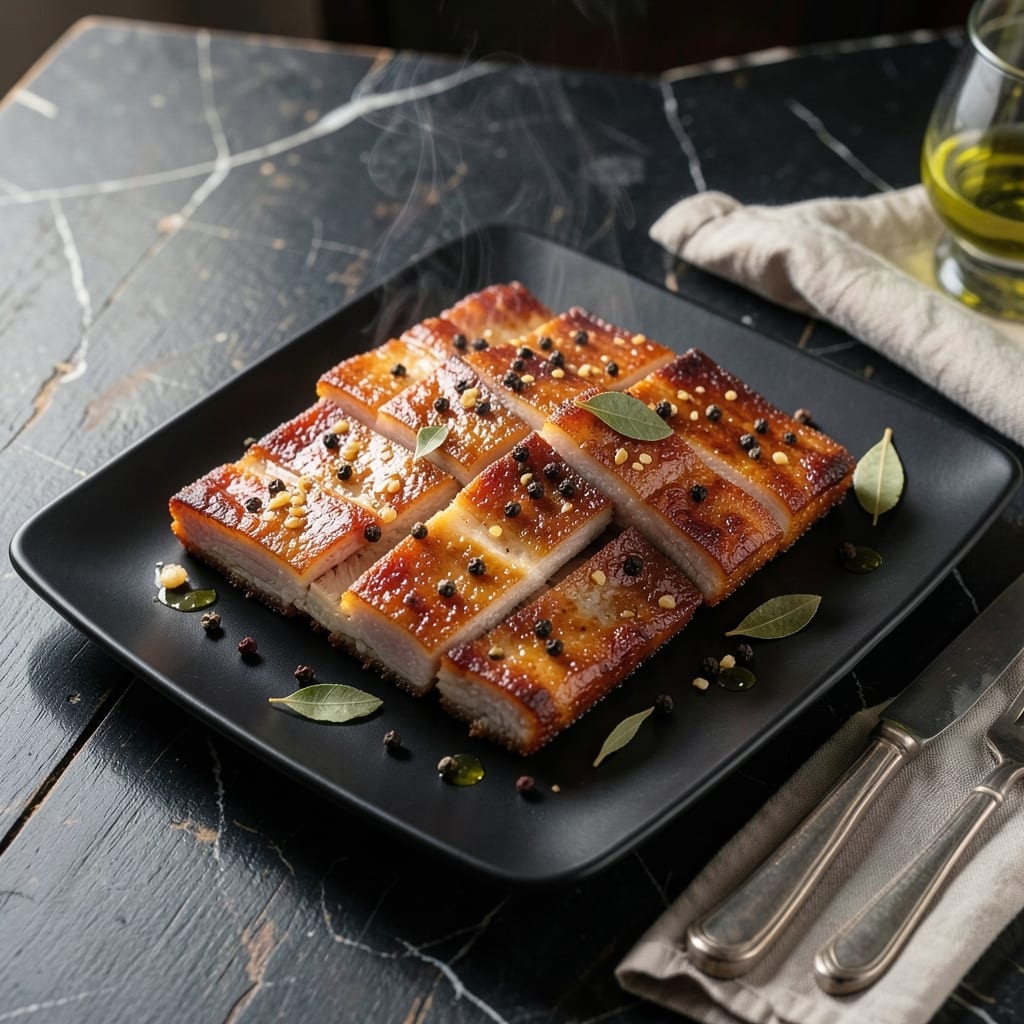
Achieving crispy pork belly at home is simpler than you might expect. This method guarantees perfectly golden layers with minimal effort and maximum flavor.
The secret lies in the preparation—properly scoring the skin and drying the meat thoroughly before frying. This ensures every bite delivers that satisfying crunch you crave.
Frying at the right temperature is crucial for even cooking without burning. The result is pork belly with a shatteringly crispy exterior and tender, juicy meat inside.
Serve immediately for the best texture, as the crust stays at its peak right out of the oil. This dish transforms any meal into a special occasion.
Ingredients for Deep Fried Pork Belly
Crispy perfection starts with quality pork belly and a few pantry essentials for the cure.
| Ingredient | Amount | Notes |
|---|---|---|
| Pork Belly 🥓 | 2 lb | Skin-on, cut into 1-inch strips |
| Kosher Salt 🧂 | 2 tbsp | Diamond Crystal preferred for curing |
| Granulated Sugar 🍚 | 1 tbsp | Balances salt in cure |
| Black Peppercorns 🌶️ | 1 tbsp | Lightly crushed for texture |
| Bay Leaves 🍃 | 2 whole | For aromatic curing |
| Garlic Cloves 🧄 | 6 cloves | Smashed for infusion |
| Neutral Oil 🫒 | 8 cups | Peanut or vegetable oil for frying |
| White Vinegar 💧 | ¼ cup | For skin blanching |
| Baking Soda 🧂 | 1 tsp | For extra crispiness |
| Fresh Thyme Sprigs 🌿 | 4 whole | Optional for garnish |
| Lemon Wedges 🍋 | 4 pieces | For serving |
The pork belly is non-negotiable—source skin-on cuts from a reputable butcher like Whole Foods or your local Asian market. Look for even marbling and a thick skin layer (at least 1/4 inch) for that signature crunch. Diamond Crystal kosher salt is ideal for the cure due to its consistent texture and clean flavor. Avoid pre-cut pieces; a whole slab lets you control the thickness for even cooking.
No pork belly? Pork shoulder with skin can work in a pinch, though the texture won’t be as luxurious. For the cure, sea salt at half the volume if Diamond Crystal isn’t available. The vinegar in the blanching step can be swapped for rice vinegar or apple cider vinegar—just avoid balsamic (too dark). The oil must be neutral with a high smoke point; peanut oil is traditional, but sunflower or canola oil are solid alternatives.
The cured pork belly keeps in the fridge for 3-4 days before cooking, but it’s best fried fresh. Once fried, serve immediately—the crust loses its shatter within 10-15 minutes. Leftovers (unlikely!) can be refrigerated for 2 days and reheated in a dry skillet to revive some crispness.
Why You’ll Love This Recipe
- Five Ingredient Magic: I love that this only needs pork belly, salt, sugar, peppercorns, and bay leaves—nothing fancy, just big flavor.
- Crispy Outside, Tender Inside: That contrast of the crackling skin with the melt-in-your-mouth fat is ridiculous. Honestly, it’s the reason I keep making it.
- Feeds a Hungry Crowd: One slab of pork belly stretches far, whether it’s a weekend lunch or a last-minute dinner for friends.
- Leftovers? Even Better: The flavors deepen overnight, so I always make extra. Between us, cold pork belly in a sandwich the next day is a secret win.
Step-by-Step Instructions for Deep Fried Pork Belly
This method ensures maximum crispiness with juicy interior layers every time.
Step 1: Cure the Pork Belly for Optimal Flavor
Begin by rubbing the 2 lb Pork Belly strips with a mixture of 2 tbsp Kosher Salt, 1 tbsp Granulated Sugar, 1 tbsp Black Peppercorns, 2 whole Bay Leaves, and 6 cloves Garlic Cloves. I crush the peppercorns lightly to release their aroma without making them too fine.
Place the pork belly in a shallow dish, skin-side up, and distribute the cure evenly over all surfaces. Let it sit uncovered in the refrigerator for 12-24 hours. This curing process draws out moisture, seasons the meat deeply, and creates the foundation for that perfect crispy texture.
Step 2: Blanch the Skin for Extra Crunch
After curing, rinse the pork belly strips under cold water to remove excess cure, then pat them completely dry with paper towels. In a large pot, bring 4 cups of water and 0.25 cup White Vinegar to a boil.
Add the pork belly strips and blanch for 3-5 minutes. This step helps break down the skin’s collagen, ensuring it puffs up and becomes extra crispy when fried. Remove the strips and pat them dry again—any remaining moisture will cause oil splatter during frying.
Step 3: Double-Fry for Maximum Crispiness
Heat the 8 cups Neutral Oil in a deep, heavy pot to 325°F. Add the pork belly strips in batches, being careful not to overcrowd the pot. Fry them for 8-10 minutes until the skin begins to puff and turn light golden.
Remove the strips and drain on a wire rack. Increase the oil temperature to 375°F. Fry the pork belly again for 3-4 minutes until the skin is deep golden brown and shatteringly crisp. This double-frying technique is the secret to achieving that perfect texture contrast between the crispy exterior and tender interior.
Step 4: Enhance and Finish with Baking Soda
For an extra level of crispiness, I sprinkle 1 tsp Baking Soda over the pork belly strips just before the second fry. The baking soda raises the pH of the skin’s surface, promoting better browning and an even crunchier texture.
Drain the fried pork belly on a wire rack set over a baking sheet—this allows air to circulate underneath, keeping the skin crisp. Let them rest for 2-3 minutes before serving to allow the juices to settle.
Step 5: Serve with Garnish and Citrus
Transfer the deep fried pork belly to a serving platter. Garnish with 4 whole Fresh Thyme Sprigs for a touch of aromatic freshness. Serve immediately with 4 pieces Lemon Wedges on the side—the acidity cuts through the richness beautifully.
The pork belly should have a glossy, deep golden crust that shatters at the slightest touch, revealing juicy, tender layers beneath. The contrast between the crispy skin and the melt-in-your-mouth fat is what makes this dish truly exceptional.
Pro Tips For Making Deep Fried Pork Belly
- Score the Skin: Cut 1/4-inch crosshatches into the pork belly skin before curing—this helps render fat evenly and creates that shatteringly crisp texture.
- Dry It Overnight: After the salt-sugar cure, leave the pork belly uncovered in the fridge for 12 hours; the dry surface ensures a better fry without splatter.
- Mind the Oil Temp: Keep oil between 325°F-350°F—I learned this the hard way after burning a batch at 375°F; too hot and the outside chars before the inside cooks.
- Double Fry for Crisp: Fry once at 300°F until tender, then rest and fry again at 375°F for 2 minutes; sounds like extra work, but it’s the only way to get that glass-like crackling.
Troubleshooting This Recipe
Oil Temperature Issues
If your pork belly isn’t crisping, check your oil temperature with a thermometer—it should stay steady at 325°F for the first fry. Too low and the meat absorbs oil instead of crisping. I use a Taylor digital thermometer for precision.
Soggy Skin Problem
Soggy skin usually means moisture wasn’t fully removed before frying. After blanching, pat the strips completely dry with paper towels, then let them air-dry on a rack for 10 minutes before frying. This extra step makes all the difference. 🔥
Uneven Cooking
Uneven cooking often happens when overcrowding the pot. Fry in batches with at least 2 inches between pieces. I recommend using a 5-quart Dutch oven to give the pork belly plenty of room to move freely.
Excess Oil Absorption
If your pork belly absorbs too much oil, your oil temperature is likely too low. Increase heat to 375°F for the second fry. Also, ensure your oil is fresh—used oil breaks down faster and can lead to greasier results.
Skin Won’t Puff
For skin that won’t puff, the blanching step is crucial. Boil the strips in vinegar water for the full 5 minutes. This softens the skin so it can expand properly during frying. I learned this trick from a Chinese restaurant chef.
Buring the Exterior
Burning happens when oil is too hot. If you see smoke or the pork darkens too quickly, reduce heat immediately. The ideal range for the second fry is 350-375°F. A heavy pot helps maintain even temperature throughout the process.
Nutrition Facts
Frequently Asked Questions
What oil works best for frying?
Use a neutral oil with a high smoke point like peanut, vegetable, or sunflower. Peanut oil is traditional for its clean flavor. Avoid olive oil as it can burn at high temperatures.
Why is double-frying necessary?
The first fry at 325°F cooks the meat through, while the second at 375°F creates the crispy crust. This two-step process ensures even cooking and maximum crispiness.
Can I skip the curing step?
No, curing for 12-24 hours is essential. It seasons the meat and draws out moisture, which is crucial for achieving that perfect crispy texture.
How do I keep the skin crispy longer?
Drain on a wire rack, not paper towels, to allow air circulation. Serve immediately—the crust stays crispest right out of the oil. Leftovers can be reheated in a dry skillet.

- BBQ Bison Recipe Steaks: Smoky Grill Mastery with Bold Flavor - September 28, 2026
- Chicken Breast Recipe Tender: Brine-Soaked Juiciness Without Overcooking - September 28, 2026
- Baked Chicken Recipe for Acid Reflux: Gentle Flavors for Sensitive Stomachs - September 28, 2026