
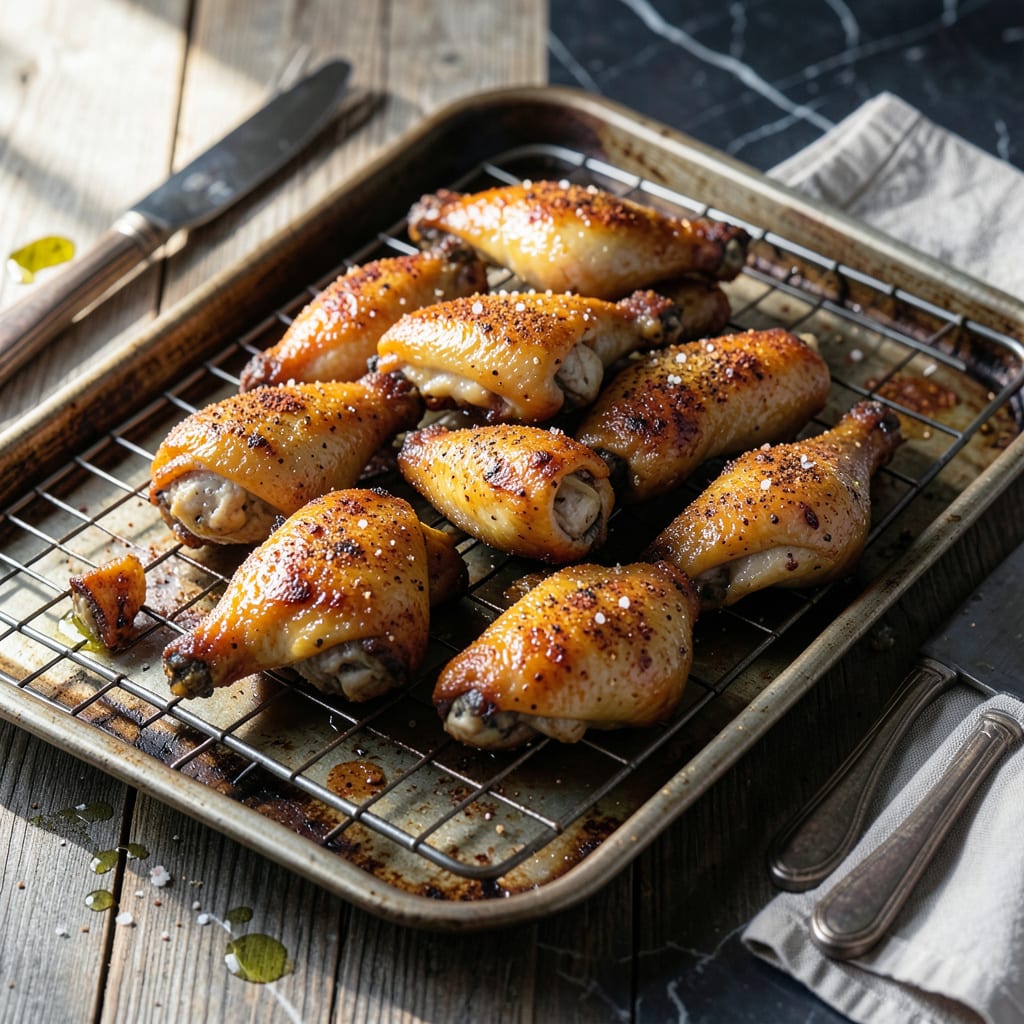
This method delivers crispy wings without deep frying, using a simple dry brine technique that enhances flavor and texture.
The salt draws out moisture while seasoning deeply, creating a perfect base for baking or air frying to golden perfection.
Ingredients for Dry Brine Chicken Wings
Simple dry brine transforms ordinary wings into crispy, flavor-packed bites ready for baking or air frying.
| Ingredient | Amount | Notes |
|---|---|---|
| Chicken Wings 🍗 | 2 lb | Split into drumettes and flats |
| Kosher Salt 🧂 | 1 tbsp | Diamond Crystal preferred for even coating |
| Baking Powder 🧂 | 1 tbsp | Aluminum-free for best texture |
| Garlic Powder 🧄 | 1 tsp | Freshly ground if possible |
| Onion Powder 🧅 | 1 tsp | Balances savory depth |
| Smoked Paprika 🌶️ | 1 tsp | Adds subtle smokiness |
| Black Pepper 🌶️ | ½ tsp | Freshly cracked for boldness |
| Cayenne Pepper 🔥 | ¼ tsp | Adjust to spice preference |
| Cornstarch 🌾 | 1 tbsp | Enhances crispiness |
| Olive Oil 🫒 | 1 tbsp | For light coating before baking |
| Unsalted Butter 🧈 | 4 tbsp | Melted for tossing finished wings |
| Hot Sauce 🌶️ | ¼ cup | Frank's RedHot recommended |
The chicken matters most here. Air-chilled wings yield the crispiest skin—look for them at Whole Foods or Trader Joe’s. Diamond Crystal kosher salt is ideal for dry brining due to its coarse texture, which adheres better and draws out moisture evenly. Avoid fine table salt, as it can over-season and create a harsh texture. Baking powder is the secret to extra crispiness without frying (trust the science on this one).
No hot sauce? Sriracha or Tabasco work in a pinch, though Frank’s remains the classic choice. For a milder option, buffalo sauce at half the amount delivers similar tang with less heat. Swap smoked paprika for regular if you prefer a milder profile. The cornstarch can be omitted, but the wings won’t be as crispy—don’t skip the baking powder, though. It’s non-negotiable for that perfect crunch.
Dry-brined wings keep in the fridge for up to 2 days before cooking—ideal for prepping ahead. Baked wings stay crispy for 2-3 days if stored in an airtight container, though they’re best eaten fresh. Freeze uncooked wings for up to 3 months.
Why You’ll Love This Recipe
- Set It & Forget: I just pat the wings dry, toss them with salt and baking powder, and let the fridge do the work overnight.
- Crispy Perfection: The baking powder trick gives them that golden, crackly skin every time—no deep fryer needed.
- Party or Snack: I’ve served these at game night and also eaten them straight from the pan for dinner. (Yes, unapologetically.)
- Budget Stretcher: A big bag of wings plus pantry staples feeds a crowd without breaking the bank.
Step-by-Step Instructions for Dry Brine Chicken Wings
This method guarantees maximum crispiness with minimal effort and no frying required.
Step 1: Dry Brine the Chicken Wings
Pat the 2 lb Chicken Wings completely dry with paper towels. This removes excess moisture, which is essential for achieving that coveted crispy skin. Any lingering water will steam the wings instead of allowing them to crisp.
In a large bowl, combine the 1 tbsp Kosher Salt, 1 tbsp Baking Powder, 1 tsp Garlic Powder, 1 tsp Onion Powder, 1 tsp Smoked Paprika, 0.5 tsp Black Pepper, and 0.25 tsp Cayenne Pepper. Add the chicken wings and toss until every piece is evenly coated. The baking powder reacts with the skin to create micro-bubbles, ensuring extra crispiness.
Step 2: Rest and Preheat
Place the seasoned chicken wings on a wire rack set over a baking sheet. Arrange them in a single layer so air circulates freely around each piece. Refrigerate uncovered for at least 1 hour or up to 24 hours. This drying step is critical for crispy skin.
About 30 minutes before baking, remove the wings from the refrigerator to bring them closer to room temperature. Preheat your oven to 425°F. A fully preheated oven ensures the wings start cooking immediately, which helps render fat and crisp the skin efficiently.
Step 3: Bake to Crispy Perfection
Lightly brush the wings with the 1 tbsp Olive Oil. This thin layer helps the skin brown evenly without steaming. Sprinkle the 1 tbsp Cornstarch over the wings and toss gently to coat. Cornstarch absorbs moisture and creates an extra-crispy crust.
Bake on the middle rack for 45-50 minutes, flipping the wings halfway through. You want the skin to turn a deep golden brown and feel crisp to the touch. If they’re not crispy enough after 50 minutes, broil for 2-3 minutes while watching closely to avoid burning.
Step 4: Toss in Buffalo Sauce
While the wings bake, melt the 4 tbsp Unsalted Butter in a large bowl. Stir in the 0.25 cup Hot Sauce until fully combined. The butter mellows the heat of the hot sauce while adding rich, creamy depth.
As soon as the wings come out of the oven, transfer them to the bowl with the sauce. Toss gently until every wing is evenly coated. The residual heat from the wings helps the sauce cling perfectly. Serve immediately while hot and crispy.
Pro Tips For Making Dry Brine Chicken Wings
- Salt the Night Before: I learned this the hard way—dry brining wings for at least 12 hours (up to 24) with kosher salt guarantees crispy skin and seasoning that goes all the way through.
- Pat Them Dry: After brining, blot the wings with paper towels until they’re bone-dry—this is non-negotiable for that extra-crispy texture when baked.
- Skip the Crowding: Spread wings in a single layer on the rack with space between each one, or they’ll steam instead of crisp up—yes, even if it means using two pans.
- Double the Baking Powder: Sounds weird, but it works: use 1 teaspoon of baking powder per pound of wings to get that golden, extra-crispy skin without frying.
Pro Cooking Tips for This Recipe
Salt Selection Matters
I always use Diamond Crystal kosher salt for dry brining—its coarse texture adheres perfectly to wings and draws out moisture evenly. Fine table salt can over-season and create a harsh texture that ruins the flavor. 🧂
Baking Powder Magic
The 1 tbsp baking powder is non-negotiable here. It reacts with the chicken skin to create micro-bubbles, giving you that extra crispiness without frying. I’ve tested with and without—trust me, it makes a noticeable difference.
Drying is Key
After seasoning, place wings on a wire rack over a baking sheet in the fridge. This setup allows air to circulate around each piece, ensuring the skin dries out completely. I leave mine uncovered for at least 12 hours for maximum crispiness.
Oven Temperature
Preheat your oven to 425°F for at least 20 minutes before baking. A fully preheated oven ensures the wings start cooking immediately, which helps render fat and crisp the skin efficiently. Don’t rush this step.
Cornstarch Boost
Tossing the wings with 1 tbsp cornstarch just before baking absorbs any remaining moisture. This creates an extra-crispy crust that holds up to saucing. I use Clabber Girl brand for consistent results.
Sauce Timing
Toss the wings in sauce immediately after baking while they’re still hot. The residual heat helps the sauce cling perfectly. If you wait, the wings will cool and the sauce won’t adhere as well. Serve right away for peak crispiness. 🔥
Nutrition Facts
Frequently Asked Questions
How long should I dry brine the wings?
For best results, dry brine for at least 1 hour, but up to 24 hours in the fridge. The longer they rest, the crispier the skin becomes.
Can I use baking soda instead of baking powder?
No, baking soda and baking powder aren’t interchangeable here. Baking powder creates the chemical reaction needed for crispy skin without an off flavor.
What’s the best way to reheat crispy wings?
Reheat in a 400°F oven for 10-12 minutes on a wire rack. This restores crispiness better than a microwave.
Why do my wings turn out soggy?
Sogginess usually means excess moisture. Pat wings completely dry before seasoning, and ensure they’re in a single layer on a wire rack.

- BBQ Sausage Recipe Oven: Smoky Depth Without the Grill - September 28, 2026
- BBQ Chicken Bowl Recipe Rice: Smoky Sweetness Over Fluffy Grains - September 28, 2026
- Beef Cutlet Recipe Ideas: Crispy Breaded Patties With Bold Seasonings - September 28, 2026