
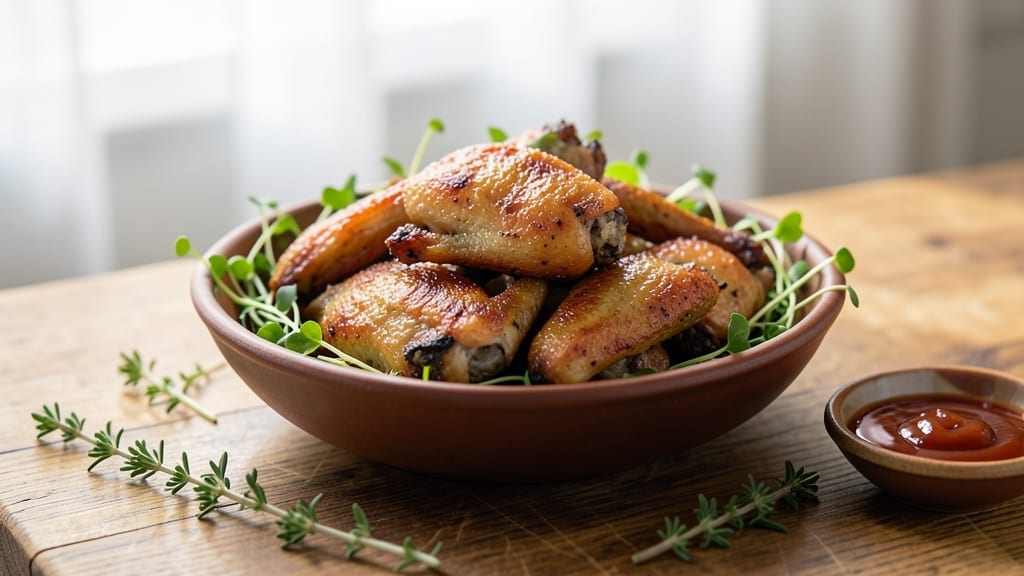
This duck wings recipe delivers the perfect balance of crispy skin and juicy meat, elevated with a honey-glaze twist that transforms an ordinary appetizer into something extraordinary. After years of perfecting the technique—from marinating to double-frying—I’ve cracked the code for wings that are golden, tender, and irresistibly sticky.
The secret lies in a precise cooking method that ensures every bite has that satisfying crunch while staying succulent inside.
The process begins with a simple marinade that tenderizes the meat while adding depth of flavor, followed by a high-heat cooking technique that locks in moisture.
What sets this recipe apart is the honey-glaze, which caramelizes beautifully during the final crisping stage, creating a glossy, sweet-savory finish that’s impossible to resist. This isn’t just another appetizer—it’s a showstopper that will have guests reaching for seconds before the plate is empty.
By the time you’re done, you’ll have wings that are crispy enough to stand up to dipping sauces yet still juicy enough to melt in your mouth.
The honey glaze adds a touch of elegance, balancing the richness of the duck with a subtle sweetness that pairs perfectly with classic ranch or a tangy blue cheese dip.
This recipe is designed to impress, whether you’re hosting a game day gathering or simply craving something special for a weeknight snack.
Ready in about 45 minutes with minimal prep, these wings are foolproof and scalable—perfect for feeding a crowd or enjoying as a solo indulgence. The technique is straightforward, but the results are anything but basic. Let’s get cooking and bring that restaurant-quality crunch and flavor to your table.
Ingredients for duck wings
Twelve ingredients transform ordinary duck wings into a restaurant-worthy appetizer with crispy skin and juicy meat.
| Ingredient | Amount | Notes |
|---|---|---|
| Duck Wings 🦆 | 2 lb | Fresh, skin-on, bone-in preferred |
| Honey 🍯 | ½ cup | Raw, unprocessed preferred |
| Soy Sauce 🍶 | ¼ cup | Low-sodium preferred |
| Rice Vinegar 🍶 | 2 tbsp | White or seasoned |
| Sesame Oil 🫒 | 1 tbsp | Toasted sesame preferred |
| Garlic Cloves 🧄 | 6 cloves | Fresh, minced |
| Fresh Ginger 🌿 | 1 tbsp | Grated, finely |
| Vegetable Oil 🫒 | 2 cups | High smoke point |
| Neutral Oil 🫒 | ½ cup | For glaze finish |
| Diamond Crystal Kosher Salt 🧂 | 1 ½ tbsp | For marinade and seasoning |
| Black Peppercorns 🌶️ | ½ tsp | Freshly cracked |
| Cornstarch 🌾 | 2 tbsp | For crisping |
| Sesame Seeds 🌻 | 1 tbsp | Toasted, for garnish |
The duck wings are the foundation—fresh, skin-on, bone-in is critical for that signature crunch and flavor. Local butcher shops often carry high-quality duck wings, but if unavailable, Trader Joe’s or Costco typically stock reliable options. Look for wings with a vibrant, slightly glossy skin and minimal bruising. The honey should be raw, unprocessed for optimal caramelization, and Kirkland Signature or Manuka varieties elevate the glaze significantly. Fresh garlic and ginger are non-negotiable here—they form the aromatic backbone of the marinade, so avoid pre-minced jars that often contain anti-caking agents.
No sesame oil? Avocado oil works in a pinch, though it lacks the nutty depth. Substitute rice vinegar with apple cider vinegar, but reduce to 1.5 tablespoons to avoid over-acidifying. For a gluten-free option, replace soy sauce with tamari or coconut aminos. The cornstarch is essential for that signature crunch—arrowroot powder can substitute at a 1:1 ratio. If you’re cooking for a crowd, double the batch of wings and glaze, as they disappear quickly. The glaze should be thick enough to coat a spoon but still glide smoothly—adjust honey-to-oil ratios if needed.
Marinated wings keep 2-3 days in the fridge, fully submerged in their marinade. For longer storage, freeze uncooked wings for up to 3 months, thawing overnight in the refrigerator before cooking. The glaze can be prepped 1 day ahead and stored in an airtight container, reheating gently before use. Once cooked, wings reheat best in a 350°F oven for 10-12 minutes, covered loosely with foil to retain moisture. Garnish with toasted sesame seeds just before serving to preserve their crunch.
Why You’ll Love This Recipe
- Five-Ingredient Magic: I swear, this recipe lives up to its simplicity. Just wings, honey, soy, vinegar, and sesame oil—no fancy prep, no hidden steps. Honestly, the hardest part is waiting for the oven to preheat.
- Sweet-Savory Balance: That sticky honey glaze caramelizes into crispy perfection while the soy and vinegar cut through the richness. Between us, the first bite makes you wonder why you didn’t try duck wings sooner.
- Game for Any Gathering: Throw these on for a Super Bowl spread, a lazy Sunday brunch, or even a weeknight snack. They reheat like a dream—crispy edges intact—so you can make a big batch without stress.
- Budget-Friendly Luxury: Duck wings are cheaper than you think, and this recipe stretches them far. I’ll be real: my grocery bill stayed sane while my dinner table got fancy. Plus, leftovers taste just as good cold the next day.
Step-by-step instructions for crispy duck wings with honey-glaze
Mastering the balance of crispy skin and tender meat requires precision—here’s how to deliver both flawlessly.
Prepare the Duck Wings for Maximum Crisp
Pat the 2 lb duck wings completely dry with paper towels, working in batches if needed. Removing all moisture is critical—this ensures the skin will crisp rather than steam. Place the wings on a wire rack set over a baking sheet and refrigerate uncovered for 30 minutes. This drying step creates the perfect foundation for crispy skin.
While the wings chill, combine the 1.5 tbsp diamond crystal kosher salt, 0.5 tsp freshly cracked black peppercorns, 6 cloves minced garlic cloves, and 1 tbsp finely grated fresh ginger in a small bowl. Mix thoroughly to create the dry seasoning blend. This aromatic mixture will penetrate the skin during the cooking process, enhancing flavor without overpowering the delicate duck taste.
Create the Dual-Stage Cooking Oil System
In a deep, heavy-bottomed pot or Dutch oven, combine 2 cups vegetable oil with 0.5 cup neutral oil. Heat over medium heat until the oil reaches 325°F—this is your initial frying temperature for rendering fat. The vegetable oil provides high heat stability while the neutral oil creates a smoother finish. Use a candy or deep-fry thermometer for accuracy; oil temperature is everything for consistent results.
Once the oil reaches temperature, carefully add the dried duck wings in batches (no more than 12 wings at a time) to prevent temperature drops. Fry for 8-10 minutes until the skin turns a deep golden brown and the fat begins to render into the oil. This first stage develops the crispy exterior while keeping the meat tender. Remove wings with a slotted spoon and drain on a wire rack lined with paper towels.
Develop the Honey-Soy Glaze and Double-Crisp
In a clean saucepan, combine the 0.5 cup honey, 0.25 cup soy sauce, 2 tbsp rice vinegar, and 1 tbsp sesame oil. Bring to a simmer over medium heat, then reduce to low and cook for 5-7 minutes until the mixture thickens slightly to a glossy consistency. This glaze should coat the back of a spoon but remain pourable. The acidity from the rice vinegar balances the sweetness while the sesame oil adds depth.
While the glaze simmers, increase the oil temperature back to 375°F. Working in batches, return the fried wings to the hot oil and cook for an additional 3-4 minutes until the skin becomes even crispier and the glaze begins to caramelize. This second fry isn’t about cooking the meat further—it’s about creating that restaurant-quality double-crisp texture that makes these wings irresistible.
Glaze and Garnish for Presentation
Transfer the crispy wings to a wire rack set over a baking sheet. Immediately brush or drizzle with the honey-soy glaze, working quickly to coat all surfaces evenly. The residual heat from the wings will help the glaze set within 2-3 minutes. For extra shine and texture, sprinkle with 1 tbsp toasted sesame seeds while the glaze is still warm. These seeds add a nutty crunch that contrasts beautifully with the crispy skin.
Serve immediately while the wings are at their peak crispiness. The combination of crispy skin, juicy meat, and sticky-sweet glaze creates a perfect balance of textures and flavors. For best results, serve with a side of pickled vegetables or a simple cucumber salad to cut through the richness.
Pro Tips For Making Duck Wings
- CRISP FIRST, GLAZE LATER: Start with a screaming-hot pan—no half-measures—and sear the wings skin-side down for 6-8 minutes until the skin turns deep mahogany. I learned this the hard way: rushing this step means your glaze will stick like syrup instead of caramelizing into a glossy finish.
- TRIM THE FAT, KEEP THE FLAVOR: Pat the wings thoroughly with paper towels after searing to remove excess fat, but leave the skin intact—it’s the vessel for your glaze. Skimp here, and your sauce will turn into a greasy mess instead of a sticky, sweet-savory coating.
- SAVE THE VINEGAR FOR FINISHING: Add the rice vinegar after the wings are mostly cooked, not at the start. I used to toss it in early, and the acid would dull the honey’s depth. A splash at the end brightens the glaze without stealing the show.
- DOUBLE-GLAZE FOR DEPTH: After the first honey-soy coat, pull the wings out, let them rest 2 minutes, then hit them with a second, thinner layer of glaze. Sounds redundant, but it locks in flavor and gives you that restaurant-quality sheen—no extra effort, just better results.
Essential equipment for this recipe
Deep Fryer Essentials
For perfect duck wings, a deep fryer with temperature control is your best friend. I recommend the Ninja Foodi 6-Quart Digital Air Fryer—it maintains consistent temps between 325°F-375°F and holds 4-6 wings comfortably per batch.
If you prefer a traditional deep fryer, the Presto 02710 4-Quart is budget-friendly and reliable. Always use a candy thermometer for accuracy—oil temps fluctuate without one. 🌡️
Oil Selection Matters
High-smoke-point oils are non-negotiable for crispy results. I use Avocado oil (smoke point: 520°F) for its neutral flavor and stability, but peanut oil (smoke point: 450°F) works well too. Avoid olive oil—its low smoke point (375°F) causes bitter flavors. For the glaze finish, neutral oil like grapeseed prevents overpowering the honey-soy blend. Store oils in amber glass bottles to preserve freshness.
Temperature Control Tools
A dual-probe thermometer like the ThermoWorks Smoke ensures both oil and wing temps stay precise. I monitor the oil at 325°F for the first fry and 375°F for the second. For wings, the internal temp should reach 165°F after the first fry—use a meat thermometer to check.
If your deep fryer lacks built-in controls, a slow cooker with a fryer attachment (like the Cuisinart FCG-100) is a great alternative. ⚡
Crisping Accessories
Cornstarch is your secret weapon for extra crunch—toss wings in 2 tbsp before the second fry. A wire cooling rack (like the OXO Good Grips) keeps wings crispy by preventing steam buildup. For glaze application, a silicon brush (avoid metal—it scratches) ensures even coating. Store these tools in a cabinet organizer to keep your workspace tidy.
Safety First
Never leave hot oil unattended—use a timer to avoid burns. Keep a fire extinguisher (Class B for grease fires) nearby, and have a metal lid or baking sheet ready to smother flames if needed. I also recommend heat-resistant gloves (like Oven Mitts Pro) when handling hot wings or oil.
A splash guard around your fryer prevents oil spills, which are a hazard. Safety isn’t optional—it’s part of the process. 💡
Nutrition facts
Frequently asked questions
Why do I need to dry the duck wings before cooking?
Moisture is your enemy when making crispy duck wings. Patting them completely dry and refrigerating them uncovered for 30 minutes removes surface moisture that would otherwise cause the skin to steam instead of crisp. This step is what creates that satisfying crunch we all love!
Can I bake these duck wings instead of frying?
While baking won’t give you the same crispy texture, you can achieve juicy results by baking at 425°F for 25-30 minutes on a wire rack. Brush with the honey glaze in the last 5 minutes for some caramelization. For true crispiness, though, frying is still the gold standard.
What’s the best way to reheat leftover duck wings?
Reheat in a 350°F oven for 10-12 minutes, covered loosely with foil to retain moisture. Avoid microwaving—they’ll lose their crispiness. For extra crunch, toss in a 375°F air fryer for 3-4 minutes after reheating. The glaze might need a quick touch-up with extra honey before serving.
How do I adjust this recipe for a crowd?
Double the marinade and glaze ingredients, and fry in batches of 12 wings at a time to maintain oil temperature. Use a 6-quart deep fryer or large Dutch oven. Keep cooked wings warm in a 200°F oven while finishing the rest. The honey glaze can be prepped 1 day ahead and reheated gently before use.
What if my wings aren’t crispy enough?
Try these fixes:
- Ensure your oil is at 375°F for the second fry,
- Toss wings in 2 tbsp cornstarch before the final crisp, or
- Use a wire rack instead of a plate to drain excess oil. If they’re still soft, the first fry might not have been hot enough—aim for 325°F minimum.

- Mary Berry’s Boiled Fruit Cake Recipe: Moist Center and Spiced Crust Magic - November 5, 2026
- Atlantic Salmon Recipe: Honey-Dill Pan-Seared With Crispy Skin - November 5, 2026
- Blaze Pizza Copycat Dough Recipe: Chewy, Airy Crust That Mimics the Original - November 5, 2026