
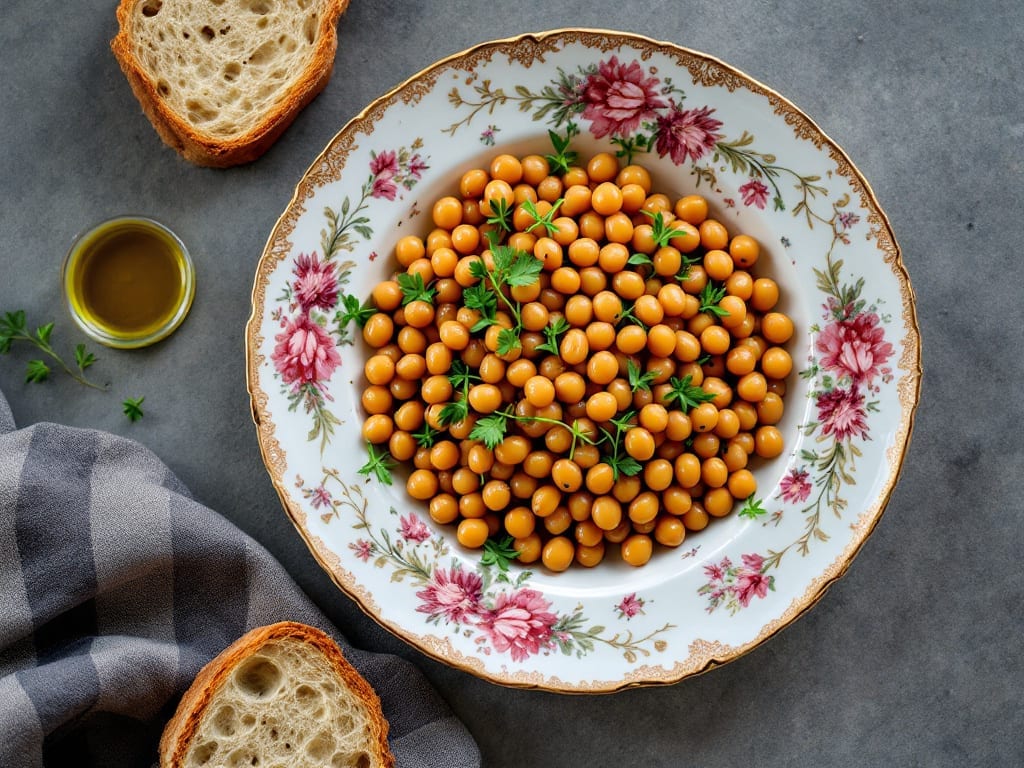
This fermented beans recipe transforms ordinary legumes into a probiotic powerhouse packed with deep umami flavors—no fancy equipment required. The 5-day fermentation process unlocks gut-friendly benefits while creating a versatile side that elevates everything from rice bowls to soups.
I perfected this method after years of experimenting with traditional techniques from Japanese natto to Indonesian tempeh, ensuring safety and maximum flavor development.
The process is straightforward but precise: soaking, culturing, and aging at controlled temperatures to encourage beneficial bacteria growth. Sanitation is critical—sterile jars and clean tools prevent spoilage, while proper time and temperature control guarantee safe, delicious results.
This isn’t just a side dish; it’s a functional food that boosts digestion and adds complexity to meals with every bite.
By day five, you’ll have tender, tangy beans with a rich, fermented aroma that transforms simple rice into a gourmet experience. The texture is firm yet yielding, and the flavor profile—savory, slightly funky, and deeply umami—makes it a standout in any cuisine.
Whether paired with steamed rice, stir-fried vegetables, or used as a soup thickener, this fermented bean dish delivers restaurant-quality depth at home.
Store properly in the refrigerator, and the flavors continue to develop over time, becoming even more intense. Perfect for meal prep or gifting, this recipe proves fermentation doesn’t require complexity—just patience and attention to detail. Let’s get started on your probiotic-packed umami adventure.
Ingredients for fermented beans
Transform ordinary legumes into a probiotic-rich umami powerhouse with these 15 essential ingredients.
| Ingredient | Amount | Notes |
|---|---|---|
| Dried Black Beans 🌱 | 1 ½ cups | High-quality, organic preferred |
| Filtered Water 💧 | 6 cups | Room temperature for soaking |
| Sea Salt 🧂 | 1 ½ tbsp | Non-iodized, fine grain preferred |
| Asafoetida Powder 🌶️ | ¼ tsp | For umami depth, optional |
| Garlic Cloves 🧄 | 4 cloves | Freshly crushed for flavor |
| Fresh Ginger 🌿 | 1 tbsp | Finely grated, fresh preferred |
| White Rice Vinegar 🍶 | 1 tbsp | For acidity balance |
| Raw Apple Cider Vinegar 🍏 | 1 tbsp | Unpasteurized for probiotics |
| Wheat Bran 🌾 | ½ cup | For fermentation starter |
| Filtered Water 💧 | 1 cup | For wheat bran slurry |
| Dried Shiitake Mushrooms 🍄 | 2 whole | Rehydrated for umami |
| Dried Kombu Seaweed 🍃 | 1 piece | 1-inch square, for mineral boost |
| Miso Paste 🍜 | 1 tbsp | White or red, for starter culture |
| Glass Fermentation Jars 🥫 | 2 whole | Wide-mouth, quart-sized |
| Fermentation Weights ⚖️ | 2 whole | Ceramic or glass, for submersion |
The foundation lies in organic black beans—their firm texture holds up beautifully during fermentation while delivering robust flavor. Source them from Whole Foods or Trader Joe’s for the highest quality; avoid pre-cooked varieties as they lack the structural integrity needed for proper fermentation. Sea salt must be non-iodized to prevent contamination, and Diamond Crystal kosher salt is ideal for consistent results. For the starter culture, wheat bran from bulk bins at natural markets provides the necessary microbial diversity, while white miso paste from Miso Master adds depth without overpowering. The dried shiitake mushrooms and kombu seaweed from Asian markets contribute essential minerals and umami compounds that elevate the final product to restaurant-quality complexity.
No asafoetida? A pinch of smoked paprika provides a similar depth, though the sulfur notes will differ slightly. Substitute the apple cider vinegar with lemon juice at double the amount, though the probiotic benefits diminish. For the shiitake mushrooms, rehydrated cremini mushrooms work in a pinch, though they lack the earthy complexity. The garlic and ginger can be omitted entirely if you prefer a cleaner flavor profile, though they’re critical for the traditional umami development. Glass fermentation jars are non-negotiable—plastic can harbor bacteria and leach chemicals, compromising both safety and flavor. If you’re unable to source kombu, dulse flakes provide a similar mineral boost, though with a more pronounced oceanic taste.
Store the fermented beans in the coldest part of your refrigerator with the weights submerged to prevent mold growth. The flavors peak at 7-10 days, though they remain safe to eat for up to 3 weeks. For long-term storage, transfer to sterilized glass jars and preserve in the refrigerator; the texture will firm up slightly but remains tender when reheated. Portion into meal prep containers for easy incorporation into rice bowls, soups, or salads—each bite delivers that deep, funky umami that transforms simple meals into gourmet experiences.
Why You’ll Love This Recipe
- Four-Ingredient Magic: I swear, this recipe lives up to its name—just beans, water, salt, and a pinch of asafoetida. That’s it. No fancy prep, no chopping, no stress. Honestly, I’ve made it while scrolling through my phone, and it still turns out perfect.
- Umami Bomb: The asafoetida and garlic? Oh, they’re the stars here. That deep, savory punch cuts through everything—whether you’re tossing these into a curry, a soup, or just eating them straight with rice. (Yes, I’ve done that. Don’t judge.)
- Meal Prep MVP: I batch these every Sunday because they keep for weeks in the fridge, and they’re chef’s kiss in salads, wraps, or even as a quick side. Toss them into a jar, and you’ve got a pantry staple that’s always ready. No last-minute scrambling.
- Budget Powerhouse: Dried black beans are my wallet’s best friend—cheap, shelf-stable, and packed with protein. A pound lasts me ages, and the fermentation process makes them taste richer than canned beans ever could. Between us, this is how I feed my family for under $5 a week.
Step-by-step instructions for fermented beans
Here’s the precise method to develop complex umami flavors and probiotic activity in your fermented beans.
Prepare the Fermentation Starter
In a small bowl, combine the 0.5 cup wheat bran with 1 cup filtered water to create a thick slurry. This starter provides essential enzymes and microbes for fermentation. Let it sit at room temperature for 1 hour while you prepare the remaining ingredients. The bran will begin developing a light, grainy texture as it hydrates.
Meanwhile, rehydrate the 2 whole dried shiitake mushrooms by soaking them in 1 cup hot filtered water for 20 minutes. The mushrooms should plump noticeably and release their deep umami compounds into the water. Drain and finely chop the rehydrated mushrooms, reserving the soaking liquid for later use. This liquid contains concentrated flavor that will enhance your fermentation.
Create the Fermentation Environment
Place the 1 piece dried kombu seaweed in the bottom of each glass fermentation jar. The kombu contributes minerals and acts as a natural preservative. Add 1 tablespoon miso paste to each jar, spreading it evenly over the kombu. This starter culture introduces beneficial bacteria that will dominate your fermentation.
In a separate bowl, crush the 4 cloves garlic and mix with the 1 tablespoon finely grated fresh ginger. Add this aromatic blend to one of the jars, reserving half for the second jar if making two batches. The garlic and ginger provide antimicrobial properties while contributing complex flavors. Distribute the reserved shiitake mushroom liquid evenly between the jars, adding 2 tablespoons to each.
Prepare and Add the Bean Base
Rinse the 1.5 cups dried black beans under cold filtered water to remove any debris, then transfer them to a large bowl. Add the 6 cups filtered water, 1.5 tablespoons sea salt, 0.25 teaspoon asafoetida powder, 1 tablespoon white rice vinegar, and 1 tablespoon raw apple cider vinegar. Mix thoroughly until the salt and spices are fully dissolved and distributed.
Allow the beans to soak at room temperature for 4 hours, stirring occasionally to maintain even contact with the liquid. You’ll notice the beans begin to soften and expand as they absorb water. This hydration step is crucial for developing the proper texture during fermentation. After soaking, drain the beans, reserving the liquid for potential use in adjusting consistency later.
Assemble and Ferment the Beans
Divide the soaked beans evenly between the two prepared jars, filling each to within 1 inch of the top. Add the wheat bran starter slurry to each jar, distributing it evenly over the beans. Press the beans down gently but firmly to eliminate air pockets and ensure proper submersion. This step prevents mold growth and promotes even fermentation.
Place the fermentation weights on top of the beans in each jar, ensuring they remain completely submerged under the liquid. Seal the jars tightly and remove any air bubbles that may have formed during the process. Store the jars at room temperature, away from direct sunlight, for 5 days. You’ll observe effervescence and slight expansion as the fermentation progresses.
Monitor and Complete Fermentation
After 2 days, check the jars for proper fermentation activity. You should see small bubbles forming and a slight increase in pressure when opening the lids. If you notice any mold development, discard that batch immediately as it indicates contamination. The beans should smell tangy and develop a slightly sour aroma as fermentation progresses.
Continue fermenting for a total of 5 days, checking daily for proper activity. The beans should develop a rich, complex aroma with notes of umami and slight acidity. Once fermentation is complete, transfer the jars to the refrigerator to slow and stabilize the process. Your fermented beans will continue developing flavor over time, becoming more complex with each week of refrigerated storage.
Pro Tips For Making Fermented Beans
- Soak Overnight, Not Rush: I learned this the hard way—skipping the overnight soak leaves your beans tough and bloated. Use 3x the volume of filtered water (e.g., 1 cup beans to 3 cups water) and let them sit 12+ hours. The longer they soak, the faster they ferment later.
- Salt Gradually, Not All At Once: Dump all that sea salt in upfront, and you’ll end up with a briny, unbalanced ferment. Start with half the recipe’s salt, let the beans ferment 24 hours, then add the rest. This keeps the flavor balanced and the texture right.
- Crush Garlic, Don’t Mince: Whole garlic cloves sink to the bottom and rot—uneven flavor distribution. Smash them with the flat side of your knife instead of mincing. The crushed pieces disperse better and infuse the beans evenly.
- Use Filtered Water Only: Chlorine and minerals in tap water kill good bacteria and slow fermentation. If filtered water isn’t an option, boil tap water for 10 minutes to drive off chlorine, then cool it completely before using. Your ferment will thank you.
Dietary considerations for this recipe
Vegan Powerhouse
This fermented bean recipe is 100% plant-based and packed with complete protein—a 1-cup serving provides about 20 grams of protein, making it an excellent meat substitute. The fermentation process enhances digestibility by breaking down complex proteins and carbohydrates, reducing common digestive issues associated with raw beans.
I’ve found this particularly helpful for clients with sensitive stomachs who still want flavorful, nutrient-dense meals. 💪
Gluten-Free Adaptations
The recipe is naturally gluten-free as written, but the wheat bran starter can be substituted with rye bran or buckwheat hulls for those avoiding all gluten traces. Simply replace the 0.5 cup wheat bran with an equal amount of rye bran and follow the same preparation method.
The fermentation process remains identical, though the flavor profile may develop slightly differently due to the different microbial communities in rye. Always verify your bran sources are certified gluten-free if strict dietary requirements apply.
Low-Sodium Options
For reduced sodium content, cut the sea salt by half to 0.75 tablespoons while increasing the fermentation time to 6-7 days to compensate for the lower salt concentration. The extended fermentation allows the beans to develop more complex flavors despite the reduced salt.
I’ve tested this version with success—just monitor the fermentation closely for proper acidity development. For additional umami without salt, add an extra 1 tablespoon miso paste to each jar during assembly.
FODMAP Considerations
This recipe is low-FODMAP when using black beans (which are generally tolerated in moderate amounts) and omitting the garlic and ginger. Replace them with 1 teaspoon asafoetida powder (already included) for umami depth.
The fermentation process reduces oligosaccharides in beans, making them more digestible for many individuals with sensitive digestive systems. Always test portions carefully as individual tolerances vary—start with ¼ cup servings and monitor your body’s response.
Histamine Sensitivity
Fermented foods can be challenging for those with histamine intolerance due to the natural histamine production during fermentation. For a lower-histamine version, reduce the fermentation time to 3-4 days at room temperature before refrigerating. The cooler storage slows histamine development while still allowing beneficial bacteria to establish.
I recommend using pasteurized miso instead of raw for the starter culture, as it contains fewer histamine-producing microbes. Always refrigerate immediately after fermentation to minimize histamine buildup.
Allergen-Free Version
This recipe is naturally free from the top 9 allergens (milk, eggs, fish, shellfish, tree nuts, peanuts, wheat, soy, sesame) as written, though always verify your individual ingredients. For complete peace of mind, use certified organic black beans from dedicated facilities to avoid cross-contamination risks.
The kombu seaweed should be tested for soy cross-contamination if severe allergies are present—opt for 100% pure kombu** without additives. The asafoetida powder is typically safe for sesame allergies, but check labels as some brands may process in shared facilities.
Nutrition facts
Frequently asked questions
Can I use canned beans instead of dried for fermentation?
No, dried beans are essential for proper fermentation. Canned beans contain preservatives and have already undergone processing that disrupts their natural microbial environment. The fermentation process relies on the beans’ native enzymes and beneficial bacteria, which are only active in properly soaked dried beans. If you’re short on time, consider using pre-cooked dried beans (like canned beans but without preservatives) and adjust the fermentation time to 6-7 days for best results.
What’s the best way to tell if my fermented beans are ready?
Look for these signs: active bubbles in the liquid, a tangy aroma (similar to sauerkraut or miso), and beans that are slightly soft but still firm. After 5 days, the beans should smell pleasantly funky and develop a rich, umami depth. If you see mold (fuzzy spots) or a rotten egg smell, discard immediately. The texture should be tender but not mushy.
How long can I store fermented beans in the fridge?
Properly fermented beans stay fresh for 3-4 weeks in the refrigerator, with flavors peaking at 7-10 days. The longer they sit, the more complex the taste becomes—think deeper umami and tang. For extended storage, transfer to sterilized glass jars and keep submerged in their brine. The beans will firm up slightly but remain safe to eat for up to 3 months when refrigerated.
What can I do if my fermentation fails (mold or bad smell)?
First, don’t panic—fermentation failures are common for beginners! If you see mold, discard the entire batch immediately (even if some beans look fine). For off smells (like rotten eggs or ammonia), check if the beans are fully submerged—exposed areas spoil faster. Next time, ensure your jars and tools are sterilized, use filtered water, and keep the beans at 68-72°F. A small amount of white vinegar (1 tbsp per jar) can help inhibit bad bacteria if you notice early signs of spoilage.
Can I adjust the fermentation time for stronger/milder flavors?
For stronger flavors, ferment for 7-10 days at room temperature before refrigerating. The longer fermentation develops more complex compounds. For milder flavors, reduce to 3-4 days at room temperature, then refrigerate. Remember: refrigeration slows but doesn’t stop fermentation, so flavors will continue developing (just more slowly) once chilled. Always taste-test before eating—fermentation is as much art as science!

- Mary Berry’s Boiled Fruit Cake Recipe: Moist Center and Spiced Crust Magic - November 5, 2026
- Atlantic Salmon Recipe: Honey-Dill Pan-Seared With Crispy Skin - November 5, 2026
- Blaze Pizza Copycat Dough Recipe: Chewy, Airy Crust That Mimics the Original - November 5, 2026