
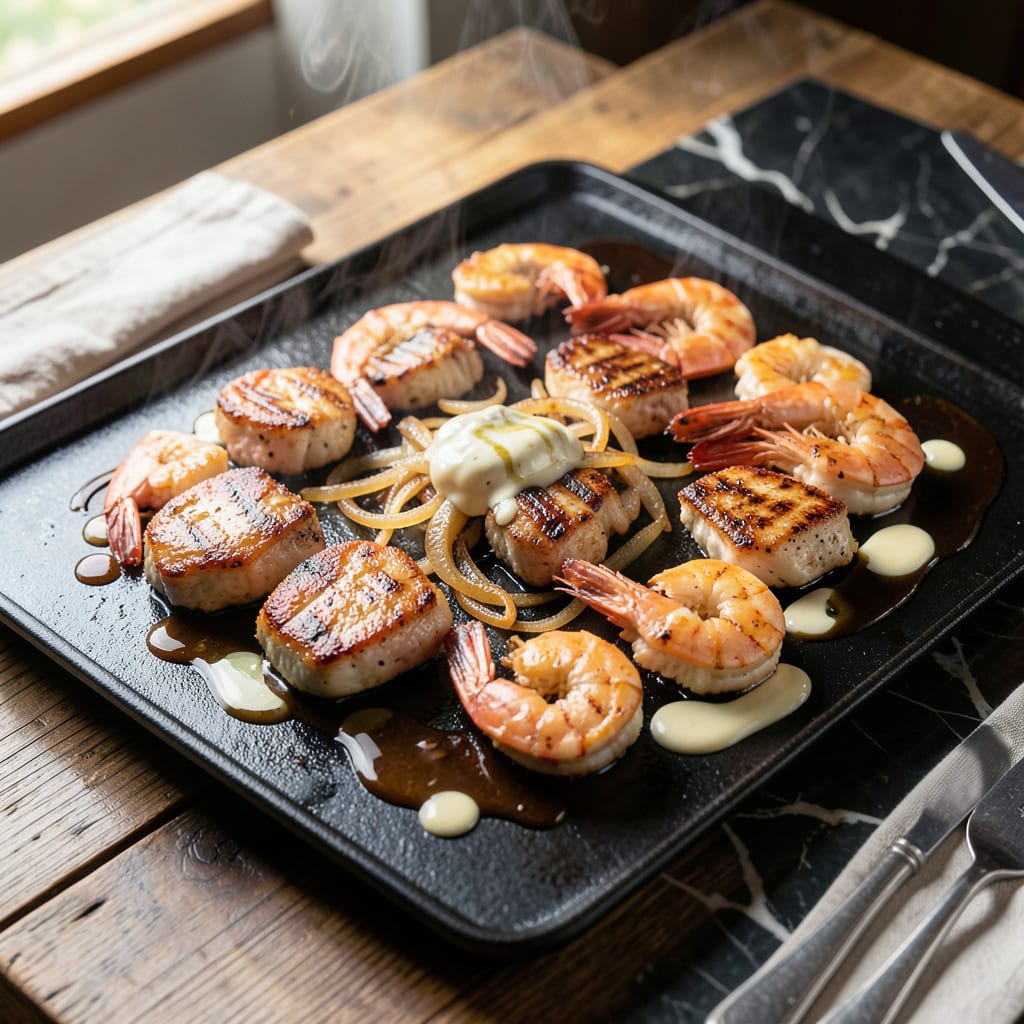
This hibachi-style dish brings the sizzle of teppanyaki to your kitchen with tender chicken and juicy shrimp. The secret lies in high heat and precise timing to lock in flavors.
You’ll achieve restaurant-quality results with simple ingredients and a hot skillet. The garlic butter sauce ties everything together for a savory, satisfying meal.
Ingredients for Hibachi Recipe Chicken and Shrimp
Simple ingredients, bold flavors. Everything you need for that teppanyaki sizzle at home.
| Ingredient | Amount | Notes |
|---|---|---|
| Boneless Skinless Chicken Breasts 🍗 | 1 ½ lb | Cut into bite-sized pieces |
| Large Shrimp 🍤 | 1 lb | Peeled and deveined |
| Garlic Butter 🧈 | ½ cup | Melted for sauce |
| Soy Sauce 🫚 | ⅓ cup | Low-sodium preferred |
| Yum Yum Sauce 🥄 | ½ cup | Store-bought or homemade |
| Onion 🧅 | 1 whole | Sliced into thin strips |
| Zucchini 🥒 | 2 whole | Sliced into half-moons |
| Mushrooms 🍄 | 8 oz | Sliced, white or cremini |
| Garlic Cloves 🧄 | 4 cloves | Minced for sauce |
| Vegetable Oil 🫒 | 3 tbsp | High smoke point |
| Salt 🧂 | 1 tsp | Divided for seasoning |
| Black Pepper 🌶️ | ½ tsp | Freshly ground |
| Sesame Seeds 🌰 | 1 tbsp | Toasted for garnish |
| Cooked White Rice 🍚 | 3 cups | For serving |
The shrimp and chicken need to be fresh—Costco or Whole Foods have great options. Look for shrimp labeled ‘easy peel’ to save time. For the chicken, thighs work too if you prefer darker meat (they stay juicier). The garlic butter sauce is non-negotiable—use real butter, not margarine. Most grocery stores carry pre-made yum yum sauce near the Asian foods aisle.
No yum yum sauce? Mix mayo, ketchup, and a dash of paprika for a quick substitute. Shrimp can be swapped for scallops or extra chicken. Low-sodium soy sauce keeps the dish from getting too salty. The veggies are flexible—swap zucchini for bell peppers if you prefer. Fresh garlic is best, but jarred minced works in a pinch.
This is best served fresh, but leftovers keep for 3-4 days in the fridge. Reheat in a skillet to maintain texture. The rice can be made ahead—day-old works great for hibachi-style dishes. Freeze cooked shrimp for up to 2 months.
Why You’ll Love This Recipe
- One Pan Meal: I toss the chicken, shrimp, and garlic butter together—no extra pots, no mess.
- Umami Bomb: The soy sauce and Yum Yum Sauce combo hits that perfect sweet-savory balance I crave every time.
- Weeknight MVP: Between us, this is my go-to when I need dinner ready before the kids start asking for snacks.
- Leftovers? Yes Please: Honestly, the flavors taste even better the next day over rice for lunch.
Step-by-Step Instructions for Hibachi Chicken and Shrimp
This is how I get that restaurant-style sizzle and flavor at home every time.
Step 1: Season and Prep the Proteins
Cut the 1.5 lb boneless skinless chicken breasts into bite-sized pieces and pat them dry with paper towels. This ensures even cooking and prevents steaming. Toss the chicken with ½ tsp black pepper and ½ tsp salt—I always divide the 1 tsp salt between the chicken and shrimp for balanced flavor.
For the 1 lb large shrimp, make sure they’re peeled and deveined. Pat them dry as well, then season with the remaining ½ tsp salt. Here’s the thing—dry shrimp sear better, and the salt enhances their natural sweetness without overpowering.
Step 2: Cook the Vegetables to Perfection
Heat 1 tbsp vegetable oil in a large skillet or griddle over medium-high heat. Add the sliced onion and cook for 2-3 minutes until it starts to soften and turn translucent. I like to keep them moving to prevent burning.
Toss in the sliced zucchini and 8 oz mushrooms, cooking for another 4-5 minutes until the zucchini is tender-crisp and the mushrooms release their moisture. You’ll see the edges of the zucchini start to brown—that’s your signal they’re ready. Transfer the vegetables to a plate and set aside.
Step 3: Sear the Chicken and Shrimp
In the same skillet, add the remaining 2 tbsp vegetable oil and increase the heat to high. Add the seasoned chicken in a single layer and let it sear undisturbed for 2-3 minutes until the bottoms are golden brown. Flip and cook for another 2 minutes until fully cooked through.
Push the chicken to one side of the skillet and add the shrimp. Cook for 2-3 minutes per side until they turn opaque and pink. Real talk: shrimp cook fast, so don’t walk away. As soon as they curl into a loose “C” shape, they’re done. Remove everything from the skillet and set aside.
Step 4: Create the Signature Hibachi Sauce
Reduce the heat to medium-low and add the 4 cloves minced garlic cloves to the skillet. Sauté for 30 seconds until fragrant—just until the garlic starts to turn golden. Pour in the 0.33 cup soy sauce and 0.5 cup garlic butter, stirring to combine.
Let the sauce simmer for 1-2 minutes until it thickens slightly. This is the moment that matters: the butter and soy sauce will emulsify into a glossy, rich sauce that coats the back of a spoon. Taste and adjust seasoning if needed, though the soy sauce usually provides enough saltiness.
Step 5: Combine and Serve
Return the chicken, shrimp, and vegetables to the skillet and toss everything in the sauce for 1-2 minutes until fully coated and heated through. The goal is to let all the flavors meld together without overcooking the proteins.
Serve the sizzling hibachi mixture over 3 cups cooked white rice, drizzled with 0.5 cup yum yum sauce. Sprinkle the 1 tbsp sesame seeds on top for that final touch of texture and visual appeal. Each bite should deliver tender chicken, juicy shrimp, and veggies drenched in that addictive garlic butter sauce.
Pro Tips For Making Hibachi Recipe Chicken And Shrimp
- Preheat the Grill: Get your grill or skillet screaming hot before adding the chicken and shrimp—I learned this the hard way after serving rubbery shrimp more times than I’d like to admit.
- Dry the Shrimp: Pat the shrimp completely dry with a paper towel before cooking, or they’ll steam instead of sear, and nobody wants sad, soggy shrimp in their hibachi.
- Skip the Overcrowding: Cook the chicken and shrimp in batches if needed—crowding the pan drops the temperature and turns your garlic butter into a sad, greasy pool.
- Butter Last: Add the garlic butter only in the final 2-3 minutes of cooking to avoid burning the garlic and to let it coat everything in that rich, golden finish.
Serving Suggestions for hibachi recipe chicken and shrimp
Plating Like a Pro
Serve this dish on a large, hot platter to maintain that sizzle. I spread the 3 cups cooked white rice on one side and arrange the chicken, shrimp, and veggies in neat sections on the other. The visual contrast makes it as impressive as it tastes. 🔥
Garnish for Impact
Sprinkle the 1 tbsp sesame seeds generously over everything right before serving. For extra flair, add thinly sliced green onions or a sprinkle of crushed red pepper for heat. The seeds add crunch and a nutty aroma that complements the garlic butter sauce.
Sauce Presentation
Drizzle the 0.5 cup yum yum sauce in a zigzag pattern across the platter. I also serve extra sauce on the side in small dipping bowls for those who want more. The creamy sauce pairs perfectly with the savory proteins.
Family-Style Service
For gatherings, place the platter in the center of the table with small bowls of rice and let everyone serve themselves. This creates a fun, interactive experience. The sizzling sound as you serve keeps the excitement going.
Pairing Suggestions
A light, crisp Sauvignon Blanc or Asian lager cuts through the richness. For non-alcoholic options, try green tea or ginger ale. These drinks cleanse your palate between bites. 🍶
Final Touch
Always serve immediately while the skillet is hot—the sizzle is half the experience. I like to bring the whole skillet to the table for that authentic teppanyaki feel. The aroma of garlic and butter will have everyone ready to dig in.
Nutrition Facts
Frequently Asked Questions
What’s the best oil for high-heat cooking?
Use vegetable oil or canola oil for their high smoke points. Avoid olive oil as it burns at teppanyaki temperatures. Always heat the skillet first for that perfect sear.
Can I use frozen shrimp instead of fresh?
Yes, but thaw them completely first and pat very dry. Frozen shrimp release moisture, which can prevent proper browning. Look for individually quick frozen (IQF) for best results.
How do I prevent the chicken from drying out?
Cut it into even bite-sized pieces and don’t overcook. Chicken is done at 165°F internal temperature. Remove it just before it reaches temp—it’ll carry over cook.
What can I substitute for yum yum sauce?
Mix ½ cup mayo with 2 tbsp ketchup, 1 tsp paprika, and ½ tsp garlic powder. It won’t be identical but delivers similar creamy tang.

- BBQ Sausage Recipe Oven: Smoky Depth Without the Grill - September 28, 2026
- BBQ Chicken Bowl Recipe Rice: Smoky Sweetness Over Fluffy Grains - September 28, 2026
- Beef Cutlet Recipe Ideas: Crispy Breaded Patties With Bold Seasonings - September 28, 2026