
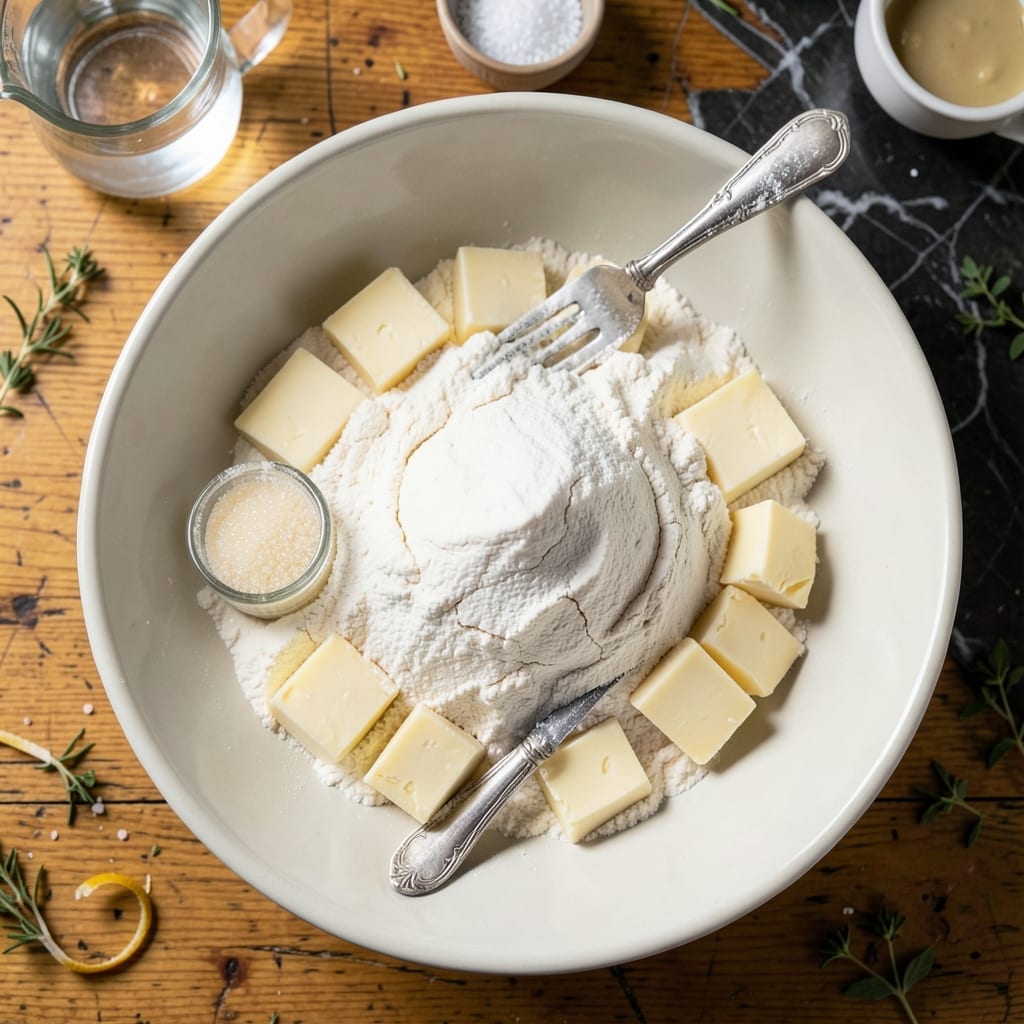
For years, I relied on store-bought crusts until I discovered this fail-proof method for achieving perfectly flaky layers at home. The secret lies in cold ingredients and minimal handling, which prevents the butter from melting prematurely.
This approach uses a food processor to quickly cut the butter into the flour, creating pea-sized crumbs that ensure those coveted flakes. A splash of ice water brings the dough together without overworking the gluten, which would make it tough.
After a short chill, the dough rolls out smoothly and bakes to a golden brown with a tender, crisp texture. It’s versatile enough for sweet or savory pies, and the results are consistently impressive.
Once you try this, you’ll never go back to pre-made crusts. Here’s how to make it.
Ingredients for Ina Garten Pie Crust
Seven simple ingredients create that signature flaky, golden crust every time.
| Ingredient | Amount | Notes |
|---|---|---|
| All-Purpose Flour 🌾 | 2 ½ cups | Spoon and level, plus extra for dusting |
| Unsalted Butter 🧈 | 1 cup | Cold, cut into cubes |
| Granulated Sugar 🍚 | 1 tbsp | Optional, for sweet pies |
| Salt 🧂 | 1 tsp | Kosher or sea salt |
| Ice Water 💧 | ½ cup | Plus more as needed |
| White Vinegar 🍋 | 1 tbsp | Helps tenderize dough |
| Large Egg Yolk 🥚 | 1 whole | Optional, for extra richness |
The butter is everything here. Use European-style if you can find it—higher fat content means flakier layers. Land O’Lakes or Plugrá are solid grocery store options. Keep it ice cold until the second you pulse it into the flour. I freeze my cubes for 10 minutes right before starting (worth the extra minute).
No food processor? Two forks or a pastry cutter work, but your arms might hate you. Out of vinegar? Lemon juice does the same tenderizing trick. For a vegan version, swap the butter for cold coconut oil or vegan sticks. The egg yolk is totally optional—skip it for a classic crust.
Dough keeps 2 days wrapped tight in the fridge, or 3 months frozen. For best results, let it sit at room temp for 10 minutes before rolling (don’t skip this part).
Why You’ll Love This Recipe
- One Bowl Wonder: I just dump flour, cold butter, sugar, salt, and ice water in one bowl—no fancy tools, no mess.
- Buttery, Flaky Layers: That cold butter creates pockets of crispness that melt in your mouth.
- Fits Any Pie: Sweet or savory, this crust works for apple pie or pot pie with zero adjustments.
- Freezer Friendly: I always make a double batch and freeze one—homemade pie crust on demand, anytime.
Step-by-Step Instructions for Buttery Flaky Pie Crust
Here’s the method. Straightforward, tested, works every time.
Step 1: Combine Flour, Sugar, and Salt
In a large bowl, whisk together the 2.5 cups All-Purpose Flour, 1 tbsp Granulated Sugar, and 1 tsp Salt until evenly distributed. I like to use a fork for this—it breaks up any lumps in the flour and ensures the sugar and salt are fully incorporated.
The sugar adds a subtle sweetness, perfect for fruit pies, while the salt enhances all the flavors. If you’re making a savory pie, you can omit the sugar, but I always keep the salt—it brings out the buttery richness.
Step 2: Cut in the Cold Butter
Add the 1 cup Unsalted Butter (cold and cut into cubes) to the flour mixture. Using a pastry cutter, two forks, or your fingertips, work the butter into the flour until the mixture resembles coarse crumbs with some pea-sized butter pieces visible. This step is key—those visible butter chunks create the flaky layers.
I prefer using my fingertips for this because I can feel the texture and control the size of the butter pieces better. Just be quick so the butter doesn’t warm up too much. If it starts to feel greasy, stop and chill the mixture for 10 minutes before continuing.
Step 3: Add the Wet Ingredients
In a small bowl, whisk together the 0.5 cup Ice Water, 1 tbsp White Vinegar, and 1 whole Large Egg Yolk. The vinegar tenderizes the dough, and the egg yolk adds richness, making the crust extra flaky and golden.
Create a well in the center of the flour-butter mixture and pour in the wet ingredients. Using a fork, gently mix until the dough just starts to come together. It will look shaggy and a little dry—that’s exactly what you want. Don’t overmix, or the crust will be tough.
Step 4: Chill and Rest the Dough
Turn the dough out onto a lightly floured surface and divide it into two equal portions. Shape each into a disk, wrap tightly in plastic wrap, and refrigerate for at least 1 hour (or up to 2 days). Chilling relaxes the gluten, making the dough easier to roll out, and solidifies the butter, ensuring flaky layers.
This resting time is non-negotiable. If you try to roll it out too soon, the dough will shrink and the butter will melt, ruining the flakiness. I always make my dough the night before—it saves time and improves the texture.
Step 5: Roll and Fit into Pie Dish
On a lightly floured surface, roll one disk of dough into a 12-inch circle, about ⅛-inch thick. Roll from the center outward, turning the dough occasionally to prevent sticking. If it cracks, just patch it with your fingers—it’s not a big deal.
Transfer the rolled dough to a 9-inch pie dish, gently pressing it into the bottom and up the sides. Trim the excess dough, leaving a ½-inch overhang for crimping. Repeat with the second disk if making a double-crust pie. Now it’s ready for filling and baking.
Pro Tips For Making Ina Garten Pie Crust
- Chill the Butter: Cut your unsalted butter into small cubes and freeze for 15 minutes before mixing—I learned this the hard way after ending up with a tough crust instead of that flaky Ina Garten texture.
- Use Ice-Cold Water: Measure your water, then add ice cubes to it for 2-3 minutes before using. Sounds weird, but it works: the colder the water, the less it develops gluten in the flour.
- Don’t Overwork It: Mix just until the dough comes together, even if it looks shaggy. My grandmother swore by this, and she was right: overworking makes the crust dense, not tender.
- Rest Before Rolling: After shaping, refrigerate the dough for at least 30 minutes—about the time it takes to clean up. This isn’t the prettiest method, but it prevents shrinking when baked.
Essential Equipment for Perfect Results
Food Processor Essential
A 12-cup food processor is my top recommendation—Cuisinart’s model has been my workhorse for years. The large capacity gives butter room to move, creating those perfect pea-sized crumbs without overworking the dough. I pulse in 1-second bursts for maximum control. 💡
Precision Scales
For consistent results, I weigh my ingredients. A digital kitchen scale like OXO’s Good Grips ensures I hit 300g flour and 227g butter exactly every time. Volume measurements can vary by 20% depending on how you scoop.
Rolling Pin Choice
I prefer a French tapering rolling pin—it’s lighter than traditional pins and gives me better control for even ⅛-inch thickness. J.K. Adams makes excellent maple wood versions. The lack of handles means I can roll from the center outward more naturally.
Chilling Setup
Invest in quality plastic wrap—I use Glad ClingWrap because it really clings to the dough disks. A flat surface in your fridge (like a baking sheet) helps the dough chill evenly. Never skip the 1-hour rest—it’s what makes the texture perfect.
Pie Dish Matters
For the best browning, I bake in a 9-inch glass pie dish—Pyrex is my go-to. Glass conducts heat evenly and lets me monitor the bottom crust. For double-crust pies, I also use a pie shield to prevent over-browning on the edges. ✨
Pastry Tools
A bench scraper helps divide dough cleanly, and pastry brush is essential for egg washes. I keep a small bowl of flour nearby for dusting. These aren’t fancy, but they make the process smoother and more professional.
Nutrition Facts
Frequently Asked Questions
Can I make this dough without a food processor?
Use two forks or a pastry cutter to work the cold butter into the flour until you reach pea-sized crumbs. It just takes a bit more effort.
Why does the dough need to chill for an hour?
Chilling relaxes the gluten and solidifies the butter, which prevents shrinking and ensures flaky layers. Skip this step and your crust may be tough.
Can I freeze pie dough for later use?
Yes! Wrap disks tightly in plastic and freeze for up to 3 months. Thaw overnight in the fridge before rolling.
What if my crust shrinks while baking?
This usually means the dough wasn’t rested or was overworked. Dock the bottom with a fork and blind-bake with weights for 15 minutes to prevent it.

- BBQ Sausage Recipe Oven: Smoky Depth Without the Grill - September 28, 2026
- BBQ Chicken Bowl Recipe Rice: Smoky Sweetness Over Fluffy Grains - September 28, 2026
- Beef Cutlet Recipe Ideas: Crispy Breaded Patties With Bold Seasonings - September 28, 2026