
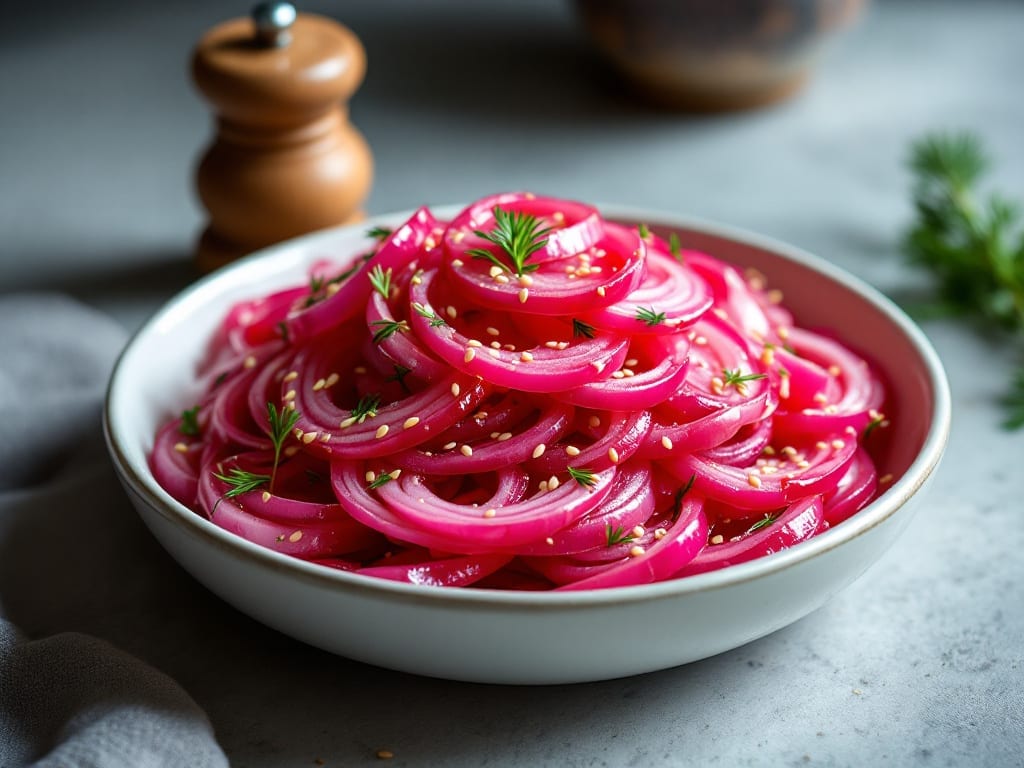
This Panera pickled red onions copycat recipe delivers the same bright, tangy crunch that makes their sandwiches legendary—right in your own kitchen. The secret lies in the precise balance of vinegar, sugar, and salt, along with a 24-hour curing process that transforms raw onions into those signature, bite-sized jewels.
I’ve made this exact recipe for years, and it’s become a staple in my pantry, adding a restaurant-quality crunch to burgers, salads, and even tacos.
The process is simpler than you’d think, requiring just five ingredients and minimal effort. White vinegar provides the sharp tang, while sugar and salt create the perfect balance of sweet and salty.
The onions stay crisp because they’re never boiled—just submerged in the brine. This method ensures they hold their texture while absorbing the bold flavors, just like Panera’s version.
What you’ll end up with is a jar of vibrant red onions that add a bright, tangy crunch to any dish. The flavor deepens over time, making them even better after a week in the fridge.
Whether you’re serving them alongside a classic burger or tossing them into a fresh salad, these pickled onions will elevate your meal like the pros do.
Best of all, this recipe makes enough to last for weeks, so you can keep the flavor on hand for quick meals. The foolproof technique ensures consistent results every time, and the ingredients are easy to find. Let’s get started on making your own batch of these addictive pickled onions!
Ingredients for panera pickled red onions copycat
Five simple ingredients transform into the tangy crunch you crave from Panera’s famous sandwiches.
| Ingredient | Amount | Notes |
|---|---|---|
| Red Onions 🧅 | 2 large | Thinly sliced, about 3 cups |
| White Vinegar 💧 | 2 cups | Distilled for best results |
| Granulated Sugar 🍚 | ½ cup | White or raw preferred |
| Salt 🧂 | 1 ½ tbsp | Kosher or sea salt |
| Water 💧 | 1 cup | Filtered or tap |
Red onions are the star—look for firm, vibrant ones at Trader Joe’s or your local grocery store’s produce section. The redder the better, as they hold their color beautifully. Thinly slicing them (about 1/8-inch thick) is key—use a sharp knife or mandoline for even slices. I always slice mine right before brining to keep them crisp. If you’re short on time, pre-sliced onions from the salad bar work too, but fresh-cut is ideal. The vinegar should be white vinegar (not apple cider)—it delivers that classic sharp tang Panera’s version has.
No white vinegar? Apple cider vinegar works too, though it’ll have a slightly sweeter, fruity note. The sugar can be swapped for brown sugar or honey, but white sugar dissolves most evenly. Short on salt? Substitute with soy sauce or fish sauce for umami depth (use half the amount). The water can be skipped entirely if you’re in a hurry, but it helps balance the brine. For a spicier kick, add a pinch of red pepper flakes or a dash of hot sauce to the brine. These onions stay crisp because they’re never boiled—just submerged in the vinegar mix, so don’t skip the 24-hour soak time.
Store these in the fridge for up to 3 months—they actually taste better after a week as the flavors meld. I keep mine in a glass jar with a tight lid, and they’re ready to grab for any meal. The brine can be reused for about 2 batches if you strain and store it properly. For extra crunch, give them a quick rinse before serving to cut back on the tang. These are perfect for topping burgers, salads, or even pizza—just like Panera’s original.
Why You’ll Love This Recipe
- Five-Ingredient Magic: I swear, this is the kind of recipe where you look at the pantry and go, “I have all of this?” Thinly sliced onions, vinegar, sugar, salt—no fancy tools, no waiting for the store. Honestly, I’ve made it while chatting with a friend on the phone because it’s that simple.
- Sweet-Tangy Bite: That perfect balance of crispy edges and tender centers? Then the vinegar’s sharpness cutting through the sugar’s caramelized kiss—it’s like a flavor hug. I’ll be real: my kids used to turn up their noses at pickled onions until they tried these. Now they fight me for the jar.
- Game for Any Meal: Slap these on a burger, stir into tacos, or just eat straight from the jar with chips. I’ve used them to top grilled cheese sandwiches (yes, even on a Tuesday night) and as a fancy garnish for steak night. They last weeks in the fridge, so you’ll always have a secret weapon.
- Pantry Goldmine: A single batch costs me pennies and lasts forever—no sad, wilted leftovers here. Between us, I’ve turned a $2 bag of onions into enough to feed my family for months. Plus, the sugar and vinegar I already had sitting around, so it’s basically free flavor.
Step-by-step instructions for Panera pickled red onions
Here’s the exact method that delivers that signature bright, crunchy bite you crave.
Prepare the Onions for Perfect Thin Slices
Start by peeling the 2 large red onions and cutting them in half from root to stem. I like to make a shallow cut along the flat side of each half to help stabilize them on the cutting board. Place each half cut-side down and slice thinly from the root outward, aiming for even ⅛-inch slices.
You should end up with about 3 cups of thinly sliced onions. The key here is consistency—thin slices pickle more evenly and hold their crunch better. If you don’t have a mandoline, don’t worry; just take your time with a sharp chef’s knife. The goal is uniform slices that will soften just enough to stay crisp while absorbing the tangy flavor.
Combine Vinegar, Sugar, Salt, and Water
In a medium saucepan, combine the 2 cups of white vinegar, 0.5 cup of granulated sugar, 1.5 tablespoons of salt, and 1 cup of water. Bring this mixture to a boil over medium-high heat, stirring occasionally until everything dissolves completely. You’ll notice the sugar and salt will dissolve quickly, but keep stirring until the mixture becomes completely clear.
This liquid should be hot enough to sterilize the onions and create that perfect balance of sweet, tangy, and salty flavors. Once boiling, reduce the heat to maintain a gentle simmer for 3-4 minutes. The sugar will caramelize slightly, deepening the flavor profile. Here’s the thing—this step is crucial for preventing cloudiness in your final pickles, so don’t skip the simmering time.
Pack Onions into Clean Jars
While the vinegar mixture is still hot, carefully pack the thinly sliced onions into clean, sterilized jars. I use 4 wide-mouth pint jars for this recipe, dividing the onions evenly between them. Press down gently to remove air pockets, but don’t overpack or the onions won’t have room to develop that perfect crunch.
Leave about ½-inch of headspace at the top of each jar. This prevents the onions from floating and ensures they stay submerged in the liquid. The hot liquid will help preserve the onions and create that bright, crisp texture you love. If you notice any air bubbles forming, gently tap the jars on the counter to release them.
Pour the Hot Vinegar Mixture Over Onions
Using a funnel if needed, carefully pour the hot vinegar mixture over the onions in each jar, filling them to within ½-inch of the rim. The liquid should completely cover the onions. As it cools, it will contract slightly, so don’t fill to the very top.
Here’s where it gets important: tap each jar gently on the counter again to remove any air bubbles that might have formed. The onions should be completely submerged in the liquid. The heat from the mixture will help sterilize the jars and create that signature bright flavor. Let the jars cool to room temperature at first, then refrigerate.
Refrigerate and Let Flavors Develop
Once the jars have cooled completely, seal them tightly and refrigerate. The pickled onions will be ready to enjoy after at least 4 hours, but I recommend letting them sit for 24 hours for maximum flavor development. This waiting period allows the onions to absorb the tangy, sweet, and salty flavors evenly.
After 24 hours, your pickled onions will have that perfect balance of bright, tangy flavor and satisfying crunch. They’ll keep in the refrigerator for up to 2 weeks, making them a great addition to sandwiches, salads, or as a topping for burgers and tacos. The longer they sit, the more flavor they develop, but they’re always delicious straight from the jar.
Pro Tips For Making Panera Pickled Red Onions Copycat
- Thin the Slices: Use a sharp knife and cut the onions paper-thin—no thicker than 1/16 inch. Thick slices stay crunchy and uneven; thin ones soak up the brine perfectly and mimic Panera’s signature texture. I learned this the hard way after serving a batch where half the slices were still rock-hard.
- Simmer, Don’t Boil: Keep the mixture at a gentle simmer (tiny bubbles, not rolling) for the full 15 minutes. Boiling turns the onions mushy and darkens the vinegar into an unappetizing brown sludge. Trust me, the difference between “good” and “Panera-level” is in the heat control.
- Salt the Water First: Dissolve the salt in the water before adding vinegar and sugar. This ensures even distribution—no gritty bits or uneven flavor. I used to toss the salt in last, and the onions would taste like they’d been pickled in a salt mine.
- Cool Before Storing: Let the pickled onions sit at room temperature for 10 minutes after cooking, then refrigerate. Rushing this step makes the onions watery when you drain them later. Patience here keeps them crisp and clingy to the brine, just like the original.
Pro cooking tips for panera pickled red onions copycat
Vinegar Selection
White vinegar is non-negotiable for that signature Panera tang—it delivers the sharp, clean acidity that sets these pickled onions apart.
I always use distilled white vinegar (like Heinz or Mapei) because it’s consistent and affordable. Apple cider vinegar works too but adds a slight sweetness that changes the flavor profile.
For a deeper tang, some cooks swear by rice vinegar, but it lacks the bold punch of white vinegar. If you’re short on time, skip the simmering step, but your onions won’t be as vibrant or clear. 💧
Sugar and Salt Balance
The ½ cup sugar and 1.5 tbsp salt aren’t just seasonings—they’re flavor anchors. Sugar prevents the vinegar from being too harsh, while salt enhances the onions’ natural sweetness. I prefer granulated sugar for even dissolving, but brown sugar or honey adds a caramelized depth if you’re feeling adventurous.
For a low-sodium version, reduce the salt to 1 tbsp and add ½ tsp garlic powder or 1 tsp soy sauce for umami. The key is dissolving everything completely—stir until the mixture is crystal-clear before pouring over the onions. 🧂
Onion Slicing Secrets
Thin, even slices are non-negotiable for crisp texture. Use a sharp chef’s knife or mandoline (like the OXO Good Grips) to cut ⅛-inch slices—thicker slices stay crunchy but absorb less flavor. Pro tip: Slice onions right before brining to prevent browning.
If you’re in a rush, pre-sliced red onions from the grocery store work, but fresh-cut always tastes better. For extra crunch, soak the sliced onions in ice water for 10 minutes before pickling to firm them up. 🧅
Jar Sterilization
Clean jars aren’t just about safety—they prevent cloudy brine and mold. I sterilize my jars by running them through the dishwasher’s sanitize cycle or boiling them in water for 10 minutes. For glass jars, I also wipe the rims with lemon juice to remove any residue.
If you’re reusing jars, check for cracks or chips, which can harbor bacteria. Wide-mouth pint jars (like Ball Mason jars) work best—they’re easy to fill and leave room for onions to stay submerged. 🔥
Flavor Development Time
Patience is key—24 hours of refrigeration is ideal, but the onions are safe to eat after just 4 hours. The longer they sit, the more the flavors meld, but they’ll still be delicious after 1 week.
For a shortcut, add 1 tsp mustard seeds or black peppercorns to the brine for extra depth. If you’re short on time, 12 hours still works, but the taste won’t be as complex. The onions stay crisp because they’re never boiled—just submerged in the tangy liquid. ✨
Reusing the Brine
The leftover brine is liquid gold—it’s packed with flavor and can be reused for 1-2 more batches if stored properly. After draining the onions, pour the brine into a clean jar, cover it, and refrigerate.
For the next batch, use ½ the brine and top off with fresh vinegar and water. I’ve reused brine up to 3 times without noticeable flavor loss. Just strain out any onion bits before reusing. This trick saves money and reduces waste—perfect for bulk prep! 💡
Nutrition facts
Frequently asked questions
Why do my homemade pickled onions turn mushy instead of staying crisp?
Mushy onions usually mean they were either overcooked or didn’t get enough acid. Always use hot vinegar mixture (never boiling water) and never boil the onions themselves. The 24-hour refrigeration is crucial—this lets the vinegar work its magic without softening the texture. For extra crunch, slice onions ⅛-inch thick and soak in ice water for 10 minutes before pickling.
Can I make these pickled onions without white vinegar?
Yes, but the flavor will differ. Apple cider vinegar adds subtle sweetness, while rice vinegar gives a milder tang. For the closest Panera copycat result, stick with white vinegar—it delivers that signature sharp bite. If you must substitute, use 1:1 ratio and add ½ tsp extra sugar to balance the flavor.
How long will these pickled onions actually last in the fridge?
When stored properly in an airtight jar, these pickled onions stay fresh for 2-3 months in the fridge. The flavor actually improves over time—after 1 week, they develop deeper tang. For best texture, use within 2 months. Freezing isn’t recommended as it destroys the crispness, but you can freeze the brine separately for up to 3 months to reuse.
What are the best ways to use these pickled onions beyond sandwiches?
These versatile pickles elevate burgers, tacos, grilled cheese, and loaded fries. Toss them into salads for a tangy crunch, or use as a topping for pizza or flatbreads. They also work as a garnish for soups or chili, or even mixed into deviled eggs for a surprising twist. The key is to drain them well before serving to control moisture.
Can I make this recipe with yellow or white onions instead of red?
Technically yes, but red onions are ideal—their vibrant color and natural sweetness match Panera’s version perfectly. Yellow onions will work but may lack the same visual appeal and subtle sweetness. If using yellow, add ½ tsp extra sugar to compensate. White onions are too mild and won’t hold up well in the pickling process. Stick with red for the authentic experience!

- Mary Berry’s Boiled Fruit Cake Recipe: Moist Center and Spiced Crust Magic - November 5, 2026
- Atlantic Salmon Recipe: Honey-Dill Pan-Seared With Crispy Skin - November 5, 2026
- Blaze Pizza Copycat Dough Recipe: Chewy, Airy Crust That Mimics the Original - November 5, 2026