
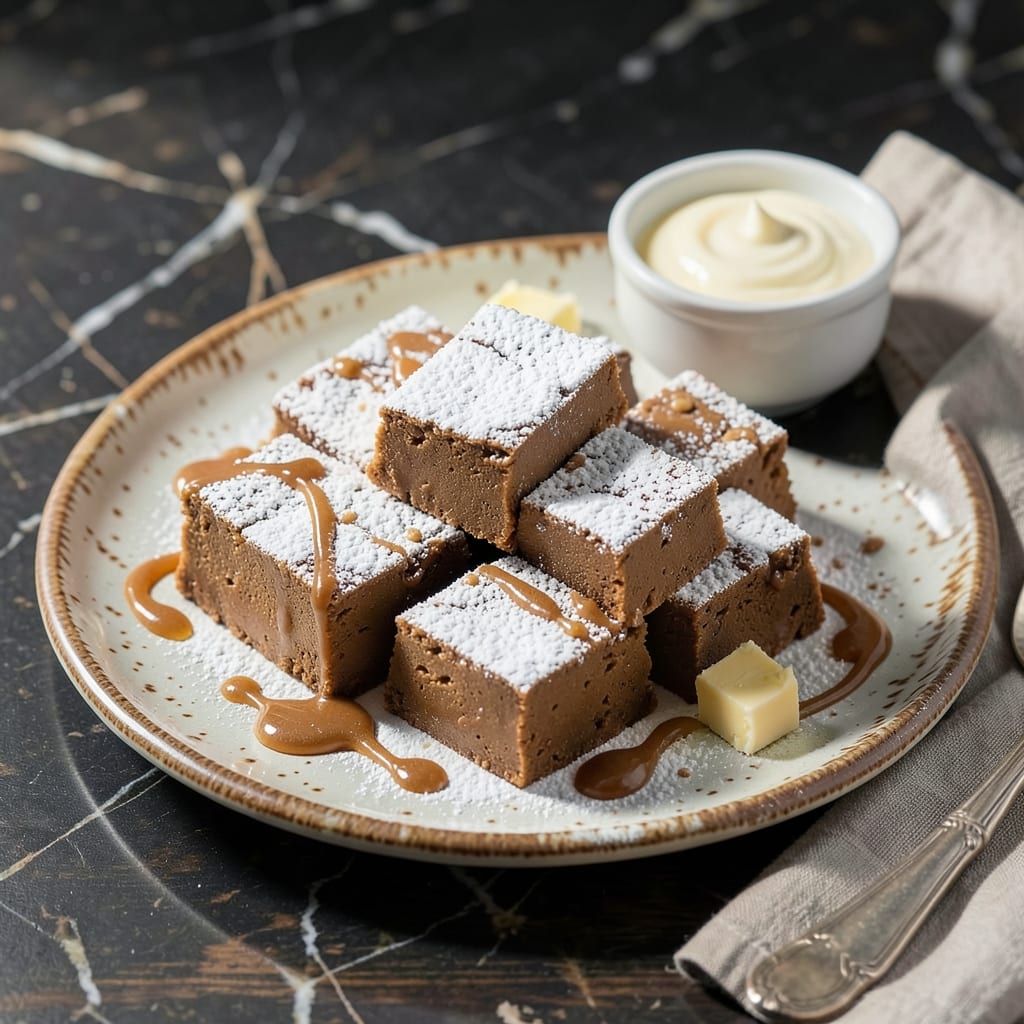
This no-bake fudge delivers rich, velvety peanut butter flavor with minimal effort. I developed this recipe to satisfy sweet cravings without turning on the oven.
The secret lies in powdered sugar, which creates an ultra-smooth texture while keeping the process simple. Just melt, mix, and chill—no candy thermometer required.
You’ll end up with perfectly set squares that melt in your mouth, offering that classic peanut butter taste in every bite. The powdered sugar ensures a creamy consistency without graininess.
Ideal for gifting or storing in the fridge for up to two weeks. Here’s how to make it.
Ingredients for Peanut Butter Fudge Recipe Using Powdered Sugar
Eight simple ingredients. One bowl. Rich, creamy peanut butter fudge ready in minutes.
| Ingredient | Amount | Notes |
|---|---|---|
| Creamy Peanut Butter 🥜 | 1 ½ cups | Smooth, no stir variety |
| Powdered Sugar 🍚 | 3 cups | Sifted for smooth texture |
| Unsalted Butter 🧈 | ½ cup | 1 stick, melted |
| Vanilla Extract 🌿 | 1 tsp | Pure vanilla preferred |
| Salt 🧂 | ¼ tsp | Fine sea salt |
| Whole Milk 🥛 | ¼ cup | For creaminess |
| Granulated Sugar 🍚 | ¼ cup | Optional for extra sweetness |
| Chopped Peanuts 🥜 | ½ cup | For topping, optional |
The peanut butter is key here—Jif or Skippy creamy give that perfect melt-in-your-mouth texture. Natural peanut butter (the oily kind) can separate and make your fudge greasy, so stick to the processed stuff for this one. I grab mine at Walmart in bulk. The powdered sugar needs to be fresh and lump-free (sift it if you’re unsure). Domino or C&H are reliable brands I always have on hand.
No peanut butter on hand? Almond butter or cashew butter work in a 1:1 swap, though the flavor changes. Want it richer? Swap milk for heavy cream or evaporated milk. Need it dairy-free? Use coconut oil instead of butter. The vanilla is flexible—imitation works (just use a little more).
This keeps beautifully in the fridge for up to 2 weeks (if it lasts that long). Store in an airtight container with parchment between layers to prevent sticking. Freezes for 3 months—perfect for making ahead for gifts. Bring to room temp before serving for the creamiest texture.
Why You’ll Love This Recipe
- Five-Minute Magic: I can mix this in one bowl, no candy thermometer needed—just melt, stir, and set.
- Rich Peanut Perfection: The creamy peanut butter and powdered sugar blend into this velvety, melt-in-your-mouth texture I can’t resist.
- Gift or Treat: I pack these squares into little boxes for teacher gifts or keep them in the fridge for my afternoon sugar fix.
- Stays Fresh: Honestly, they taste just as good on day five as day one, so I always double the batch.
Step-by-Step Instructions for Peanut Butter Fudge Using Powdered Sugar
This no-bake method delivers creamy, melt-in-your-mouth fudge with minimal effort and maximum flavor.
Step 1: Melt and Combine the Butter and Peanut Butter
In a medium saucepan, melt the 0.5 cup Unsalted Butter over low heat. I like to use a light-colored pan so I can see the butter melting evenly without browning. Once fully melted, add the 1.5 cups Creamy Peanut Butter and stir until the mixture is smooth and completely combined.
Keep the heat low—you don’t want to scorch the butter or peanut butter, which can impart a bitter taste. The mixture should be glossy and pourable, with no visible separation or oil pooling on the surface.
Step 2: Incorporate the Sugars and Milk
Next, stir in the 3 cups Powdered Sugar, 0.25 cup Granulated Sugar, and 0.25 cup Whole Milk. The powdered sugar will start to dissolve immediately, but you’ll need to stir vigorously to avoid lumps. I use a wooden spoon for this—it gives me better control than a whisk.
Continue stirring until the mixture is smooth and there are no dry spots or streaks of powdered sugar. This should take about 2-3 minutes. The fudge will start to thicken slightly as the sugars dissolve.
Step 3: Add Vanilla and Salt for Depth of Flavor
Remove the saucepan from heat and stir in the 1 tsp Vanilla Extract and 0.25 tsp Salt. The vanilla adds a warm, aromatic note, while the salt balances the sweetness and enhances the peanut butter flavor.
Let the mixture sit for 1-2 minutes to cool slightly. This step is important because adding the topping to a too-hot mixture can cause it to melt or lose texture. You’ll notice the fudge thickens a bit more as it cools.
Step 4: Press into a Pan and Top with Chopped Peanuts
Line an 8×8-inch baking dish with parchment paper, leaving an overhang on the sides for easy removal. Pour the fudge mixture into the dish and spread it evenly with a spatula. The surface should be smooth and level.
Sprinkle the 0.5 cup Chopped Peanuts evenly over the top, pressing them lightly into the fudge so they adhere. The peanuts add a delightful crunch and visual appeal, but they’re optional if you prefer a smoother texture.
Step 5: Chill and Slice into Squares
Refrigerate the fudge for at least 2 hours, or until it’s firm enough to slice cleanly. I often leave it overnight to ensure it’s fully set, but if you’re impatient, 1.5 hours in the freezer will do the trick.
Once firm, lift the fudge out of the pan using the parchment paper overhang and place it on a cutting board. Use a sharp knife to slice it into 1-inch squares. For the cleanest cuts, dip the knife in hot water and wipe it dry between slices. Serve at room temperature for the creamiest texture.
Pro Tips For Making Peanut Butter Fudge Recipe Using Powdered Sugar
- Melt Butter First: Always melt the butter completely before mixing—cold butter leaves streaks and makes the fudge grainy instead of smooth.
- Sift the Sugar: I learned this the hard way—lumps in powdered sugar create weird texture, so sift it even if the bag says “pre-sifted.”
- Use Room-Temp Peanut Butter: Straight-from-the-fridge peanut butter seizes up when mixed; let it sit out for 30 minutes so it blends effortlessly.
- Press into Pan Fast: The mixture sets up in minutes, so press it into your pan immediately—waiting makes it crumbly and hard to smooth.
Dietary Considerations for This Recipe
Gluten-Free Friendly
This creation is naturally gluten-free since it contains no flour or wheat-based ingredients. Always verify your peanut butter and other components are certified gluten-free if celiac disease is a concern. 💡
Dairy-Free Option
For a dairy-free version, replace the butter with coconut oil and use unsweetened almond milk instead of whole milk. The texture remains smooth, though the flavor will have subtle coconut undertones.
Lower Sugar Variation
To reduce sugar, replace 1 cup powdered sugar with ½ cup powdered erythritol or monk fruit sweetener. Note that alternative sweeteners may slightly alter the texture, making the fudge slightly firmer.
Vegan Adaptation
Make this vegan by using vegan butter (like Earth Balance), plant-based milk, and ensuring your peanut butter has no honey additives. The result is just as creamy and delicious.
Nut Allergy Warning
This dish contains peanut butter and optional chopped peanuts, making it unsafe for anyone with nut allergies. For nut-free alternatives, consider sunflower seed butter as a substitute. 🥜
Portion Control
Each 1-inch square contains roughly 120-150 calories. For mindful indulgence, cut into smaller ½-inch pieces to create bite-sized portions that satisfy sweet cravings without overdoing it.
Nutrition Facts
Frequently Asked Questions
Can I use natural peanut butter?
No, stick with processed varieties like Jif or Skippy. Natural peanut butter can separate and make your fudge greasy or oily.
How long does it need to chill?
Refrigerate for at least 2 hours or until firm. For quicker results, freeze for 1.5 hours before slicing.
Can I make it without milk?
Yes! Swap whole milk for heavy cream or evaporated milk for richness, or use unsweetened almond milk for a dairy-free version.
Why is my fudge grainy?
Graininess usually means the powdered sugar wasn’t fully dissolved. Stir vigorously for 2-3 minutes until smooth.

- Potato Candy Recipe 1933: Vintage Peanut Butter Roll Delight - October 30, 2026
- Potato Chip Cookie Recipe With Pecans: Buttery Crunch Meets Nutty Richness - October 30, 2026
- Potato Patty Recipe No Egg: Crispy Edges Without the Binder - October 30, 2026