
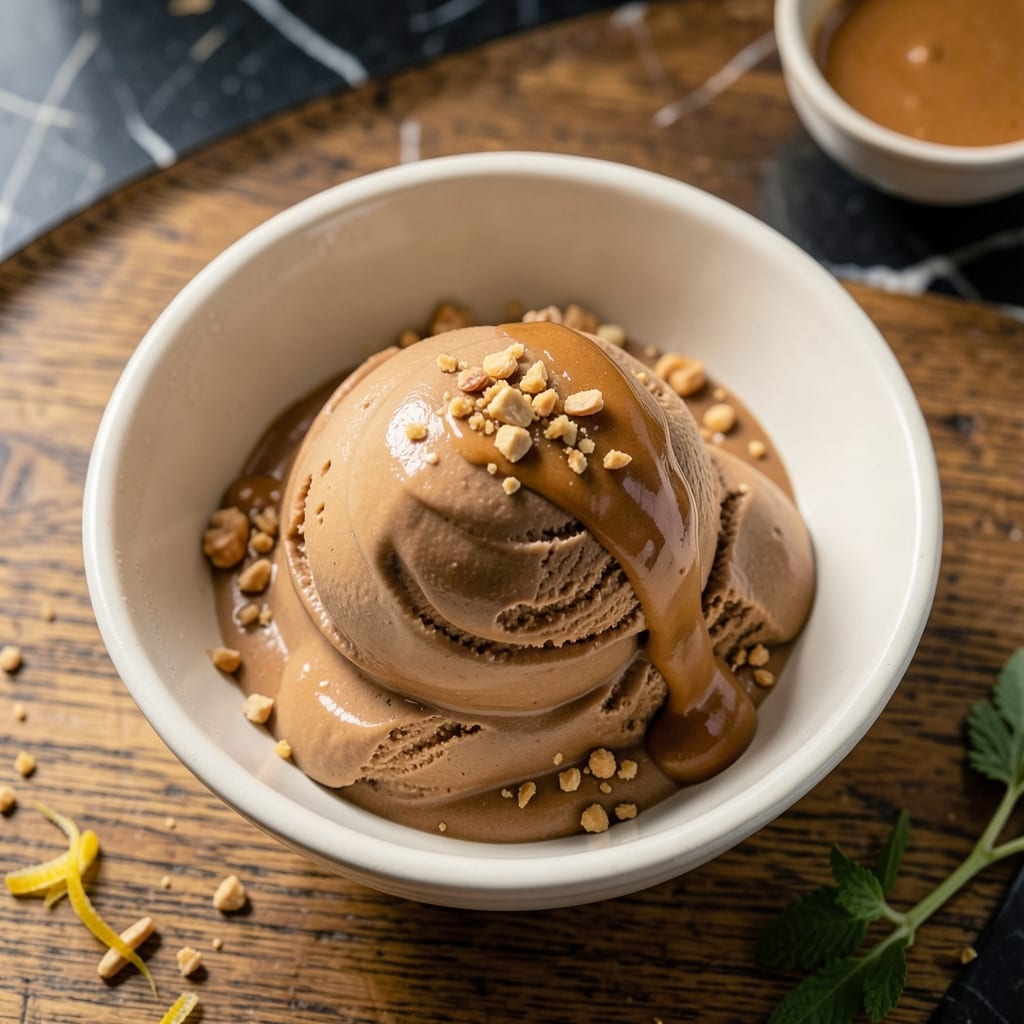
There’s nothing quite like homemade ice cream, and this version delivers a rich, velvety texture that’s hard to resist. I’ve tested this on multiple machines to ensure it works perfectly every time.
The key is balancing the peanut butter’s intensity with just enough sweetness and creaminess. This recipe uses simple ingredients but transforms them into something extraordinary. David, my official taste-tester, gives it two enthusiastic thumbs up.
What you’ll get is a smooth, creamy base with ribbons of peanut butter swirled throughout. The churning process ensures a light, airy texture that melts beautifully on the tongue.
Serve it fresh from the machine or freeze for firmer scoops. This is one treat that never disappoints.
Ingredients for Peanut Butter Ice Cream Recipe for Ice Cream Maker
Rich, creamy, and perfectly balanced—these ingredients create an irresistible frozen treat.
| Ingredient | Amount | Notes |
|---|---|---|
| Heavy Whipping Cream 🥛 | 2 cups | Cold, at least 36% fat |
| Whole Milk 🥛 | 1 cup | Cold, full-fat preferred |
| Granulated Sugar 🍚 | ¾ cup | Fine white granulated |
| Creamy Peanut Butter 🥜 | ¾ cup | Smooth, no added sugar |
| Pure Vanilla Extract 🌿 | 1 tsp | High-quality, alcohol-based |
| Large Egg Yolks 🥚 | 4 whole | Room temperature, pasteurized optional |
| Salt 🧂 | ¼ tsp | Fine sea salt or table salt |
| Powdered Sugar 🍚 | ¼ cup | For dusting, optional |
| Roasted Peanuts 🥜 | ½ cup | Chopped, for garnish |
The cream and milk form the base, so opt for full-fat dairy—lower fat versions yield icy results. Organic Valley or Darigold are reliable brands for heavy cream. For the peanut butter, natural smooth (like Jif or Skippy) works best, but avoid the separated kind unless you stir it thoroughly first. Room temperature egg yolks incorporate more air, which means a lighter texture.
No ice cream maker? Use a stand mixer with the whisk attachment and freeze in a shallow container, stirring every hour. For a lighter version, half-and-half replaces the cream, though it won’t be as rich. Short on peanut butter? Almond butter at a 1:1 ratio works, but the flavor profile shifts. The vanilla should be pure—avoid imitation, which can taste artificial.
The base keeps in the fridge for 24 hours before churning. Once churned, it’s best eaten within 1 week for optimal texture. Freeze in an airtight container with parchment pressed directly on the surface to prevent ice crystals. Garnish with extra peanut butter or chocolate sauce just before serving.
Why You’ll Love This Recipe
- Minimal Effort: I just dump everything into the ice cream maker and let it do the work—no fancy steps, no stress.
- Rich PB Swirl: The creamy peanut butter and vanilla create this deep, nutty flavor that’s honestly hard to resist.
- Crowd Pleaser: Between us, even my pickiest nephew asks for seconds when I serve this at BBQs.
- Freezer Stash: I always make a double batch because it keeps beautifully for up to a month.
Step-by-Step Instructions for Peanut Butter Ice Cream
Master the custard base and churning process for ice cream with unmatched richness and texture.
Step 1: Infuse the Dairy Base with Peanut Butter
Combine the 2 cups Heavy Whipping Cream, 1 cup Whole Milk, and 0.75 cup Granulated Sugar in a medium saucepan. Heat over medium heat until the mixture reaches 175°F and the sugar fully dissolves. Stir frequently to prevent scorching.
Remove from heat and whisk in the 0.75 cup Creamy Peanut Butter until completely smooth. The mixture will thicken slightly as the peanut butter emulsifies. This step ensures the peanut butter flavor is evenly distributed throughout the base.
Step 2: Temper and Thicken the Custard
In a separate bowl, whisk together the 4 whole Large Egg Yolks and 0.25 tsp Salt. Slowly pour about 1 cup of the hot dairy mixture into the yolks while whisking constantly—this tempering prevents the eggs from curdling.
Return the tempered egg mixture to the saucepan and cook over medium-low heat for 5-7 minutes, stirring constantly with a silicone spatula. The custard is ready when it thickens enough to coat the back of a spoon and leaves a clear path when you run a finger through it.
Step 3: Chill and Flavor the Custard
Strain the custard through a fine-mesh sieve into a clean bowl to remove any cooked egg bits. Stir in the 1 tsp Pure Vanilla Extract. Press plastic wrap directly onto the surface to prevent a skin from forming and refrigerate until completely cold—at least 4 hours, preferably overnight.
This chilling step is critical for proper texture and flavor development. The custard should be 40°F or colder before churning to achieve the smoothest, creamiest ice cream.
Step 4: Churn in the Ice Cream Maker
Pour the chilled custard into your ice cream maker and churn according to the manufacturer’s instructions, typically 20-25 minutes. The mixture should resemble soft-serve ice cream when done—thick, creamy, and holding its shape.
Transfer the churned ice cream to a lidded freezer-safe container. Smooth the top with a spatula and press plastic wrap directly against the surface to minimize ice crystals. Freeze for at least 4 hours to firm up completely.
Step 5: Serve and Garnish
Scoop the ice cream into bowls or cones. For an elegant finish, dust with 0.25 cup Powdered Sugar and sprinkle with 0.5 cup Roasted Peanuts. The contrast of creamy ice cream with crunchy peanuts creates the perfect texture.
Serve immediately for the best consistency. If stored, allow the ice cream to sit at room temperature for 5-10 minutes before scooping to soften slightly.
Pro Tips For Making Peanut Butter Ice Cream Recipe For Ice Cream Maker
- Chill the Base: Let the mixture rest in the fridge for at least 4 hours—I learned this the hard way after my first batch turned out grainy because the peanut butter didn’t fully incorporate into the cold cream.
- Warm the Peanut Butter: Microwave the peanut butter for 20-30 seconds before mixing, so it blends smoothly into the cream and milk. Sounds weird, but it works.
- Skip the Overmixing: Once the peanut butter is fully combined, stop stirring. Overmixing can introduce air bubbles that make the ice cream icy instead of creamy.
- Add Vanilla Last: Stir in the vanilla extract just before churning to preserve its delicate flavor—adding it too early can let the alcohol cook off, dulling the taste.
Regional Styles of This peanut butter ice cream recipe for ice cream maker
Southern Comfort Style
In my Atlanta days at Nana Mae’s diner, we’d fold in ½ cup chopped salted peanuts and a drizzle of local honey for that classic Southern touch. The honey adds a floral sweetness that balances the richness beautifully. 💛
Texas Bold Version
Here in Austin, I like to add 1 tsp smoked paprika and a pinch of cayenne to the base for a subtle kick. It’s a nod to Texas BBQ culture—just enough heat to keep things interesting without overpowering the peanut butter.
French-Inspired Elegance
For a refined twist, I’ll swirl in ¼ cup chocolate ganache at the end of churning, using 70% dark chocolate from Central Market. The bitterness of the chocolate contrasts perfectly with the sweet, creamy peanut butter base.
Midwest Classic
This version calls for mixing in ½ cup mini marshmallows and ¼ cup chocolate chips during the last 2 minutes of churning. It’s a nostalgic throwback to the ice cream socials of the Midwest, with gooey texture in every bite.
California Light
For a lighter take, I replace 1 cup of heavy cream with coconut milk and add 2 tbsp chia seeds for texture. The Asheville farm-to-table scene taught me that small tweaks can make a big difference in health without sacrificing flavor. ✨
Nutrition Facts
Frequently Asked Questions
Can I use natural peanut butter with oil separation?
Yes, but stir it thoroughly before measuring to ensure even distribution. The oil separation can create pockets of greasiness if not fully incorporated into the base.
Why does my ice cream turn icy?
Icy texture usually means the custard wasn’t cold enough before churning or the machine wasn’t pre-chilled. Ensure your base is 40°F or colder and follow manufacturer prep steps.
How long can I store homemade peanut butter ice cream?
It keeps well for up to 1 week in an airtight container. Press plastic wrap directly on the surface to prevent ice crystals. For best texture, eat within 3 days.
Can I make this without an ice cream maker?
Freeze the custard in a shallow container and stir vigorously every 30 minutes for 3-4 hours. It won’t be as smooth but still delicious.

- Pina Colada Dip Recipe Red Lobster: Tropical Creaminess With Toasted Coconut - October 12, 2026
- Pickled Sweet Cherry Peppers Recipe Canning: Tangy Heat for Pantry Staples - October 12, 2026
- Peppercorn Sauce Recipe Vegan: Rich Umami Depth Without Cream - October 12, 2026