
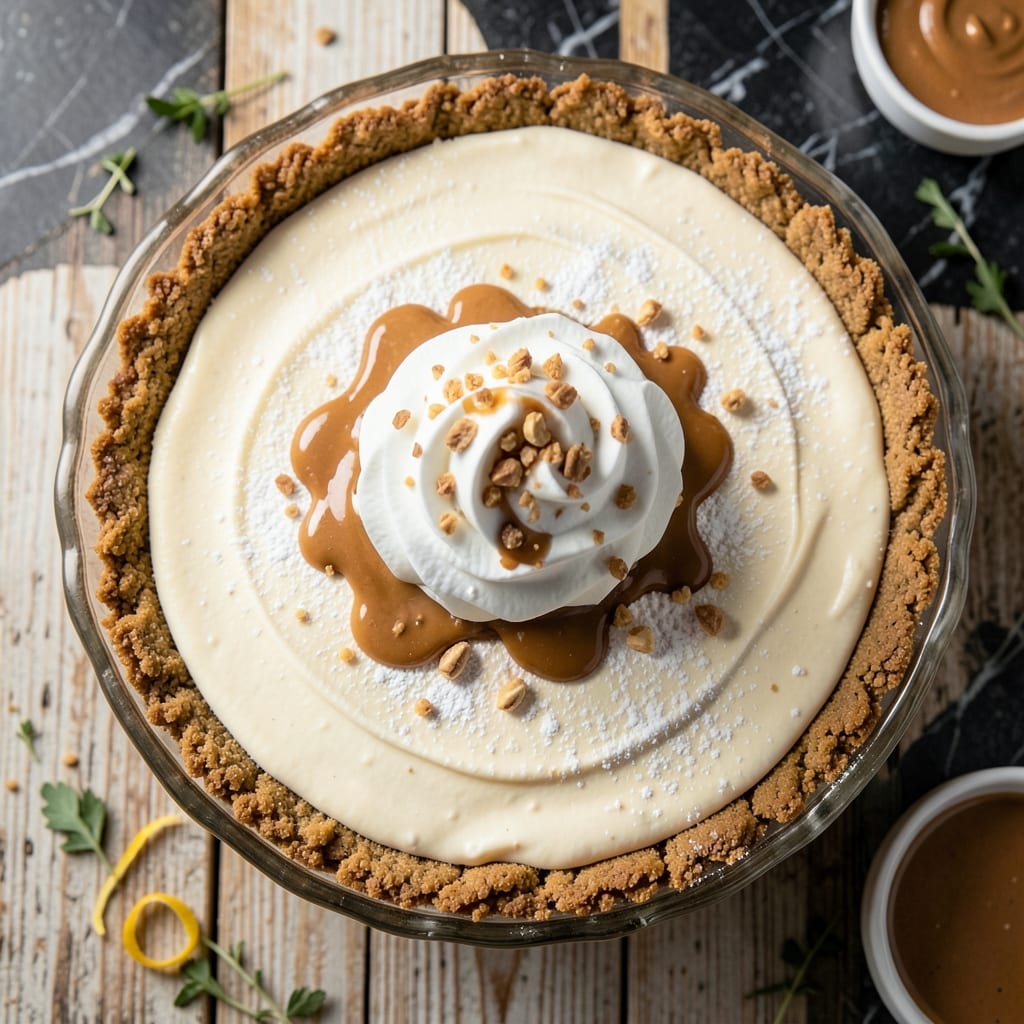
This no-bake peanut butter pie is a game-changer for dessert lovers seeking a light and fluffy treat.
With just a handful of ingredients and no oven required, you can create a creamy, dreamy pie that’s ready in minutes. The Cool Whip adds airy texture, while peanut butter provides rich, nutty flavor.
The beauty of this recipe lies in its simplicity—just mix, layer, and chill. No baking, no fuss, and no special equipment needed.
Perfect for warm days or last-minute gatherings, this pie delivers a satisfying dessert without the heat or hassle. Here’s how to make it.
Ingredients for Peanut Butter Pie Recipe No Bake Cool Whip
Minimal ingredients deliver maximum fluff and nutty goodness in this chilled dessert.
| Ingredient | Amount | Notes |
|---|---|---|
| Graham Cracker Crust 🍪 | 1 whole | Pre-made 9-inch crust |
| Creamy Peanut Butter 🥜 | 1 ½ cups | Smooth, not natural style |
| Cool Whip 🍦 | 3 cups | Thawed frozen whipped topping |
| Powdered Sugar 🧂 | 1 cup | Sifted for smoothness |
| Cream Cheese 🧀 | 8 oz | Full-fat, softened at room temperature |
| Vanilla Extract 🌿 | 1 tsp | Pure extract preferred |
| Milk 🥛 | ¼ cup | Any type, for adjusting consistency |
| Chocolate Chips 🍫 | ½ cup | Semi-sweet, for garnish |
| Salt 🧂 | ¼ tsp | Table salt or fine sea salt |
The peanut butter is the foundation here. Jif or Skippy creamy work perfectly—avoid natural styles that separate. For the cream cheese, Philadelphia full-fat gives the best texture, but store brands work in a pinch. Most grocery stores carry pre-made graham crusts near the baking aisle. If you’re making your own, use 1.5 cups crushed graham crackers mixed with melted butter.
No Cool Whip? Homemade whipped cream (2 cups heavy cream + 2 tbsp sugar, whipped) is the best swap. Need a lighter option? Greek yogurt at half the amount works but changes the texture. For a chocolate twist, add 2 tbsp cocoa powder to the peanut butter mixture. The vanilla extract can be swapped with almond extract for a different flavor profile.
This pie needs at least 4 hours to set properly in the fridge—overnight is even better. Keeps well covered for 3-4 days. Freeze for up to 1 month (thaw in fridge overnight). Garnish with chocolate shavings or a drizzle of melted peanut butter right before serving.
Why You’ll Love This Recipe
- No Oven Needed: I just mix, chill, and serve—no baking required, thanks to the Cool Whip and cream cheese base.
- Peanut Butter Heaven: The creamy peanut butter and powdered sugar blend into this rich, dreamy filling that’s impossible to resist.
- Party Ready: I’ve brought this to potlucks and family dinners, and it’s always the first dessert gone.
- Budget Friendly: A graham cracker crust and simple pantry staples mean I can make this for under $10.
Step-by-Step Instructions for Peanut Butter Pie
This no-bake method delivers a silky, rich filling in a pre-made crust with minimal effort.
Step 1: Beat Cream Cheese and Peanut Butter Until Smooth
In a large mixing bowl, beat the 8 oz cream cheese with an electric mixer on medium speed until completely smooth. This removes any lumps and creates a velvety base for your filling. Scrape down the sides of the bowl as needed.
Add the 1.5 cups creamy peanut butter and continue beating for 1-2 minutes until the mixture is uniform and fluffy. The peanut butter should be fully incorporated with no streaks remaining. This step ensures a creamy texture without graininess.
Step 2: Incorporate Sweet and Flavorful Elements
Gradually add the 1 cup powdered sugar to the peanut butter mixture, beating on low speed initially to prevent a sugar cloud. Once incorporated, increase to medium speed and beat for another 30 seconds until smooth.
Add the 1 tsp vanilla extract and 0.25 tsp salt, then mix until just combined. These ingredients enhance the peanut butter flavor and balance the sweetness. The mixture will be thick but spreadable at this stage.
Step 3: Lighten the Filling with Cool Whip
Using a silicone spatula, gently fold in 2 cups of the 3 cups Cool Whip by hand until no white streaks remain. This step prevents deflating the whipped topping while creating that signature light texture. Be careful not to overmix.
Add the remaining 1 cup Cool Whip along with the 0.25 cup milk. Fold until just combined. The milk adjusts the consistency to a smooth, pipeable filling. If the mixture seems too thick, add the milk gradually until it reaches a mousselike texture.
Step 4: Assemble and Chill the Pie
Spoon the peanut butter filling into the graham cracker crust, spreading it evenly with the spatula. Smooth the top into a slight dome in the center for an attractive presentation. The crust should be completely filled with no gaps.
Refrigerate the pie for at least 4 hours, or preferably overnight. This chilling time allows the filling to set properly and the flavors to meld. The surface should be firm to the touch when ready to serve.
Step 5: Garnish and Serve
Just before serving, sprinkle the 0.5 cup chocolate chips evenly over the top of the pie. Press them gently into the filling so they adhere. For best results, chill the pie for an additional 15 minutes after garnishing to set the chocolate chips.
Slice the pie into 8 equal portions using a sharp knife dipped in hot water for clean cuts. Each serving should have a generous layer of filling with a perfect ratio of crust to the creamy center. Serve immediately for the best texture.
Pro Tips For Making Peanut Butter Pie Recipe No Bake Cool Whip
- Soften the Cream Cheese: Let it sit at room temperature for at least 30 minutes—cold cream cheese leaves lumps no matter how hard you mix, and I learned this the hard way.
- Chill Between Layers: After spreading the peanut butter mixture into the crust, pop it in the fridge for 15-20 minutes before adding the Cool Whip topping. This keeps the layers distinct instead of a muddy mess.
- Use Full-Fat Peanut Butter: Skip the natural or reduced-fat versions here; the extra oil in regular creamy peanut butter binds everything together and gives that rich, smooth texture.
- Freeze Before Slicing: Give the pie at least 2 hours in the freezer—yes, even if you’re impatient like me—so it holds its shape when you cut clean slices instead of a gooey blob.
Creative Variations of This Dish
Chocolate Lover’s Twist
Fold in ½ cup mini chocolate chips directly into the peanut butter mixture before adding Cool Whip. This creates a rich chocolate-peanut butter combo throughout. I also drizzle ¼ cup melted chocolate over the top before chilling for extra decadence. 💫
Crunchy Nut Version
Add ½ cup chopped salted peanuts to the filling for texture. Press additional peanuts into the top before serving. The contrast between creamy filling and crunchy nuts is amazing. For extra flair, toast the peanuts in a dry pan for 2-3 minutes first.
Banana Cream Variation
Layer 1 sliced banana at the bottom of the crust before adding the filling. Top with sliced bananas and a drizzle of caramel sauce. This adds freshness and a fruity twist that pairs perfectly with peanut butter.
Oreo Cookie Crust
Swap the graham cracker crust for a pre-made Oreo crust. The chocolate flavor enhances the peanut butter beautifully. You can also crush 10 Oreo cookies and mix with ¼ cup melted butter to make your own crust.
Peanut Butter Cup Surprise
Press 8 mini peanut butter cups into the filling just before chilling. They’ll soften slightly but maintain their shape. I like to arrange them in a circular pattern for a pretty presentation. Each bite delivers a delightful surprise. 💛
Lighter Option
Use light Cool Whip and Neufchatel cheese (lower-fat cream cheese) to reduce calories. The texture remains fluffy, though slightly less rich. You can also reduce powdered sugar to ¾ cup for a less sweet version.
Nutrition Facts
Frequently Asked Questions
Can I use natural peanut butter instead?
It’s not recommended. Natural styles separate and can make the filling oily. Stick with creamy Jif or Skippy for the smoothest texture without graininess.
How long does it need to chill?
At least 4 hours is required for proper setting. For best results, chill overnight. This ensures the filling firms up completely before slicing.
What can I use instead of Cool Whip?
Try 2 cups homemade whipped cream (heavy cream + sugar) as the closest substitute. For a lighter option, use 1.5 cups Greek yogurt, but expect a denser texture.
Can I make this ahead of time?
Yes! It keeps well covered in the fridge for 3-4 days. You can also freeze it for up to 1 month—just thaw overnight before serving.

- Potato Candy Recipe 1933: Vintage Peanut Butter Roll Delight - October 30, 2026
- Potato Chip Cookie Recipe With Pecans: Buttery Crunch Meets Nutty Richness - October 30, 2026
- Potato Patty Recipe No Egg: Crispy Edges Without the Binder - October 30, 2026