
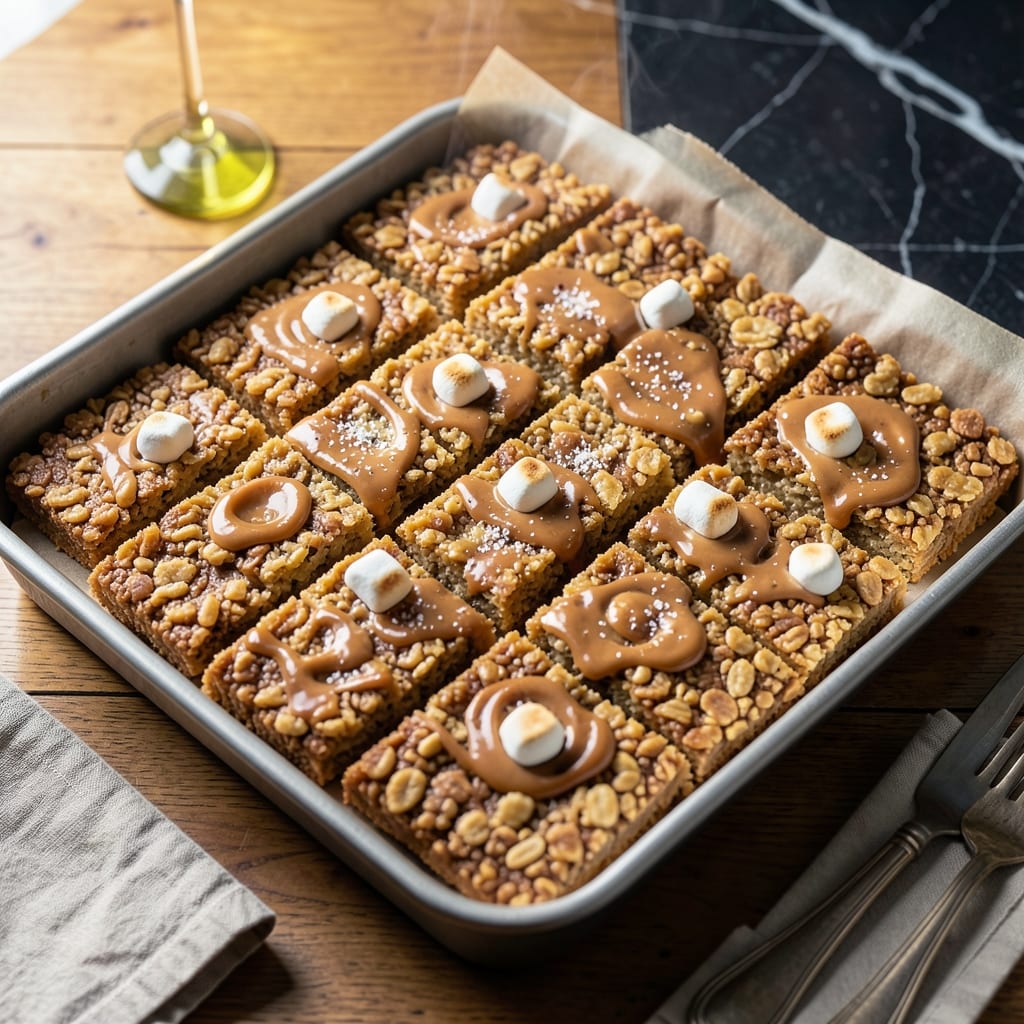
This no-bake recipe transforms a childhood favorite with rich peanut butter and gooey marshmallow goodness. My approach maximizes flavor while keeping prep effortless.
The secret is in the balance: melted butter, creamy peanut butter, and perfectly toasted marshmallows create a sticky, sweet base. Stir in crispy rice cereal for that signature crispy texture we all crave.
You’ll end up with chewy, decadent squares that set quickly—no oven required. The result is nostalgic yet elevated, with just the right amount of peanut butter depth.
Ideal for gatherings or a quick treat, these hold their shape beautifully and disappear even faster.
Ingredients for Peanut Butter Rice Crispy Treats Recipe Marshmallow
Butter, peanut butter, marshmallows, and cereal combine for nostalgic no-bake magic with a crispy finish.
| Ingredient | Amount | Notes |
|---|---|---|
| Unsalted Butter 🧈 | ½ cup | Melted for binding base |
| Creamy Peanut Butter 🥜 | 1 ½ cups | Smooth, no-stir variety preferred |
| Mini Marshmallows 🍬 | 10 cups | Fresh for best melt |
| Crispy Rice Cereal 🥣 | 6 cups | Classic brand recommended |
| Pure Vanilla Extract 🌿 | 1 tsp | For depth of flavor |
| Sea Salt 🧂 | ½ tsp | Fine grain for even distribution |
| Light Corn Syrup 💧 | ¼ cup | Prevents crystallization (optional) |
| Honey 🍯 | 2 tbsp | For natural sweetness |
The marshmallows are the star here. Jet-Puffed or Kraft melt the smoothest—avoid stale ones (they won’t dissolve right). Butter should be unsalted so you control the salt level. For peanut butter, Jif or Skippy creamy gives that perfect consistency. If you’re feeling fancy, natural peanut butter works too (just stir it well first).
No corn syrup? Skip it—won’t hurt anything. Maple syrup or agave can replace the honey if you prefer. The cereal is non-negotiable for texture, but any crispy rice brand works. Want extra crunch? Substitute 1 cup of the cereal with crispy corn flakes. For a richer peanut taste, add an extra quarter cup of peanut butter.
These keep at room temperature for 3-4 days in an airtight container (if they last that long). For longer storage, refrigerate for up to 1 week or freeze for 6 weeks. Slice before freezing for easy grab-and-go treats.
Why You’ll Love This Recipe
- One Pot Wonder: I melt the butter, marshmallows, and peanut butter together—no extra bowls, no fuss.
- That PB-Marshmallow Magic: The creamy peanut butter and vanilla make these taste like a candy bar in treat form.
- School Lunch Hero: I pack these for my kids’ lunches, and they’re always the first thing gone.
- Budget Friendly Batch: A box of cereal and a jar of peanut butter stretch further than you’d think.
Step-by-Step Instructions for Peanut Butter Rice Crispy Treats
Here’s my proven method for achieving that perfect balance of chewy and crispy every time.
Step 1: Melt the Butter and Prep the Pan
In a large saucepan, melt the 0.5 cup unsalted butter over low heat. I always use a light-colored pan here—it helps you see the butter melt without browning. While it melts, line a 9×13-inch baking dish with parchment paper, leaving an overhang on the sides for easy removal later.
This step seems simple, but don’t rush it. You want the butter fully liquid but not hot enough to sizzle when you add the next ingredients. That gentle heat ensures everything combines smoothly without scorching.
Step 2: Combine the Marshmallow Mixture
Add the 10 cups mini marshmallows, 1.5 cups creamy peanut butter, 0.25 cup light corn syrup, and 2 tbsp honey to the melted butter. Stir constantly with a silicone spatula until the mixture is completely smooth and glossy—this takes about 5-7 minutes on low heat.
Watch for the marshmallows to lose their shape entirely. If you see any stubborn lumps, keep stirring and press them against the side of the pan. The peanut butter will thicken the mix slightly, which is exactly what you want for that signature chewy texture.
Once melted, stir in the 1 tsp pure vanilla extract and 0.5 tsp sea salt. The vanilla deepens the flavor, while the salt balances the sweetness perfectly.
Step 3: Fold in the Crispy Rice Cereal
Remove the saucepan from the heat and immediately add all 6 cups crispy rice cereal. Using the same spatula, fold gently but thoroughly until every piece is evenly coated. I prefer folding in a figure-eight motion—it distributes the mixture without crushing the cereal.
You’ll notice the cereal starts to soften slightly as it absorbs the warm marshmallow mixture. This is normal and exactly what creates that ideal texture. Work quickly here—the mixture will start to set as it cools.
Step 4: Press and Set in the Pan
Transfer the mixture to your prepared baking dish. Using the spatula or a piece of parchment paper to avoid sticking, press it down firmly into an even layer. I like to press the edges first, then work my way toward the center for an even finish.
For extra crispness, lightly press a second sheet of parchment on top and use your hands to compact it further. This step ensures the treats hold their shape when sliced. Let them cool at room temperature for 1-2 hours until fully set.
Step 5: Slice and Serve
Once completely cool and firm to the touch, lift the treats out of the pan using the parchment overhang. Place them on a cutting board and slice into squares using a sharp knife. For clean cuts, I dip the knife in warm water and wipe it between each slice.
These are best served the same day but will keep in an airtight container for up to 3 days. The cereal stays crispy while the marshmallow layer remains delightfully chewy—a texture contrast that’s impossible to resist.
Pro Tips For Making Peanut Butter Rice Crispy Treats Recipe Marshmallow
- Melt Butter Low: Keep the heat on low when melting the butter and peanut butter—I learned this the hard way after scorching a batch. It melts evenly without turning the mixture bitter or grainy.
- Use Fresh Marshmallows: Skip the stale mini marshmallows; fresh ones melt smoother and bind better. After burning three batches with old marshmallows, I finally figured out they lose moisture over time and turn gummy.
- Press Lightly: Resist the urge to pack the crispy rice cereal mixture too tightly into the pan. Pressing too hard makes the treats dense and hard—I was skeptical until I tried it, but a gentle touch keeps them light and chewy.
- Add Vanilla Last: Stir in the vanilla extract after removing the mixture from the heat. Sounds weird, but it works: adding it too early can make the vanilla flavor taste harsh or bitter, especially with the heat.
Make-Ahead Tips for This peanut butter rice crispy treats recipe marshmallow
Prep Ahead Strategy
I always measure the 6 cups crispy rice cereal and 10 cups mini marshmallows the night before. Store them in separate bowls covered with clean kitchen towels. This saves 10 minutes of prep time when you’re ready to cook. 💡
Make the Mixture Early
You can melt and combine the butter, peanut butter, and marshmallows up to 24 hours ahead. Let it cool completely, then store in an airtight container at room temperature. Reheat gently before folding in the cereal.
Press and Refrigerate
After pressing the mixture into the pan, cover with parchment paper and refrigerate. This speeds up the setting process to just 30-45 minutes instead of waiting 1-2 hours at room temperature.
Portion Control
For grab-and-go treats, press the mixture into a lined pan, then immediately score the top with a knife into squares. Once set, simply break along the lines. No extra slicing step needed later. ✨
Freeze for Later
Once completely set, slice into squares and wrap individually in wax paper. Place in a freezer bag and freeze for up to 6 weeks. Thaw at room temperature for 15-20 minutes before serving.
Nutrition Facts
Frequently Asked Questions
Can I use chunky peanut butter?
Yes, but the texture will be different. Chunky peanut butter adds nuttier bits, but can make slicing harder. For smooth squares, stick with creamy.
What if my marshmallows won’t melt completely?
Stale marshmallows resist melting. Use fresh ones and stir constantly on low heat until smooth. If lumps remain, press them against the pan sides.
How do I make them extra crispy?
Press the mixture firmly into the pan using parchment paper. For more crunch, substitute 1 cup of cereal with corn flakes.
Can I add chocolate chips?
Fold in 1 cup of mini chocolate chips after mixing in the cereal. They’ll soften slightly but add rich pockets of chocolate.

- Pina Colada Dip Recipe Red Lobster: Tropical Creaminess With Toasted Coconut - October 12, 2026
- Pickled Sweet Cherry Peppers Recipe Canning: Tangy Heat for Pantry Staples - October 12, 2026
- Peppercorn Sauce Recipe Vegan: Rich Umami Depth Without Cream - October 12, 2026